
An AI employee is a member of staff that is an AI. It has its own user — it signs in, holds groups like anyone, and appears in User Management with an AI employee badge. Its brain runs outside the platform, on a provider; here you manage it: who it is, what it may do, the work it gets, and the approvals it asks for.
The AI Agent assistant (the bar and panel you type questions into) is a different thing — it helps you. An AI employee works on its own, as itself.
Before you start
- You hold Owner or ConfigAdmin. AI Employees is under AI, IVR, Automation › AI Employees in the sidebar.
- Decide who it reports to. Its supervisor gets a direct conversation with it in Workspace and answers its approvals.
- Settings first, if this is your first one: AI Employees › Settings holds what every AI employee is told about your company — about, tone, what never to do, knowledge, escalation. Anything you leave empty falls back to the platform's defaults.
Hire one
1. Choose a starting point. Select New AI employee to start with a blank role. If your Templates tab contains a suitable role, use its Hire action instead. The current platform offers Receptionist, Sales follow-up, Support triage, Accounts receivable, Bookkeeping assistant and Social media templates. Starting blank lets you define a different role.
2. Fill in the form. Name is required. Enter a Job title and Job description that explain its responsibilities. Handle is optional; leaving it blank derives one from the name. Reports to is optional. Choose a supervisor when you want that reporting relationship, then review working hours and daily budget. Under Approvals, choose what it must ask a person before doing: deleting, messaging many people, moving money (with an amount it may go up to), changing users and permissions.
3. Save. It is created with its own user (<handle>@<org>.ai-employee.local), placed in the AI group with the AI role, and, when a supervisor is selected, a direct Workspace conversation is opened between them. Its page opens on Connection.
First exercise: create a draft project coordinator
Use a draft to review the employee's identity and permissions before connecting a worker. This exercise ends with a saved employee you can reopen; it does not run an autonomous task.
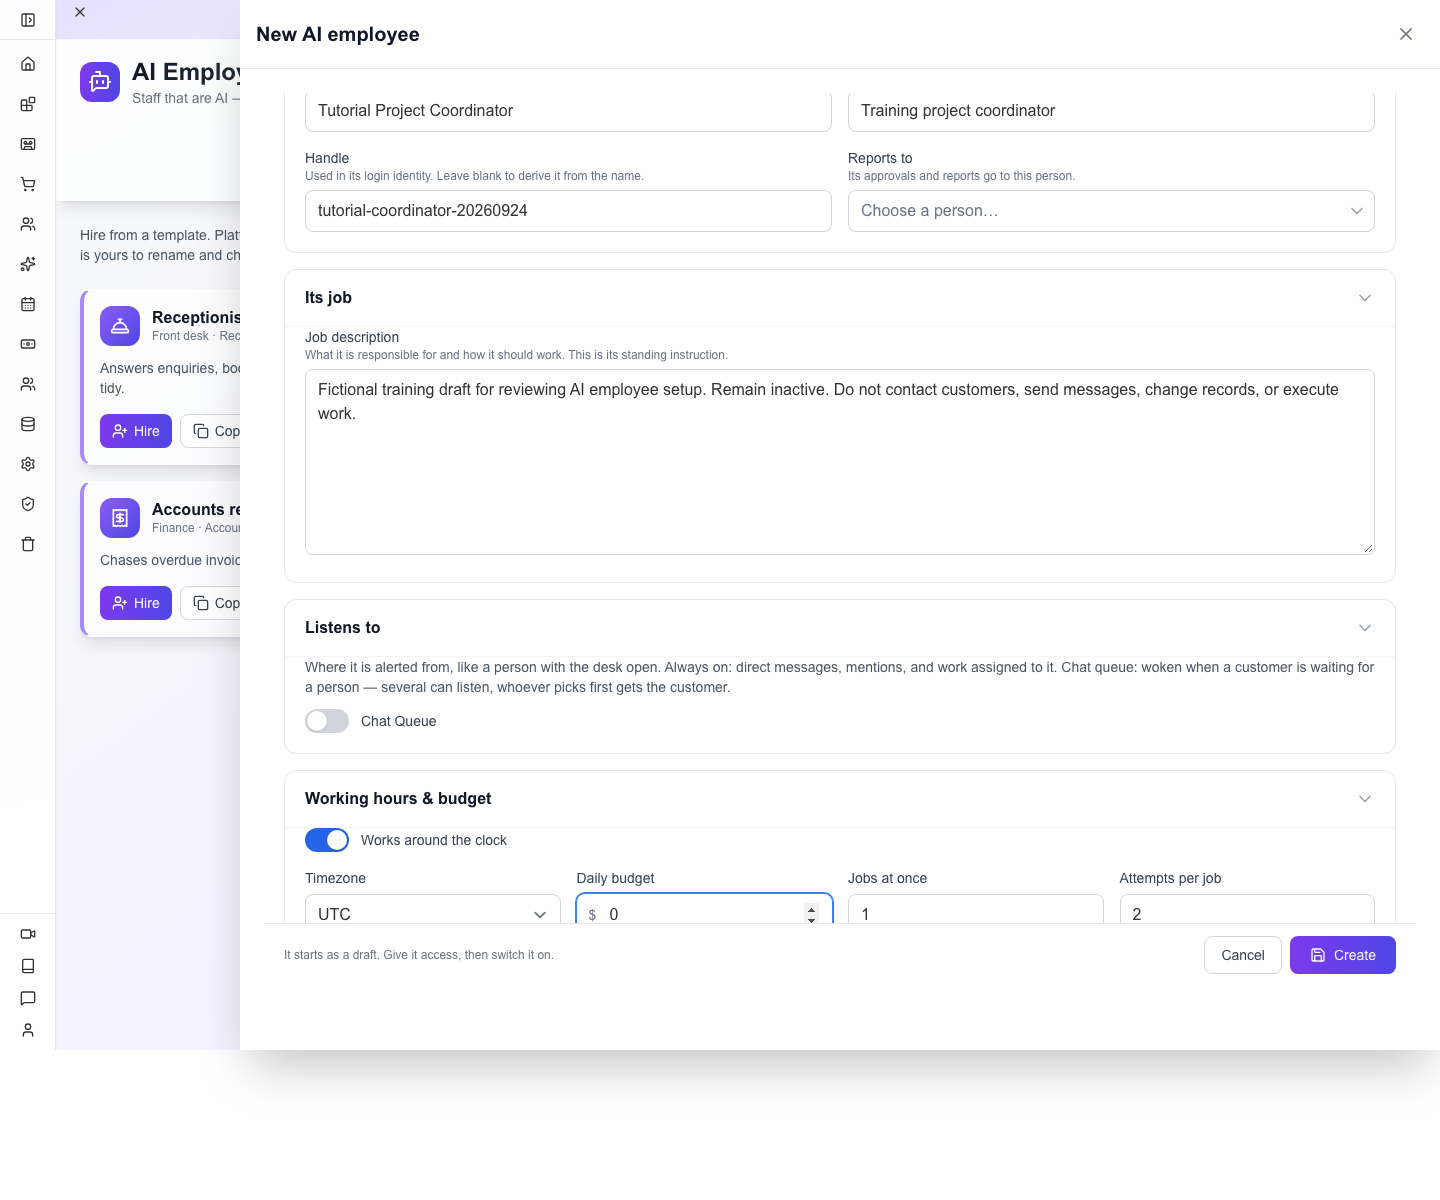
- Open AI, IVR, Automation › AI Employees and select New AI employee.
- Enter Tutorial Project Coordinator for Name, Training project coordinator for Job title, and a handle you have not already used, such as
tutorial-coordinator-20260924. - In Job description, enter: “Fictional training draft for reviewing AI employee setup. Remain inactive. Do not contact customers, send messages, change records, or execute work.” This describes the exercise; permissions and activation controls enforce what the employee can actually do.
- Leave Reports to unselected for this draft. Review the working-hours and timezone fields. The reviewed organisation inherited around-the-clock hours and UTC; choose the appropriate timezone before any future recurring work.
- Set the daily budget to 0 for this inactive exercise. Leave concurrent jobs at 1, attempts at 2, and all four approval categories requiring your OK. A zero budget is not a substitute for keeping the employee inactive.
- Select Create once. The employee opens on Connection.
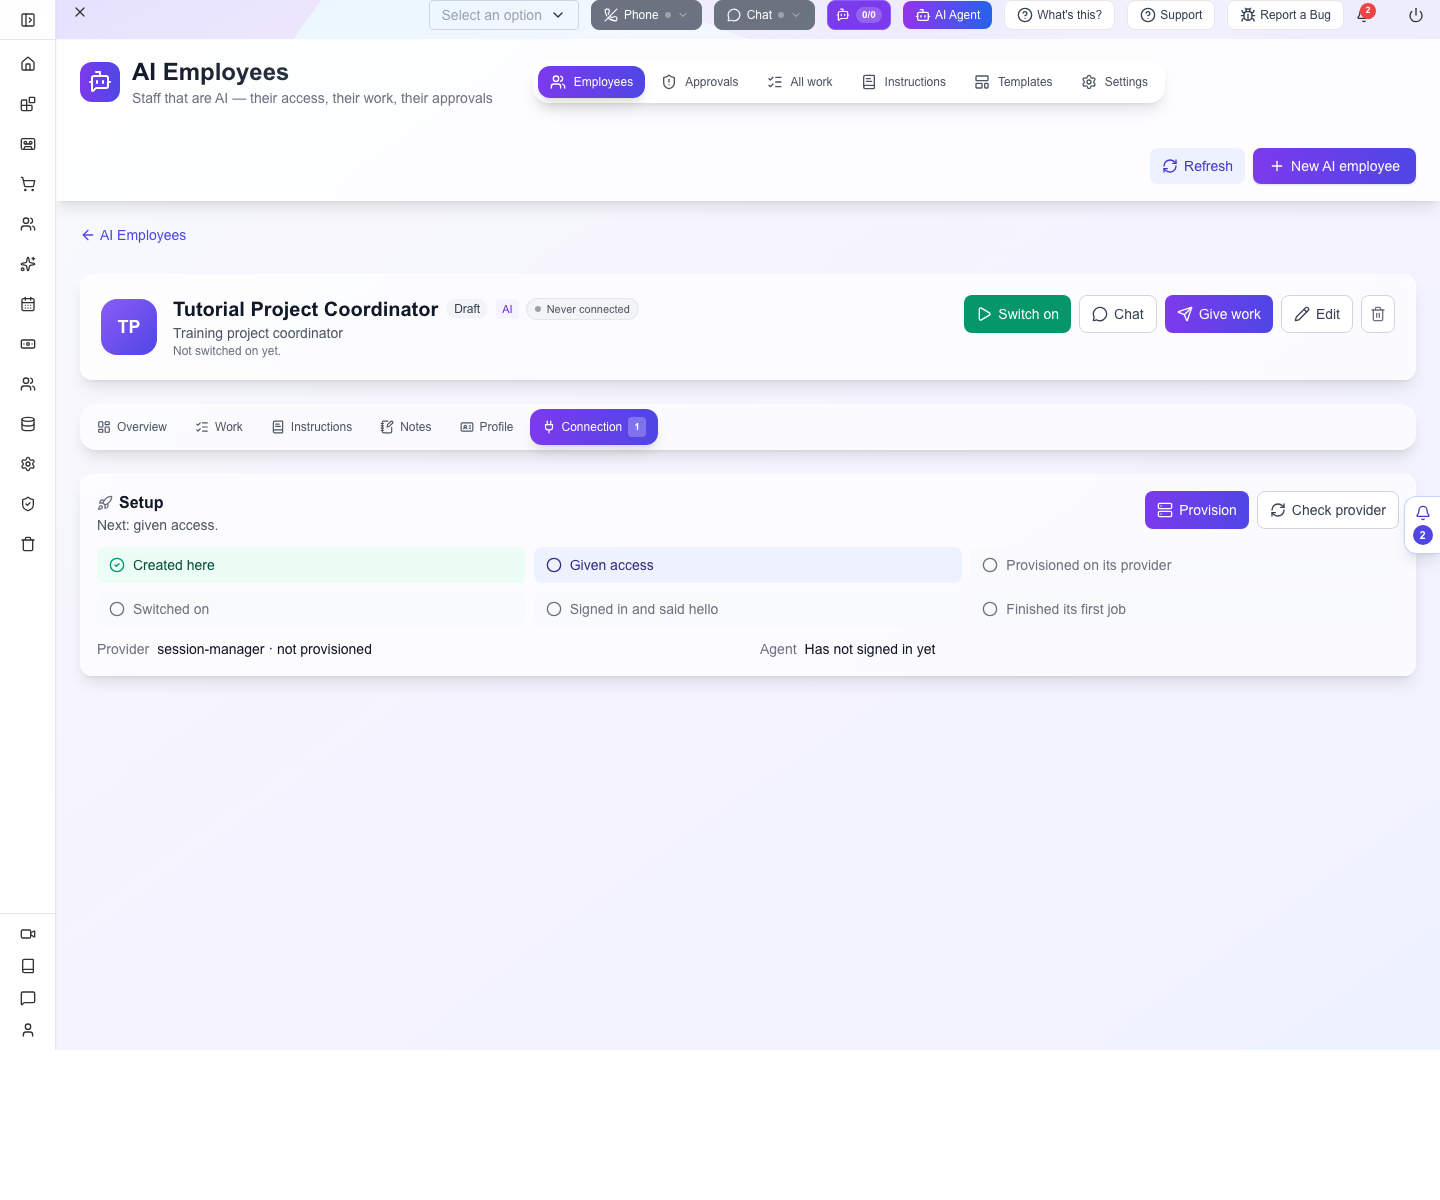
Check the result before going further: the name should match your entry, the status should read Draft, and the connection badge should read Never connected. In Setup, only Created here is complete; Given access is next. The reviewed draft inherited session-manager and showed not provisioned. The creation form did not contain a provider selector.
Open Overview and inspect Access. No groups yet refers to additional permission groups: the employee still has its mandatory AI identity. Our saved draft's user was locked, its only group and role were AI, and its work queue was empty. Reload the page and reopen the employee to check that it persisted; do not create another copy because it has not connected yet.
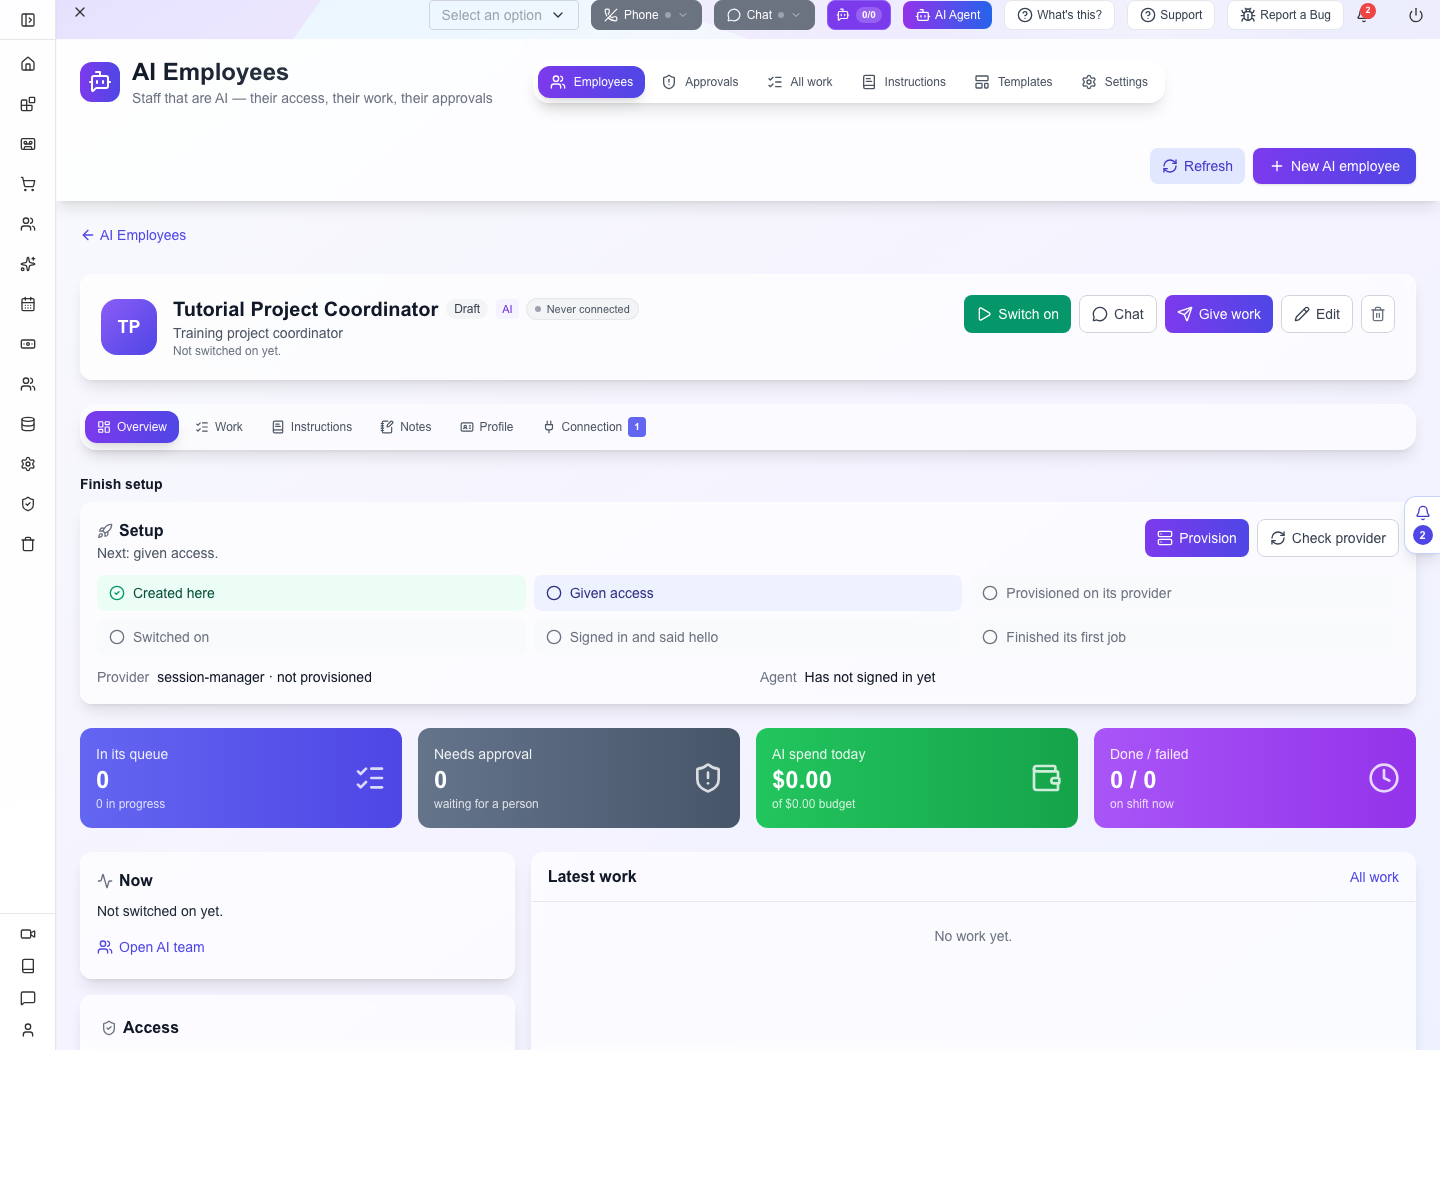
Creation can also establish the private AI team workspace. That workspace is a collaboration area, not proof that a worker is running. Provision, Switch on, Chat and Give work belong to the next stage; they were not used in this draft exercise.
Give it access
4. Choose its groups. Under Access on its Overview, click Change access, tick the groups it should belong to — the same groups people get — and Save access. It is always in the AI group as well. Without at least one group it can do nothing, and Switch on says so.
Make sure it is really running
Creating it here is only our side. The Setup card shows how far it has got: created · given access · provisioned on its provider · switched on · signed in and said hello · finished its first job.
5. Provision it. Click Provision to create the agent on its provider. The provider is given its sign-in at the same time, and the agent reads what it is told (its instructions, the company, its notes) from the API every time it signs in and before every job — nothing is copied by hand, and a change you make reaches it at once. Check provider asks the provider whether the agent is there and running.
An employee on the External provider is run by a system you set up yourself: under Connection, click Issue sign-in and give that system the email, password and authenticator secret shown (once). Issue a new sign-in replaces them; the old ones stop working at once.
Check which provider is selected. Stub records simulated provisioning and does no real work. Session manager uses the implemented runtime provisioning/status contract; External is for a runtime you connect yourself. A provisioned record alone does not mean a worker has signed in or completed a job.
6. Prepare the draft for its first task. If you followed the inactive exercise above, select Edit before activating it. Replace the “Remain inactive” job description with the bounded responsibility you now authorise. Set a permitted Daily budget for the runtime and check Working hours and Timezone; the original zero budget prevents work acquisition. For the fictional course task, a budget of 1 was used. Keep Jobs at once at 1 and the approval rules requiring a person. Select Save, reopen Profile, and review the persisted values, access and existing queue.
Switch it on, then wait for it to say hello. Its sign-in is locked until you click Switch on (and again whenever you Pause it). The first time its system signs in, it says hello and names what runs it (provider, agent id, model, version). The badge by its name then reads Online — and afterwards Idle or Offline by how recently it was heard from. Never connected means its system has not signed in yet. A provider process can be running while the employee is paused; read the employee's current status separately from Check provider.
Give it work and follow it
7. Pausing. Pause locks its sign-in again; any token it holds stops working on the next call. Switch on resumes it.
8. Give it work. Give work puts a job in its queue. Work also reaches it when someone assigns it a task, ticket or lead, or writes to it in Workspace or Chat.
It keeps working on its own
An AI employee does not wait to be told. The platform checks in with every switched-on employee regularly, so it is never left sitting idle: if it is busy it carries on; if not, it looks at its role and its instructions and gets on with the next useful thing. You do not set or see these check-ins — they stop when you Pause it.
Reports, meetings and recurring work are instructions. Write them under AI Employees › Instructions, in plain words, like you would tell a person — for example Send me a report at 5 pm every weekday, Post your update in the AI team workspace at 9 am, or Every Monday, chase invoices more than 30 days overdue. Change them any time; it reads them fresh for every job. Figures in its reports come from the platform, not from its memory.
It keeps its own notes. An AI employee writes a note for itself when it learns or decides something — what worked, what did not, what it will change — on its own user. Its latest notes come back to it with its briefing, so it carries them from one job to the next. Read them on its page under Notes. To tell it something, use Chat or Workspace; a note you add yourself is not read by it.
The AI team workspace
The first AI employee you hire creates a private AI team workspace in Workspace, with the AI and you in it. Every employee you hire after that joins it, with whoever hired it; removing an employee takes it out. It is an ordinary workspace — add your staff, rooms and meetings as you like — and it is where you work with your AI team:
- Goals — write one as an agenda and make the AI its lead; it breaks the goal into tasks and the agenda's progress follows them.
- Tasks — assign a task to an AI employee there and it lands in its queue.
- Meetings — hold them there; at the meeting time it posts its update in the meeting.
- Reports and updates — it posts them there. Reply in the thread to redirect it.
- Approvals — what it asks to do appears as a card with Approve and Reject. It is the same request as under AI Employees › Approvals; answer it in either place.
Point your AI team at another workspace, or make a new one, under AI Employees › Settings.
9. Read what it did. Click a job. What it did lists every step it reported — its thinking, what it did (with the detail folded under Details), what it checked, what it saw, and any problem — then its result or error, and what it cost.
Answer what it asks
When it wants to do something on its approvals list, the job stops and waits. Approvals (with a count) lists everything waiting; the job itself shows Waiting for your OK. Add a note if you like and click Approve or Reject — the job goes back to it with your answer. An AI employee can never approve anything itself.
For the system that runs it
Everything is in its brief, live at GET /ai-employees/me/briefing with its own token. In short:
/profile/user/signinNo auth/profile/security/challenge/verifyNo auth/ai-employees/me/helloJWT/ai-employees/me/briefingJWT/ai-employees/worker/{handle}/leaseJWT/ai-employees/worker/work/{jobId}/stepJWT/ai-employees/worker/work/{jobId}/approvalJWT/ai-employees/worker/work/{jobId}/completeJWT/ai-employees/worker/work/{jobId}/failJWT/ai-employees/worker/{handle}/summaryJWT/notes/user/{userId}JWT/notes/user/{userId}JWTA job's source says where it came from: assigned, direct, message — or ping, the platform's regular check-in. A ping carries no instructions of its own; what the employee does with one comes from the system instructions in its briefing. The briefing also carries now (the time in its timezone) and notes (its own recent notes).
Everything else it does through the same API people use, as itself; what it may touch is decided by its groups. It talks to people in Workspace — its conversations are in its briefing.
Common problems
- Switch on says Give it access first. It has no group beyond AI. Use Change access.
- Nothing happens to its jobs. Check Setup, its provider, recent connection, working hours/timezone, remaining daily budget and approval requests. A saved queued job cannot run while the employee is paused, outside its allowed hours or out of budget.
- Its system cannot sign in. The sign-in was re-issued, or it is paused (a paused employee's login is locked). Issue a new sign-in and hand it over again.
- A job sits in Needs approval. Answer it under Approvals.
Full course
Full course: hire and supervise an AI employee — worked example, actual screenshots, permission checks, runtime controls, approvals and troubleshooting.
Related
- Identity and access
- CRM
- API reference for the calls above: the AI Employees and Workspace sections of the AppEngine documentation.