
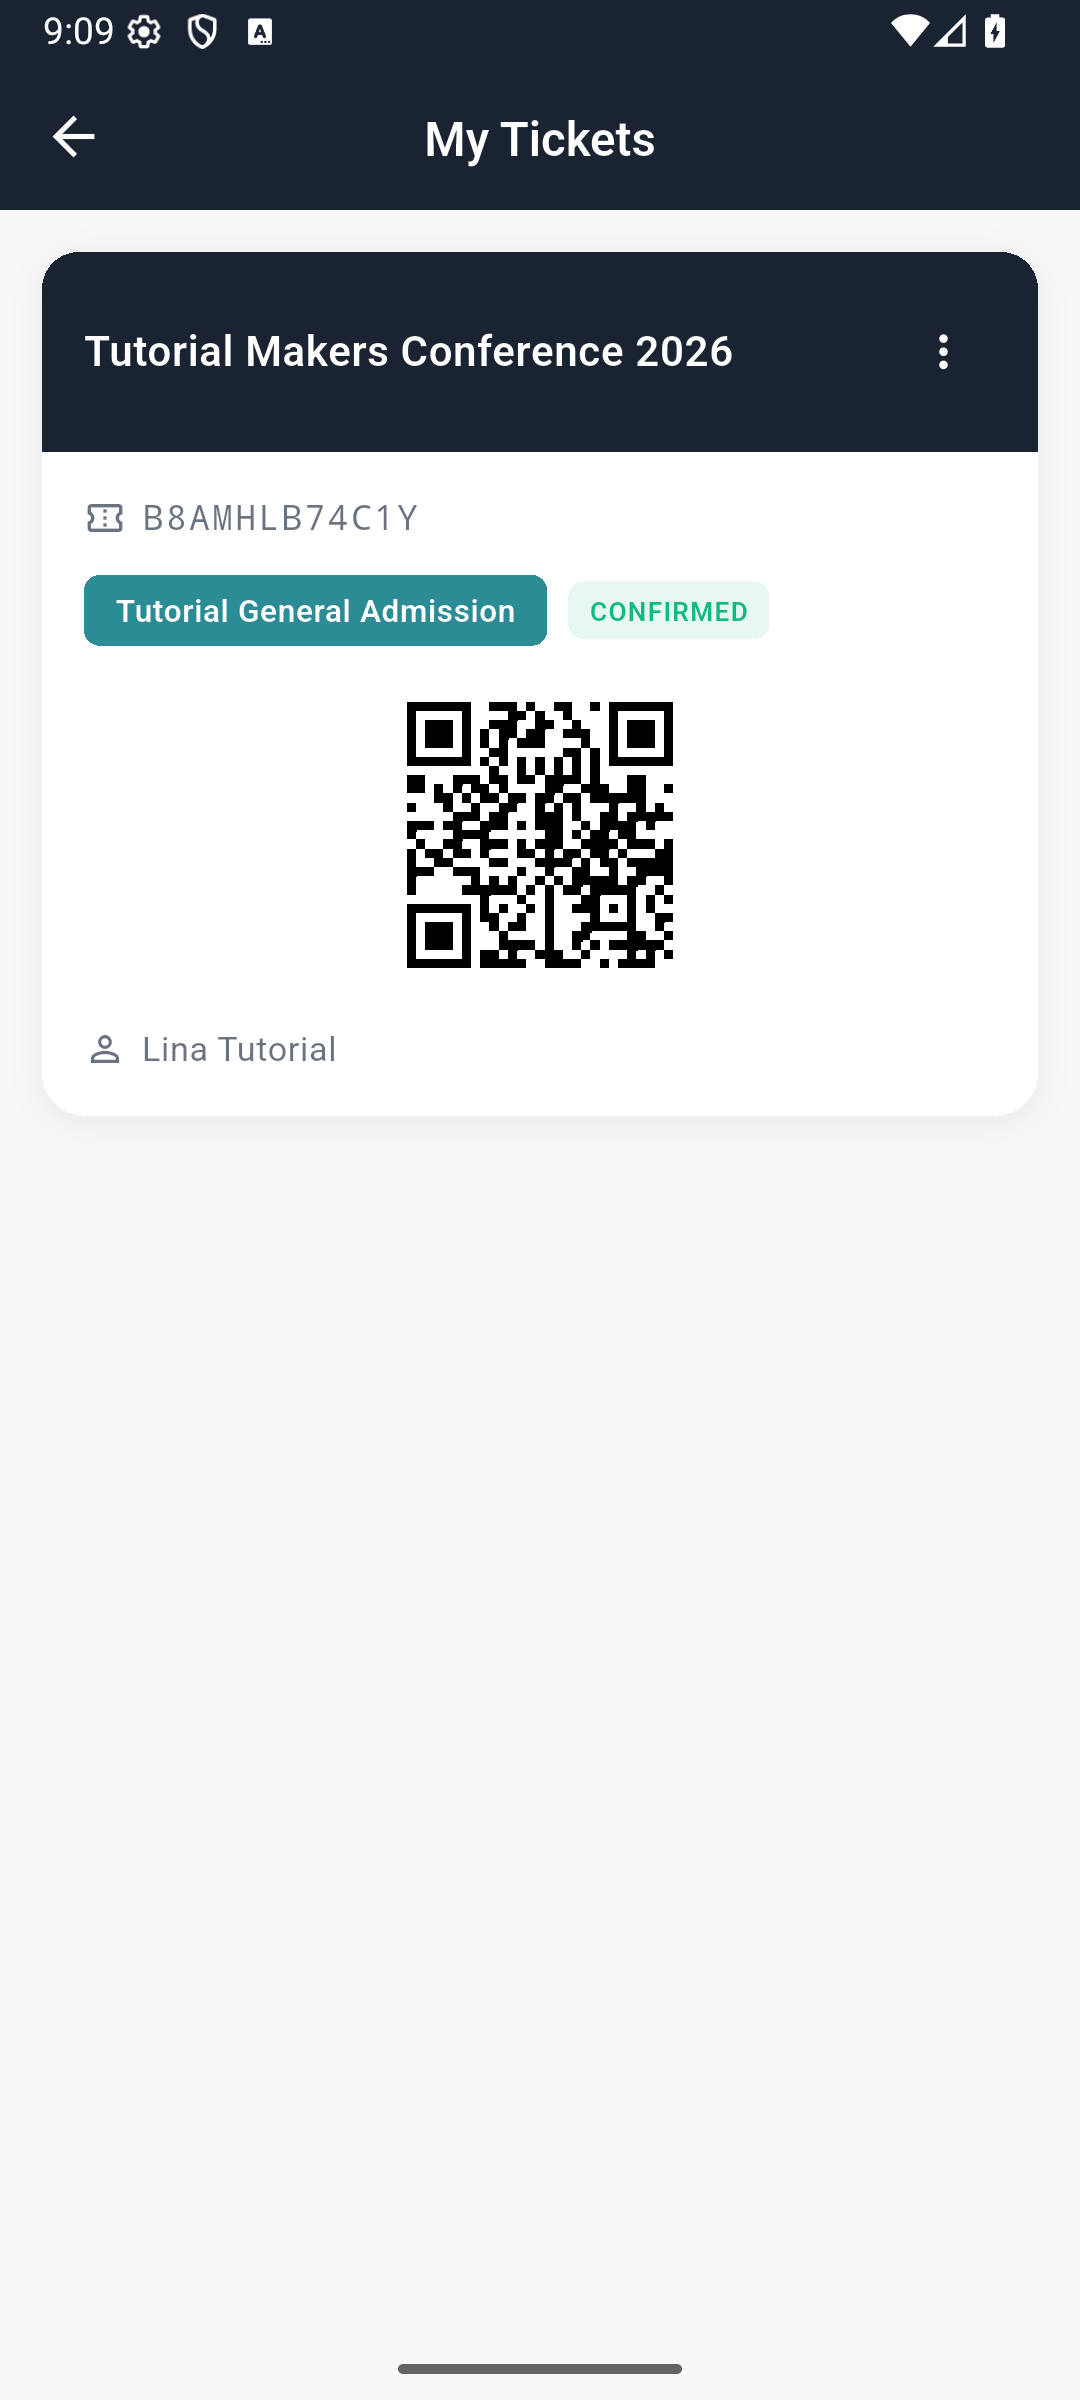
A registration you can find again: the event, ticket type, holder and admission code are together on your phone.
Who this is for: attendees, speakers and event teams explaining their attendee app. Time: 35 minutes for the main walkthrough once the organizer has supplied the app and practice event; allow another 15 minutes with a practice partner. Organizer/developer setup time is additional. Level: beginner, with an organizer/developer appendix. Product: EventOxygen. Build checked: separately configured current-source Android debug build, 24 September 2026. The iPhone download route is included; the captures are Android, not iOS.
What you will have at the end
With the prepared app, event and partner listed below, you will create an attendee account, register for one free ticket, find it after reopening the app, read the programme, connect with another attendee and find a message in your Inbox. You will also distinguish a ticket QR from a profile QR, save a useful post and understand the current limits of meetings and ticket assignment.
The rehearsal follows a real record across two apps: Lina registers in EventOxygen, staff admit her in Appmint Mobile, and her EventOxygen ticket changes to CHECKED IN. No card payment is needed for this exercise. EventOxygen and Appmint Mobile are free.
What you need
- The app your organizer provides, and an email address you can use for both your attendee account and ticket registration.
- A published event with available tickets. This lesson uses Tutorial Makers Conference 2026, prepared in the organizer course: November 14–15, 2026, America/Chicago, Tutorial Makers Hall, Chicago.
- For the networking exercise, another attendee who can accept your request. Our fictional partner is Kofi Tutorial.
- For an admission rehearsal, staff signed into Appmint Mobile. Attendees do not need access to Studio Manager or a staff account.
- For Part 5, permission from your organizer to publish a fictional practice question in the displayed audience. You will create and save your own post; no existing example post is required.
Organizer preparation before the timed walkthrough: give learners the installable app or listing and app version, the exact published event title, a free ticket type, the session date/time/timezone and room, a practice partner who appears in People, and an organizer contact route outside the app. Confirm these in the attendee app with a fresh account. The separate tutorial build and event shown here are not distributed by this lesson. When using your own event, substitute those supplied details for Tutorial Makers Conference, General Admission, the joinery talk and Kofi throughout.
Independent review limit: on 18 September 2026, the corrected stock Android package installed and a fresh account remained signed in after reopening, but Browse Events still showed No events yet — Check back soon. If that happens, the ticket exercises are blocked until the organizer supplies access to a published event in the installed app. Creating another attendee account does not supply that event.
Which app carries your event? The stock production EventOxygen configuration points at the eventos organization. Your organizer’s separately configured build can show their own Appmint organization. Installing the stock app does not connect it to any organization ID you happen to own. The captures here use a clearly separate EventOxygen Tutorial build connected to our training organization.
The story
Lina is attending a talk on 3D-printed joinery. She wants to arrive with the right ticket, know which room to use and meet Kofi afterward to compare materials. The app should help her prepare before the day, get through registration and keep the useful conversation afterward.
The current rehearsal uses [email protected] and [email protected]; older captures use [email protected] and [email protected]. They are fictional, non-deliverable training addresses. Use your own actual address when attending a real event; receiving organizer messages may depend on it.
The route
flowchart LR
    A[Create attendee account] --> B[Browse the event]
    B --> C[Register for a ticket]
    C --> D[My Events + My ticket]
    D --> E[Staff admission]
    B --> F[Read the programme]
    F --> G[People: request + acceptance]
    G --> H[Inbox: continue the conversation]
Part 1 — Install the right app and create your account
1. Get the organizer’s app
On iPhone, use the EventOxygen App Store link linked by Appmint’s EventOxygen section. Check the app name and organizer’s instructions before installing. If the organizer supplies their own branded app, use that specific listing.
On Android, the published direct download is EventOxygen APK. When a valid APK downloads, open it and follow Android’s installer. If Android asks whether the browser may install apps, allow that source only for the organizer-provided package you intended to install.
Check the app before continuing: this corrected public APK was downloaded and installed on a fresh Android emulator during the independent review. The stock app uses its configured organiser; installing it does not connect it to a different Appmint organisation or supply the training event in these screenshots. Confirm the organiser and event before attempting the ticket exercises. If you receive an XML error instead of an APK, check the link above contains
android/latest/; do not rename the error file to.apk.
The development appendix explains the separate training build used to continue this course. An attendee should receive an installable app, not have to compile it.
2. Open My Account
Open the app. The signed-out screen is headed Events, with My Account at the top right. You can browse the published event before signing in.
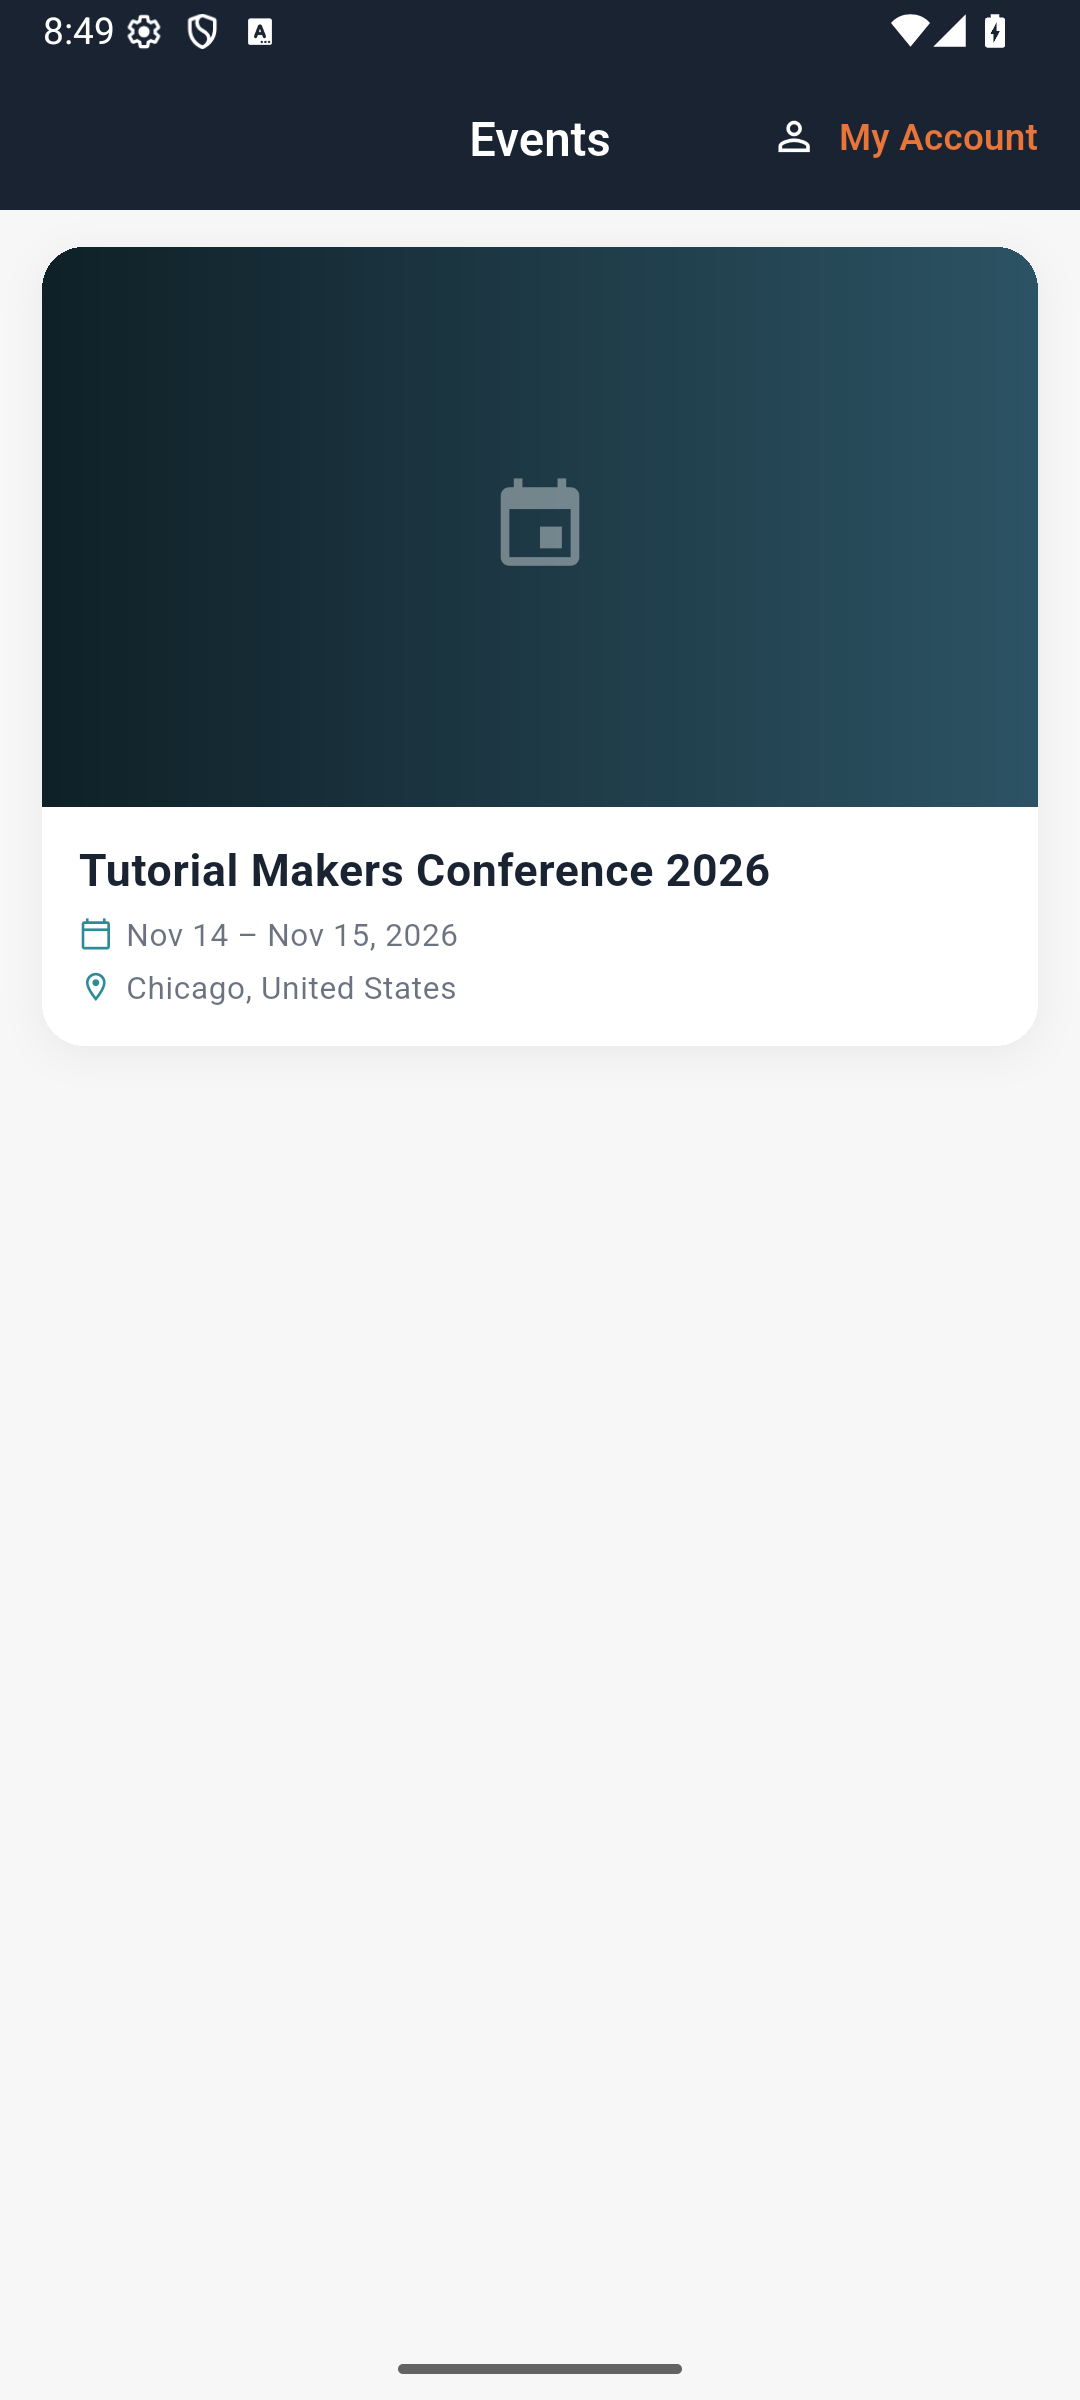
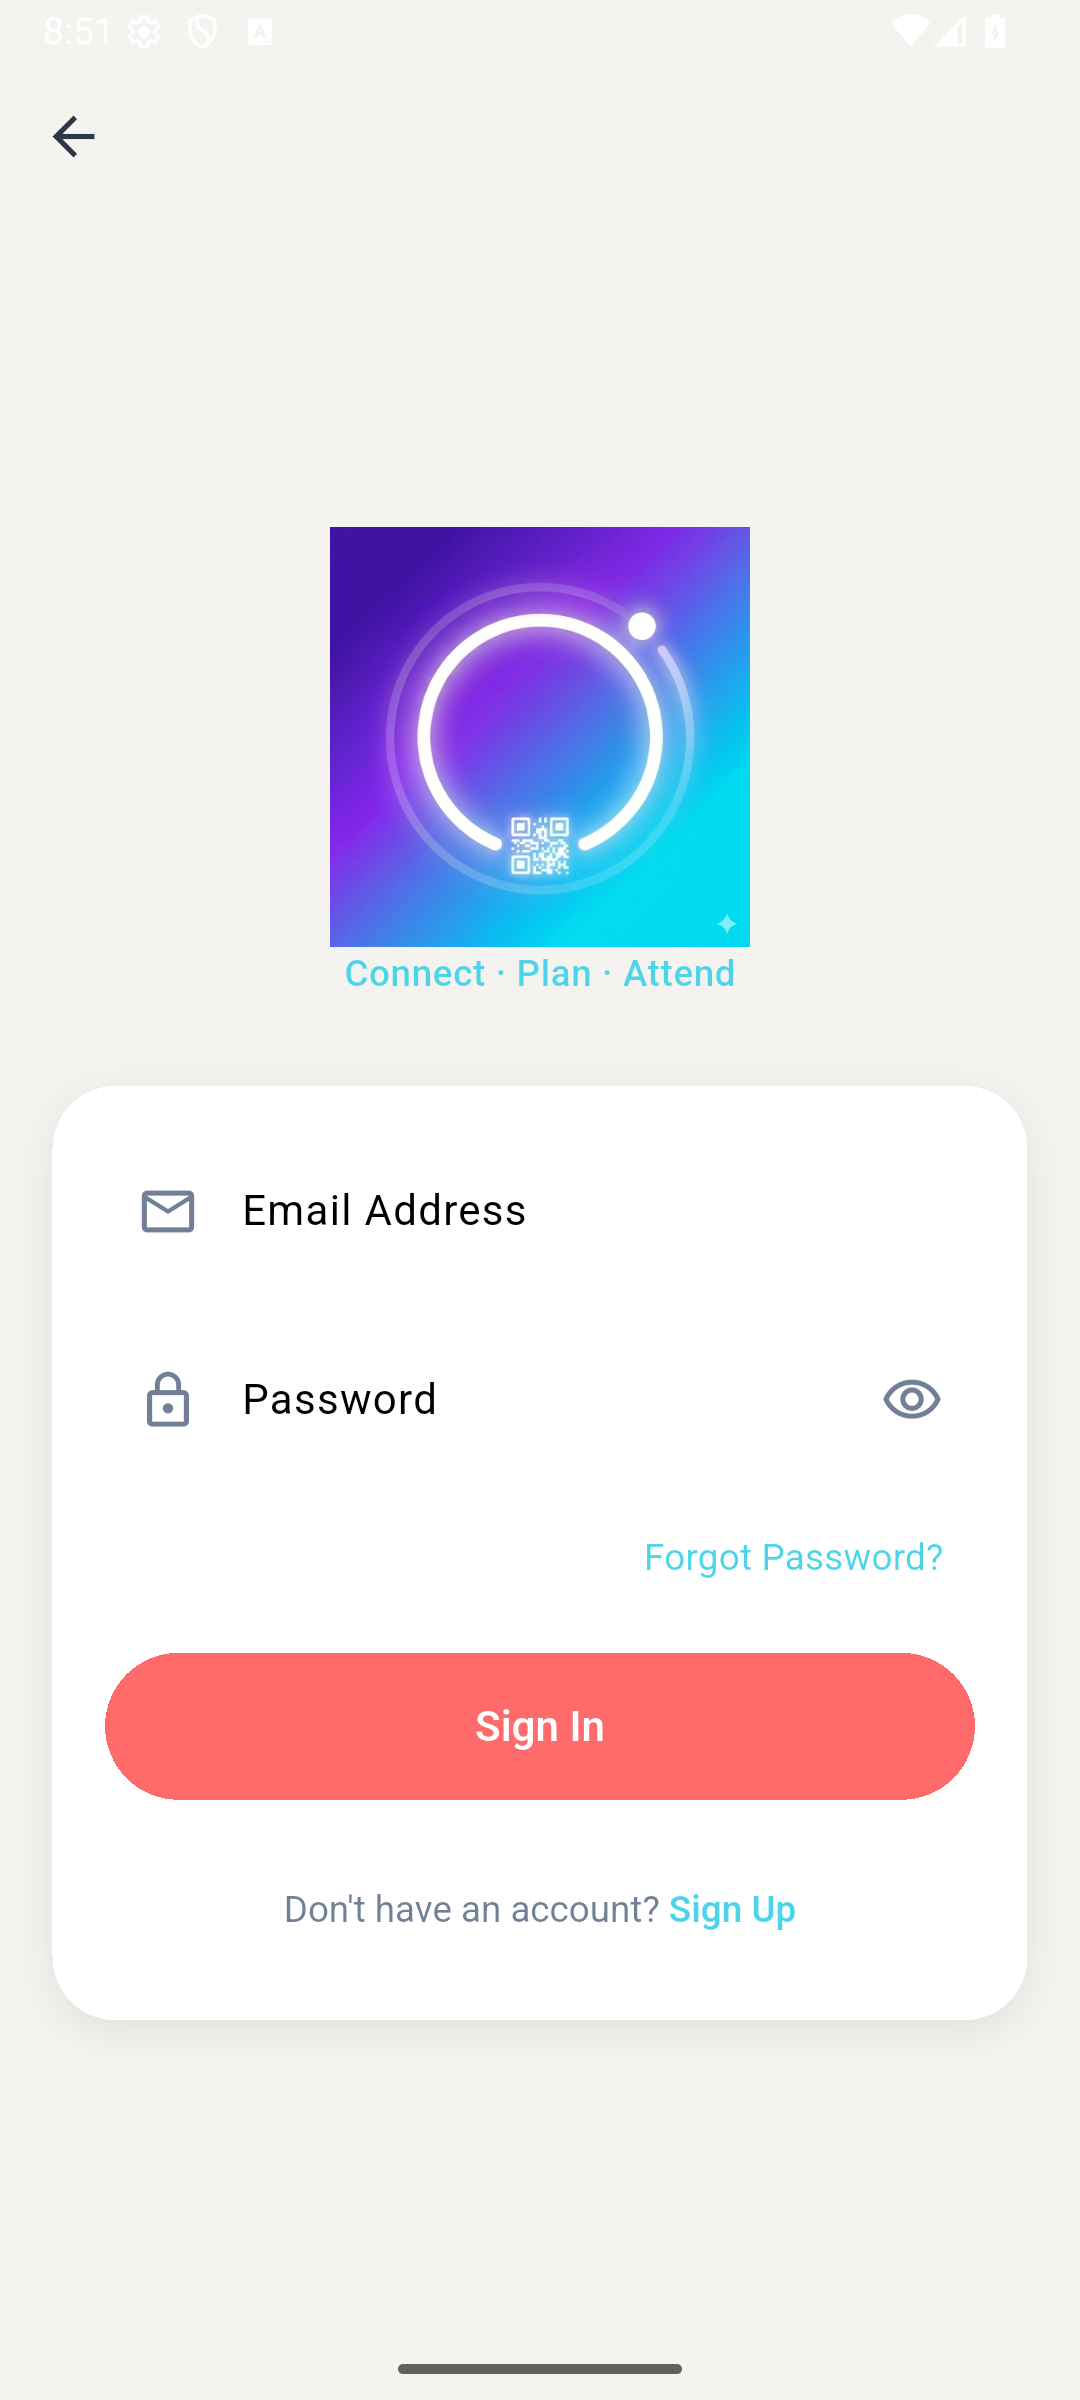
Tap My Account. The sign-in screen has Email Address, Password, Sign In, Forgot Password?, and Don’t have an account? Sign Up.
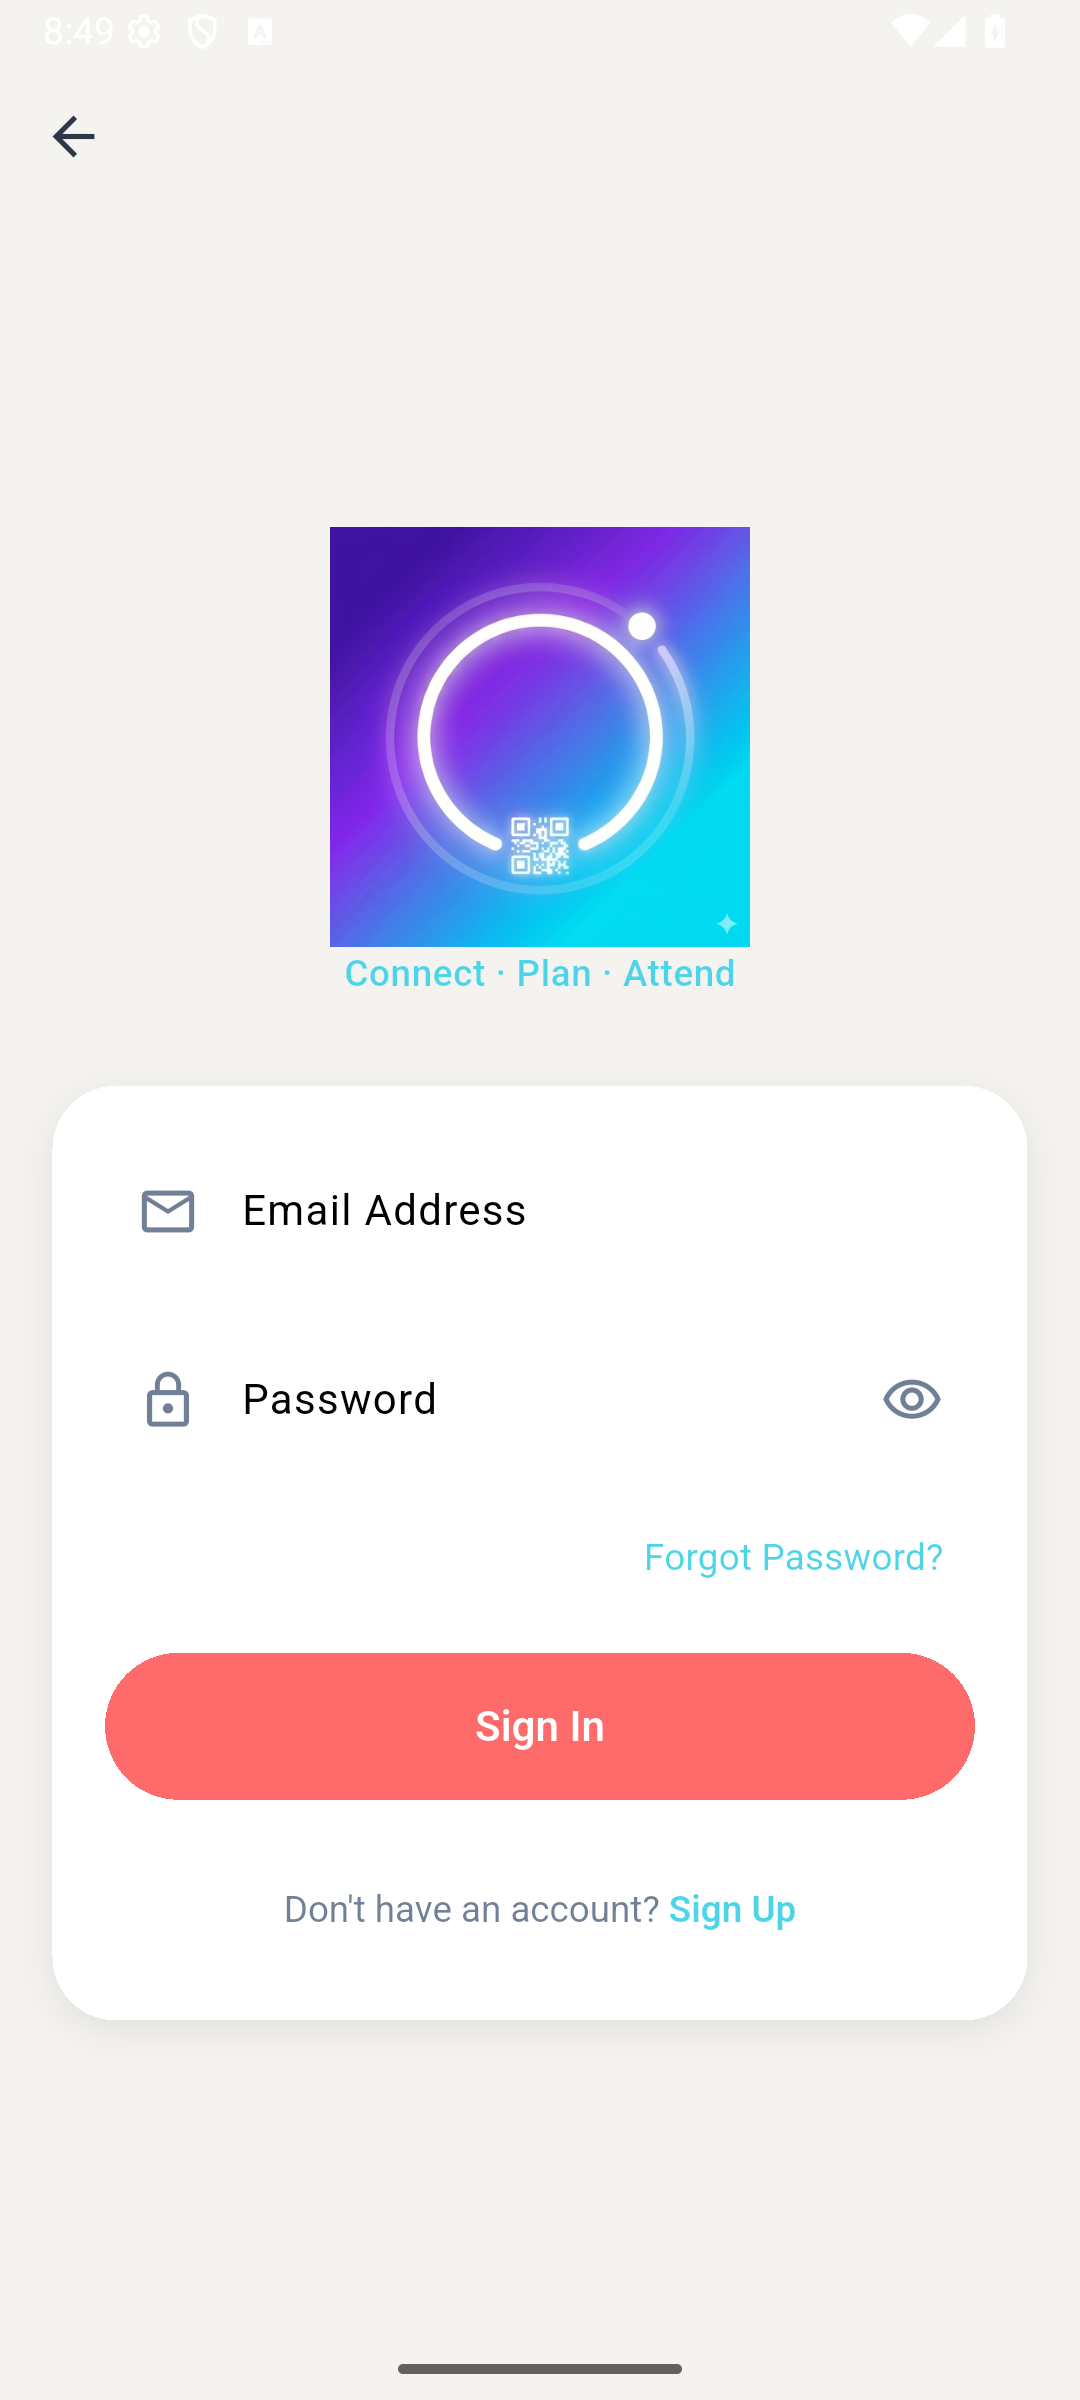
If you already have an attendee account for this organizer, enter that email and password and choose Sign In. Your staff Studio credentials are a different identity; do not assume they are an attendee account.
3. Enter your attendee details
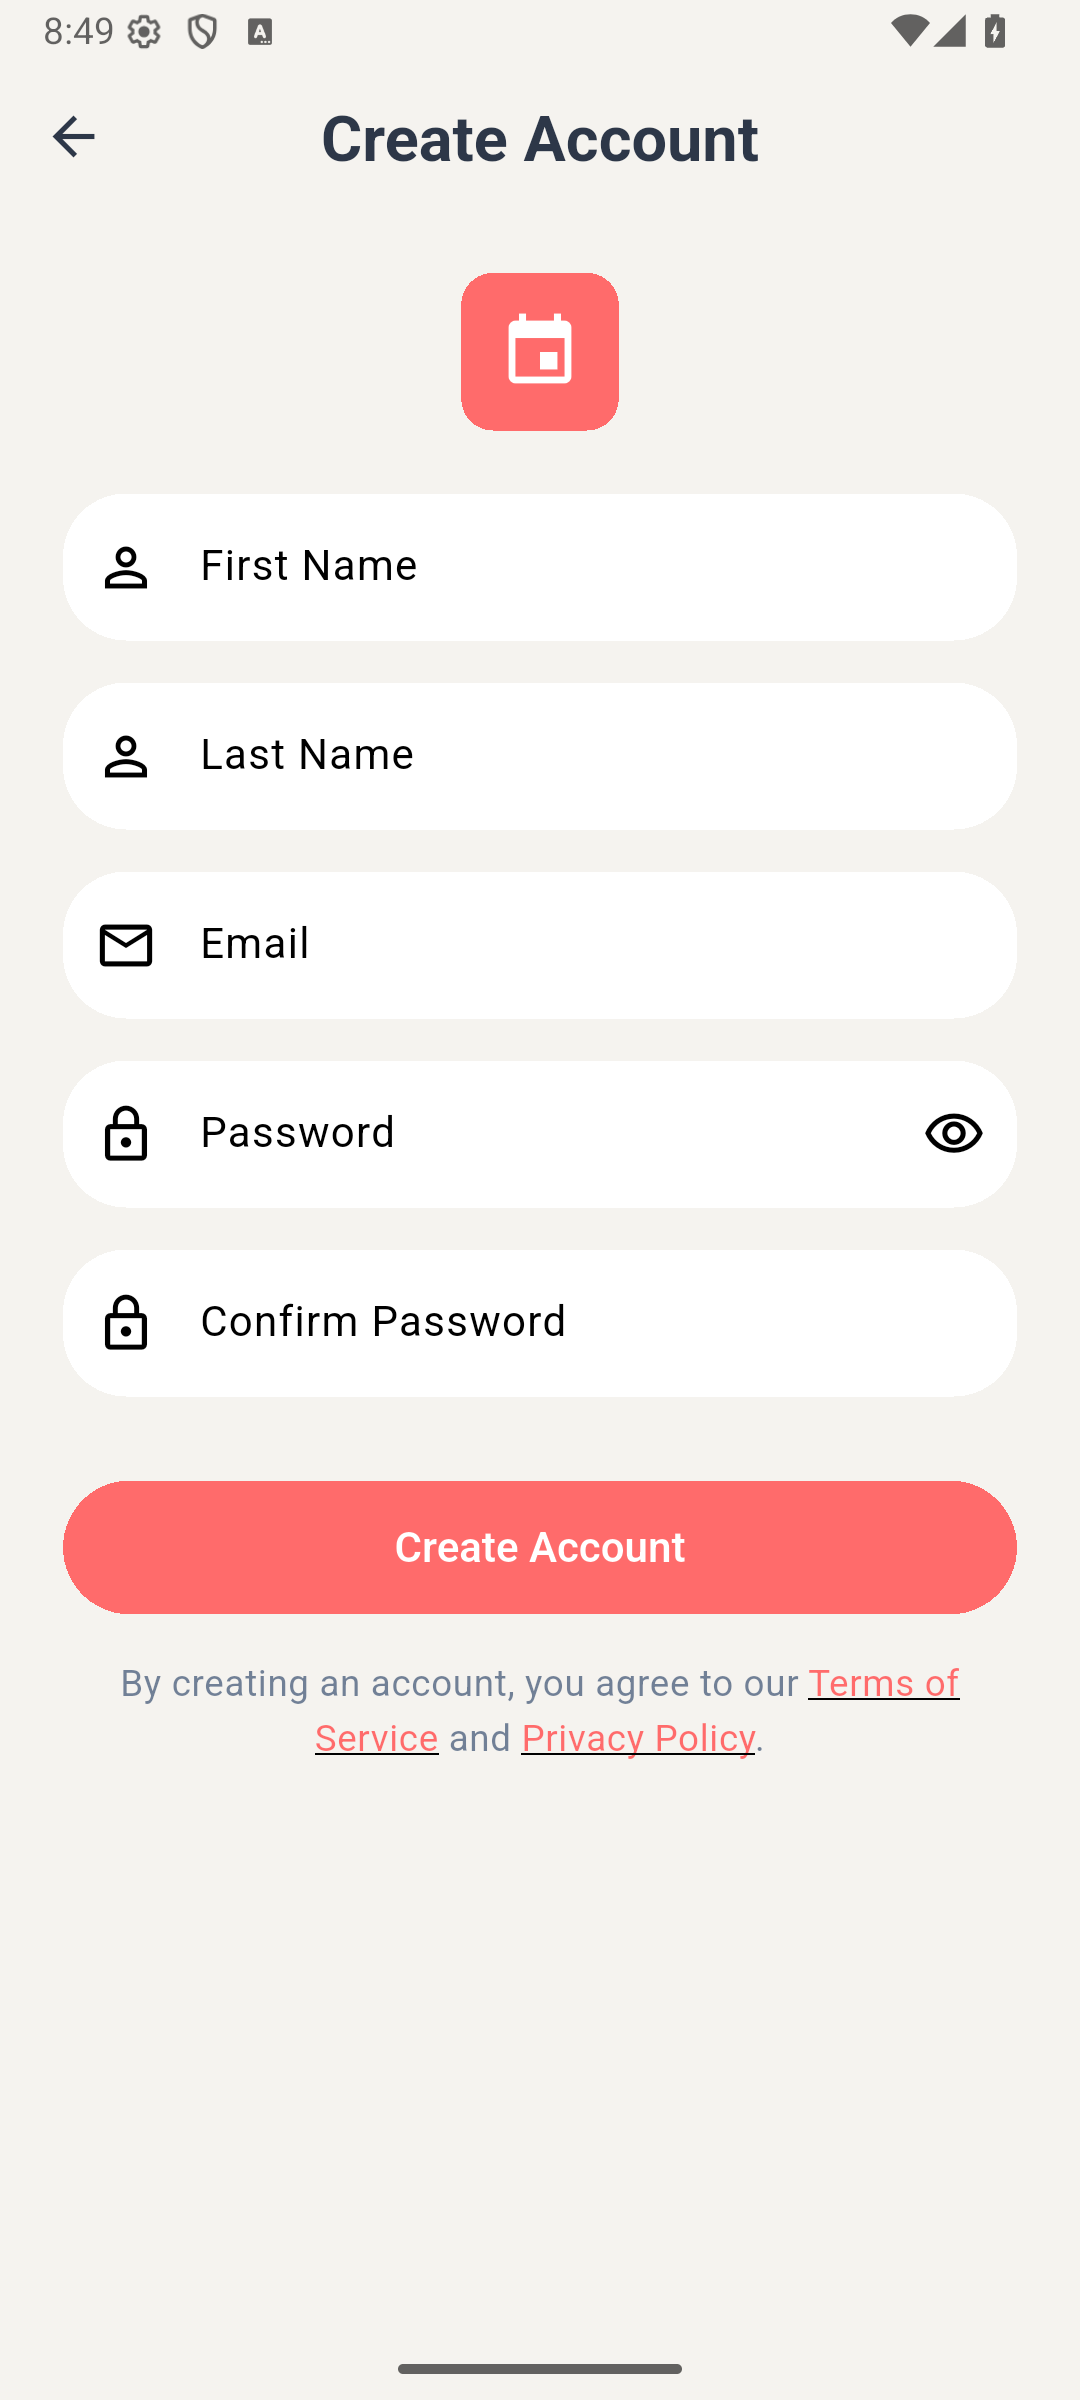
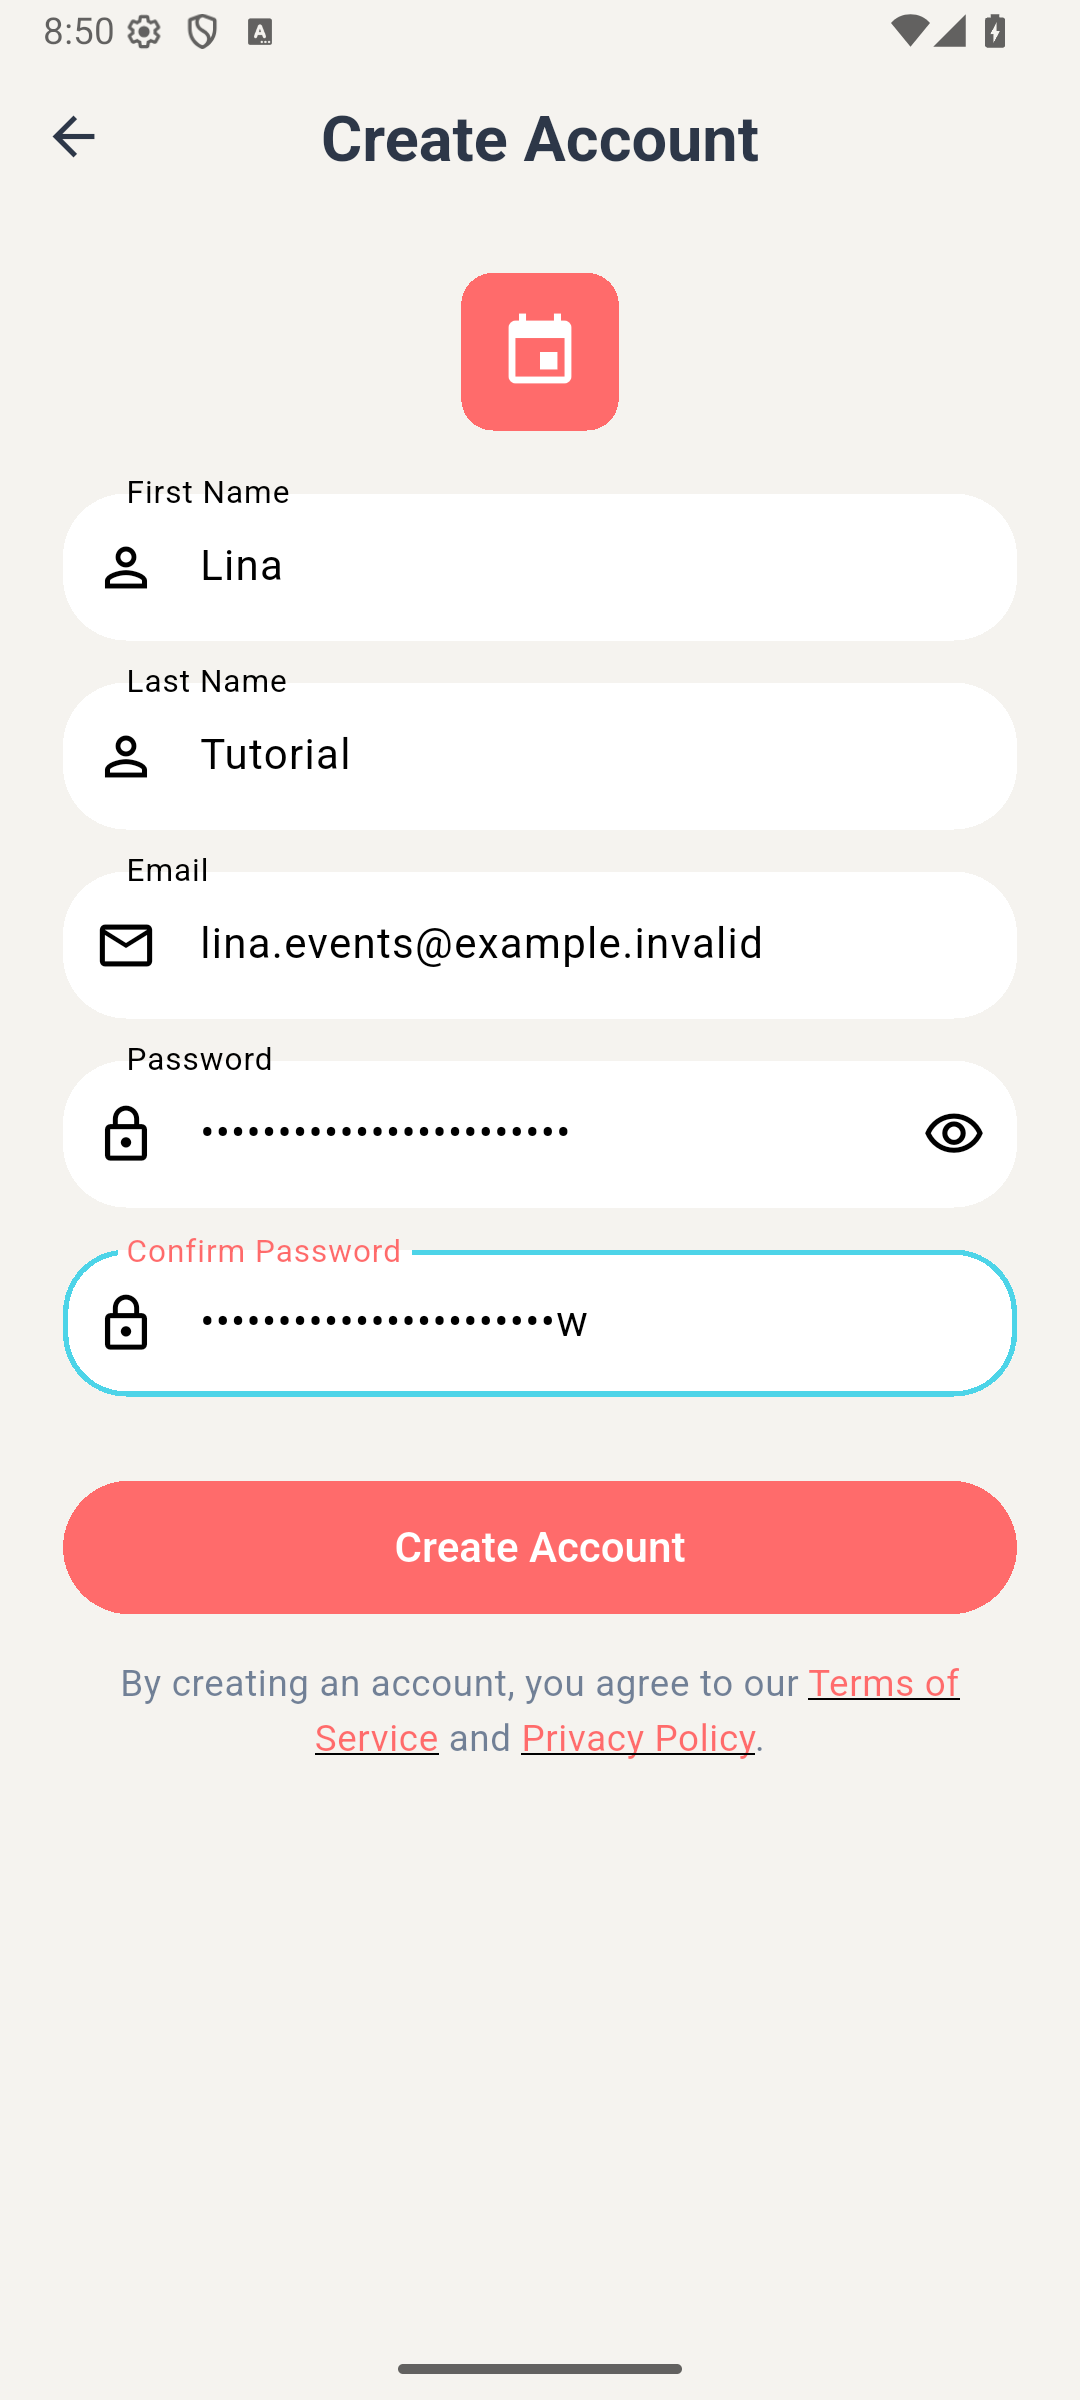
Choose Sign Up. Fill:
| Field | Example | Why you enter it |
|---|---|---|
| First Name | Lina | The name other attendees recognize. |
| Last Name | Tutorial | Completes the displayed name. |
| Your own email | Tickets are matched to their holder email. | |
| Password | A unique password you keep privately | Signs you back into this organizer’s attendee account. |
| Confirm Password | The same password | Catches a typing mistake before submission. |
The checked form’s minimum validator is six characters; use a longer unique password. Keep it hidden when sharing screenshots. Read the linked Terms of Service and Privacy Policy, then choose the Create Account button beneath the fields.
The corrected local build opens Privacy Policy at appmint.io/privacy-policy, the destination published in EventOxygen’s official App Store listing. To revisit it after signing in, open My Events → your account initials → Privacy Policy. The native Android check opened a readable page over a secure connection.
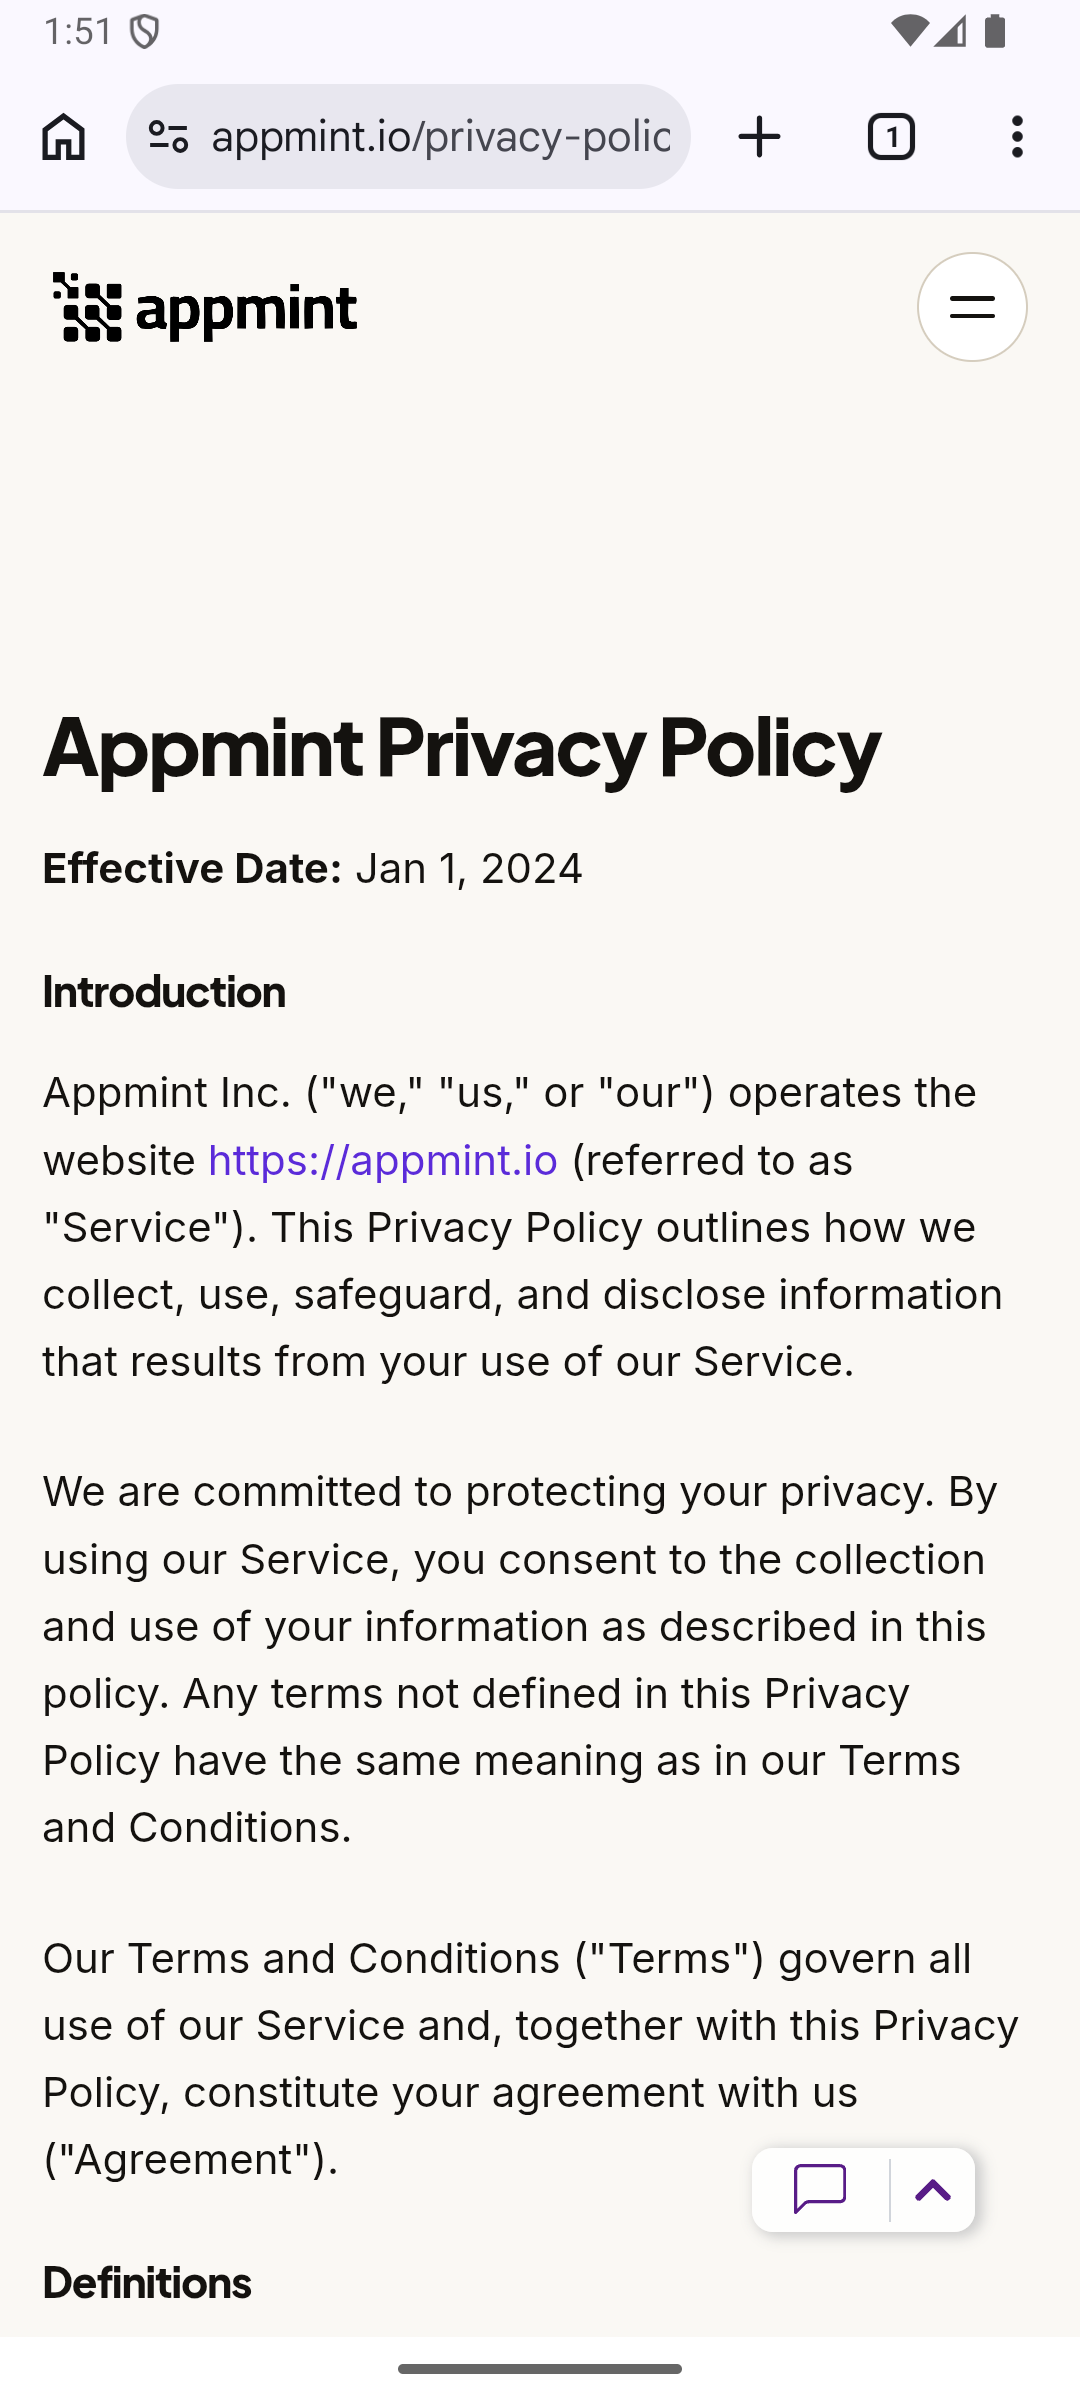
Terms link still needs correction: the current Terms of Service address,
eventos.app/terms, fails certificate validation. The intended replacement is awaiting the owner’s confirmation. Request the intended attendee terms through the organizer’s contact route; do not bypass the browser warning or treat another site’s terms as automatically applicable.
4. Reach your signed-in home
After Create Account succeeds, the corrected Android build opens My Events directly. A fresh attendee has No events yet until they register for a ticket; choose Browse Events to find the organizer’s published event. This direct navigation was verified with a second fresh account on 24 September. Older builds can leave the previous Sign In screen on top: press Android Back once before attempting another signup.
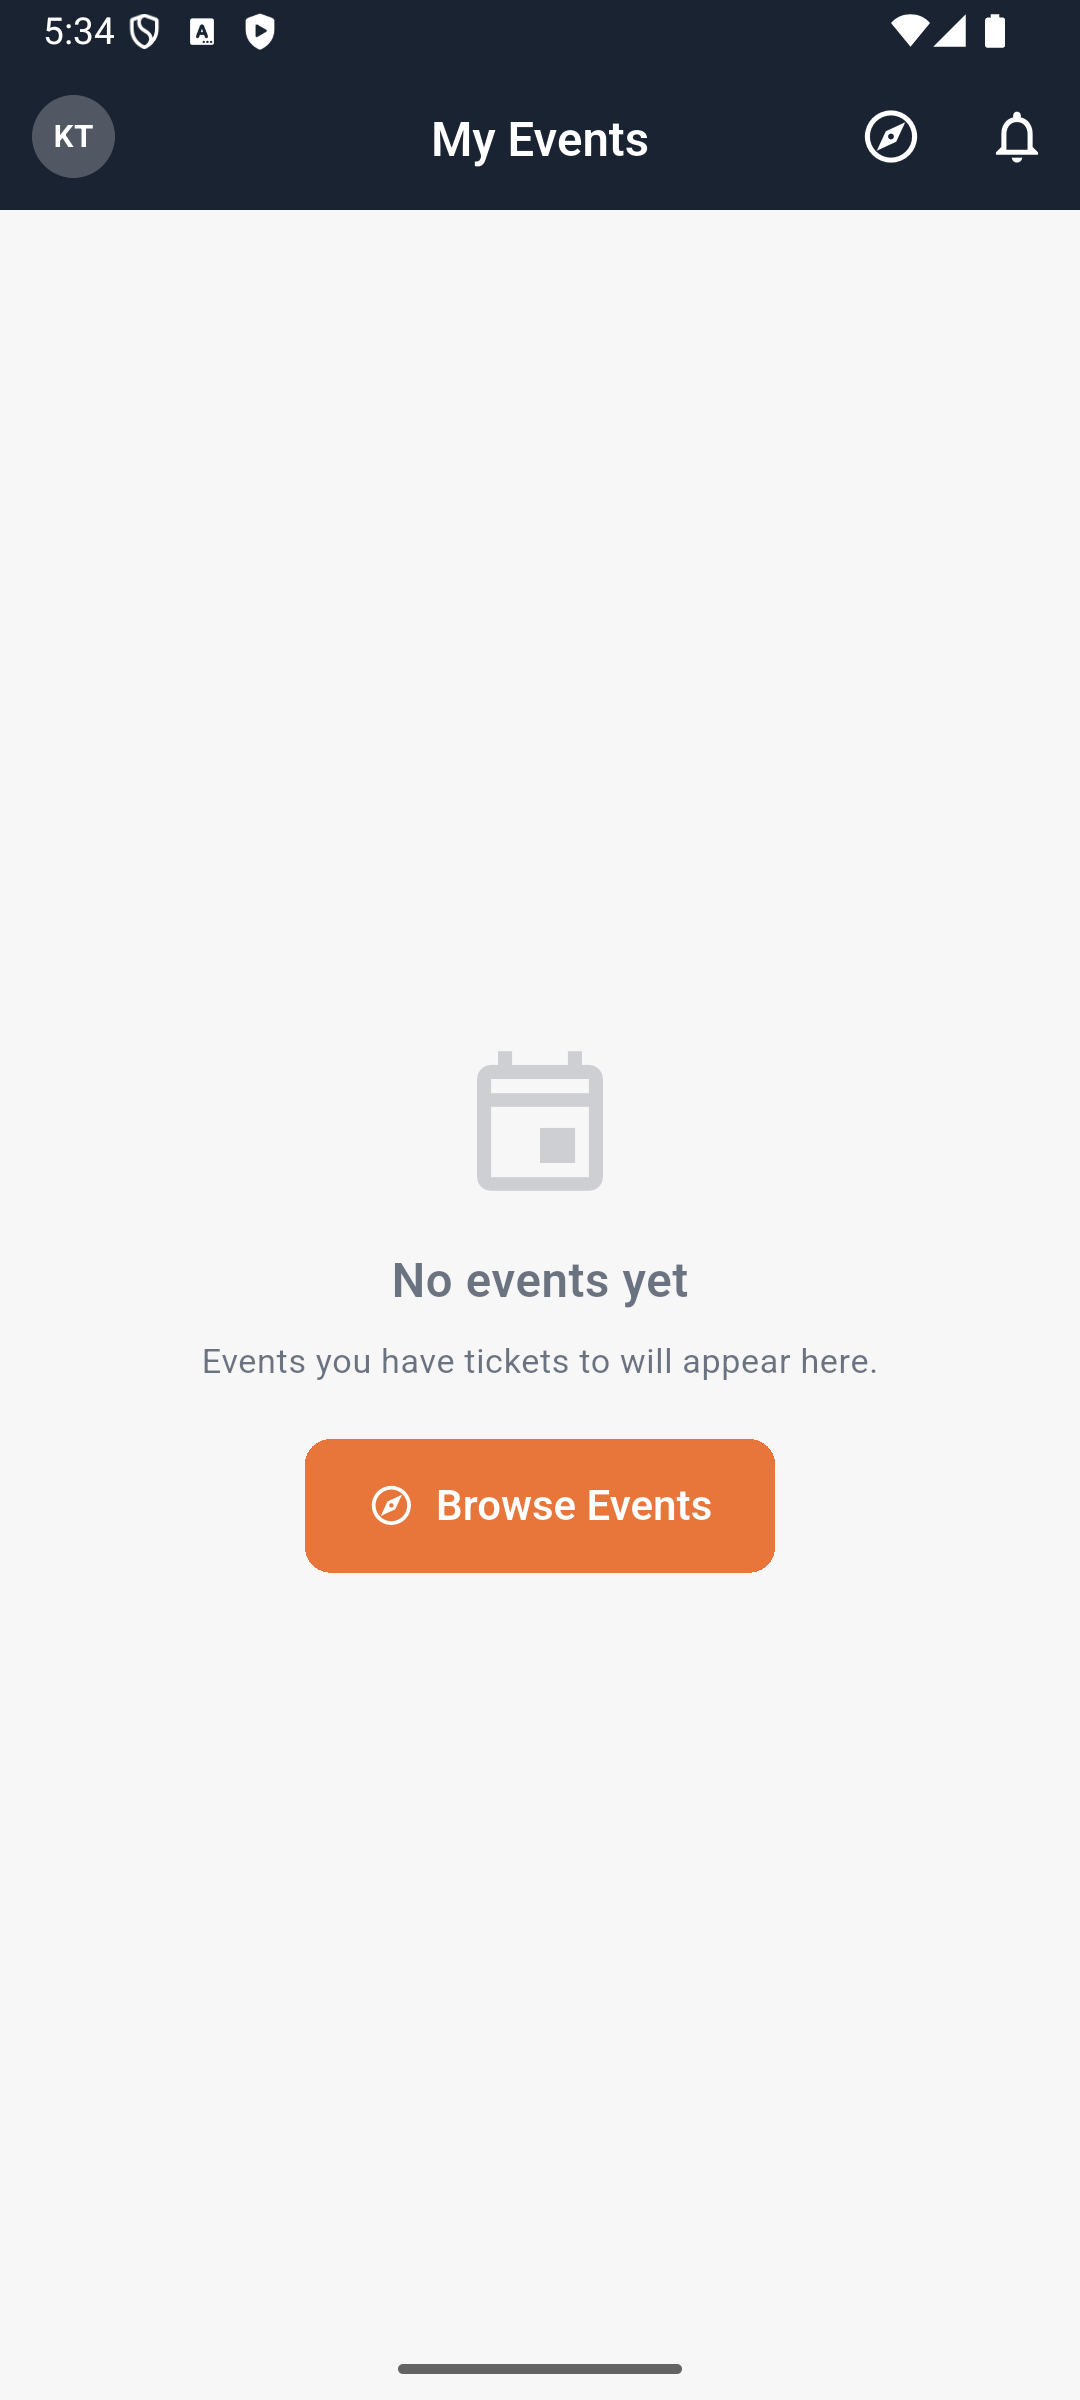
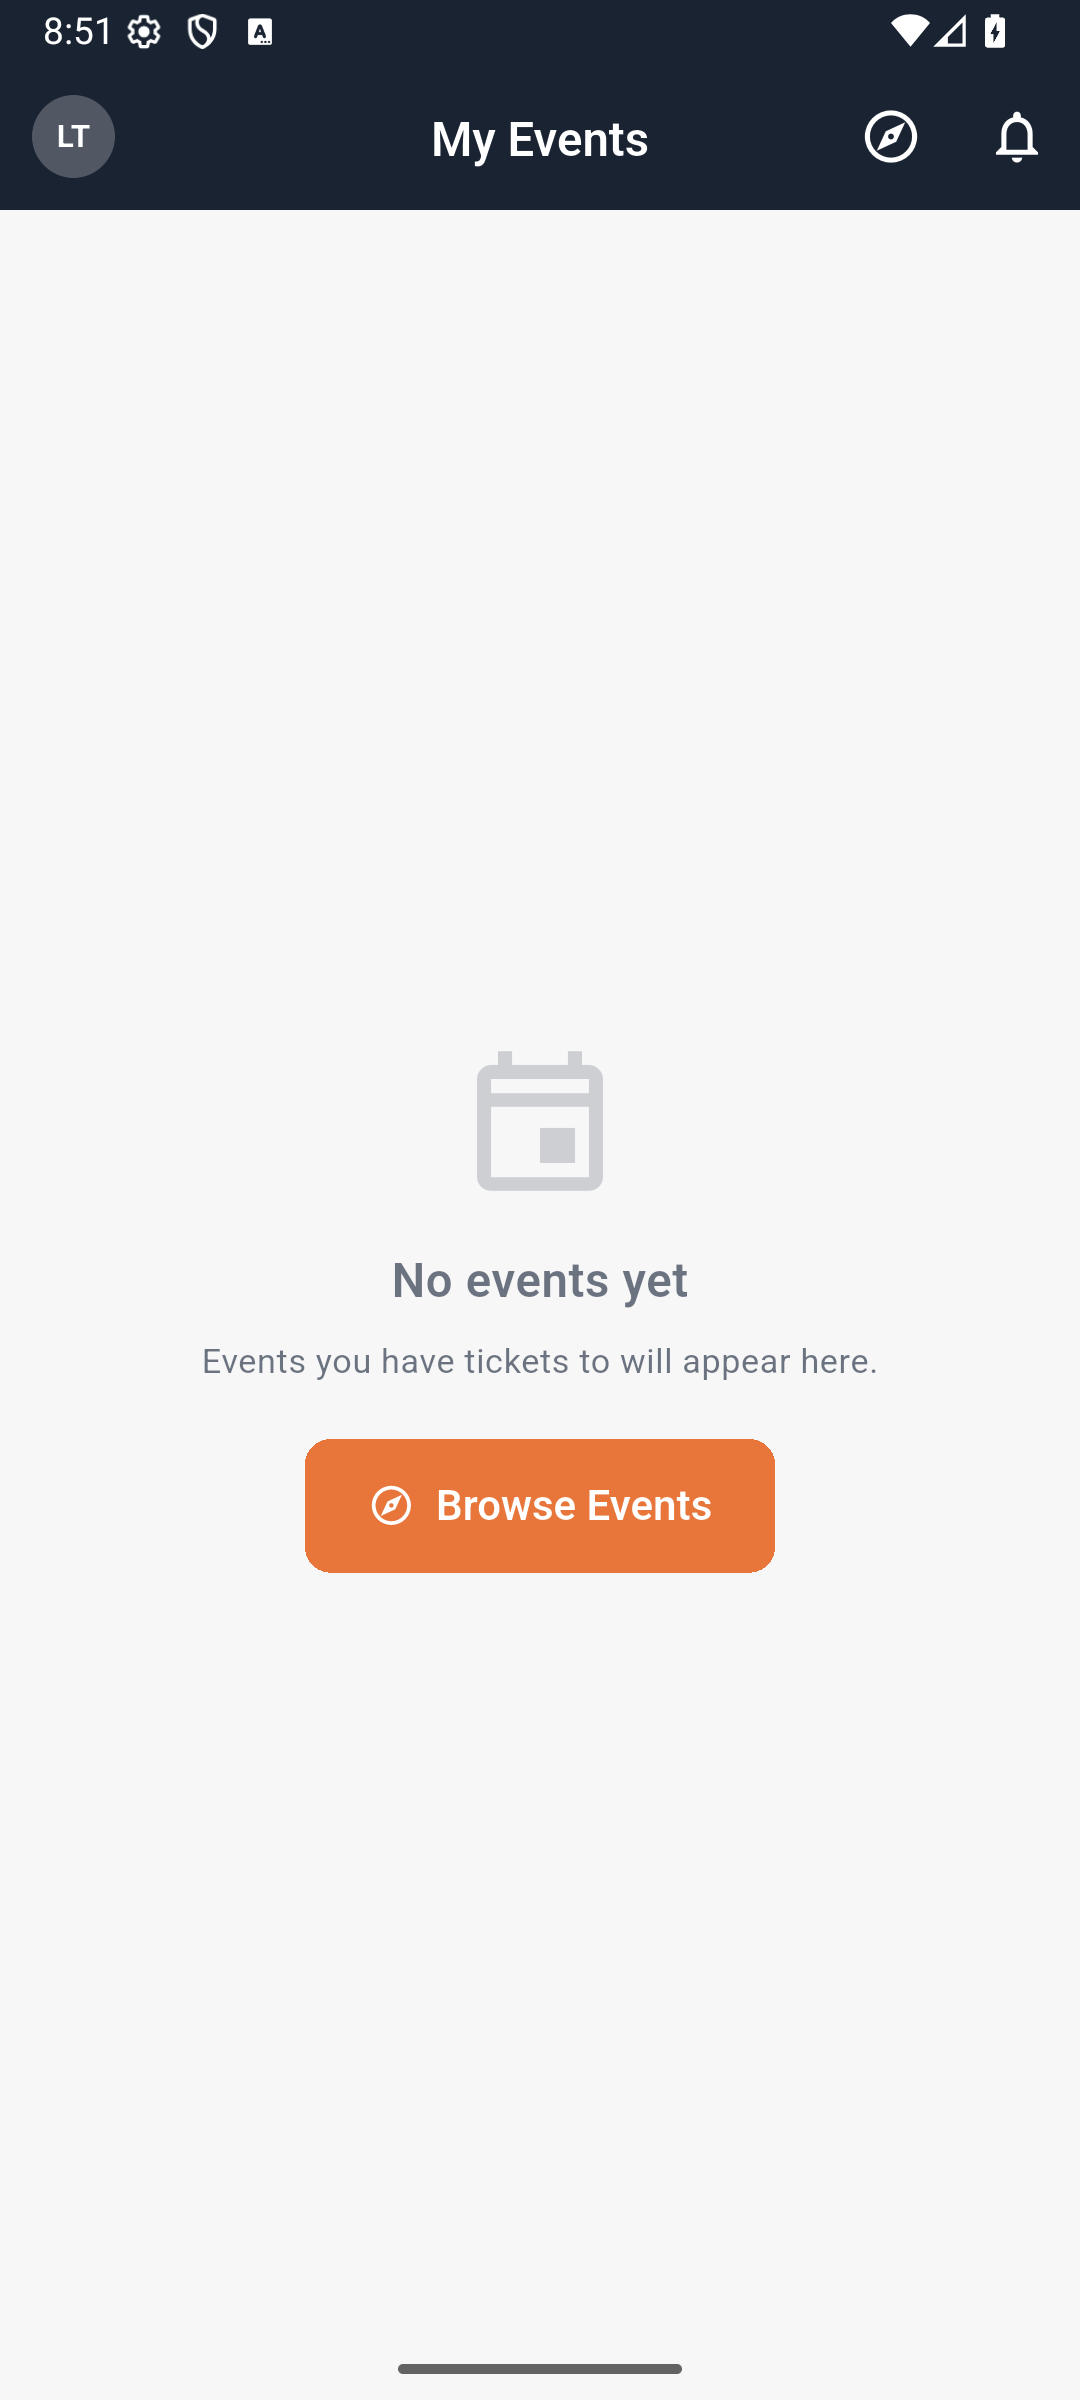
You should see: your initials at the top left, My Events, and No events yet — Events you have tickets to will appear here. That empty state means the account exists but has no tickets. It does not mean signup failed.
Try it: identify the email you will use for registration before leaving this screen.
Check yourself: will a ticket registered to a different email automatically appear here? No. The ticket holder email and your signed-in attendee email need to match.
Part 2 — Register once and find the ticket again
1. Read the event before selecting a ticket
Tap Browse Events, then Tutorial Makers Conference 2026, or the exact event your organizer supplied. If Browse Events says No events yet — Check back soon, stop this part and ask the organizer to verify the app/event pairing. This differs from an empty My Events ticket list after signup. Once the event is visible, review the dates, timezone, city, speakers and programme. The event detail offers quick links such as People, Schedule, Venue and Tickets, plus Get Tickets at the bottom.
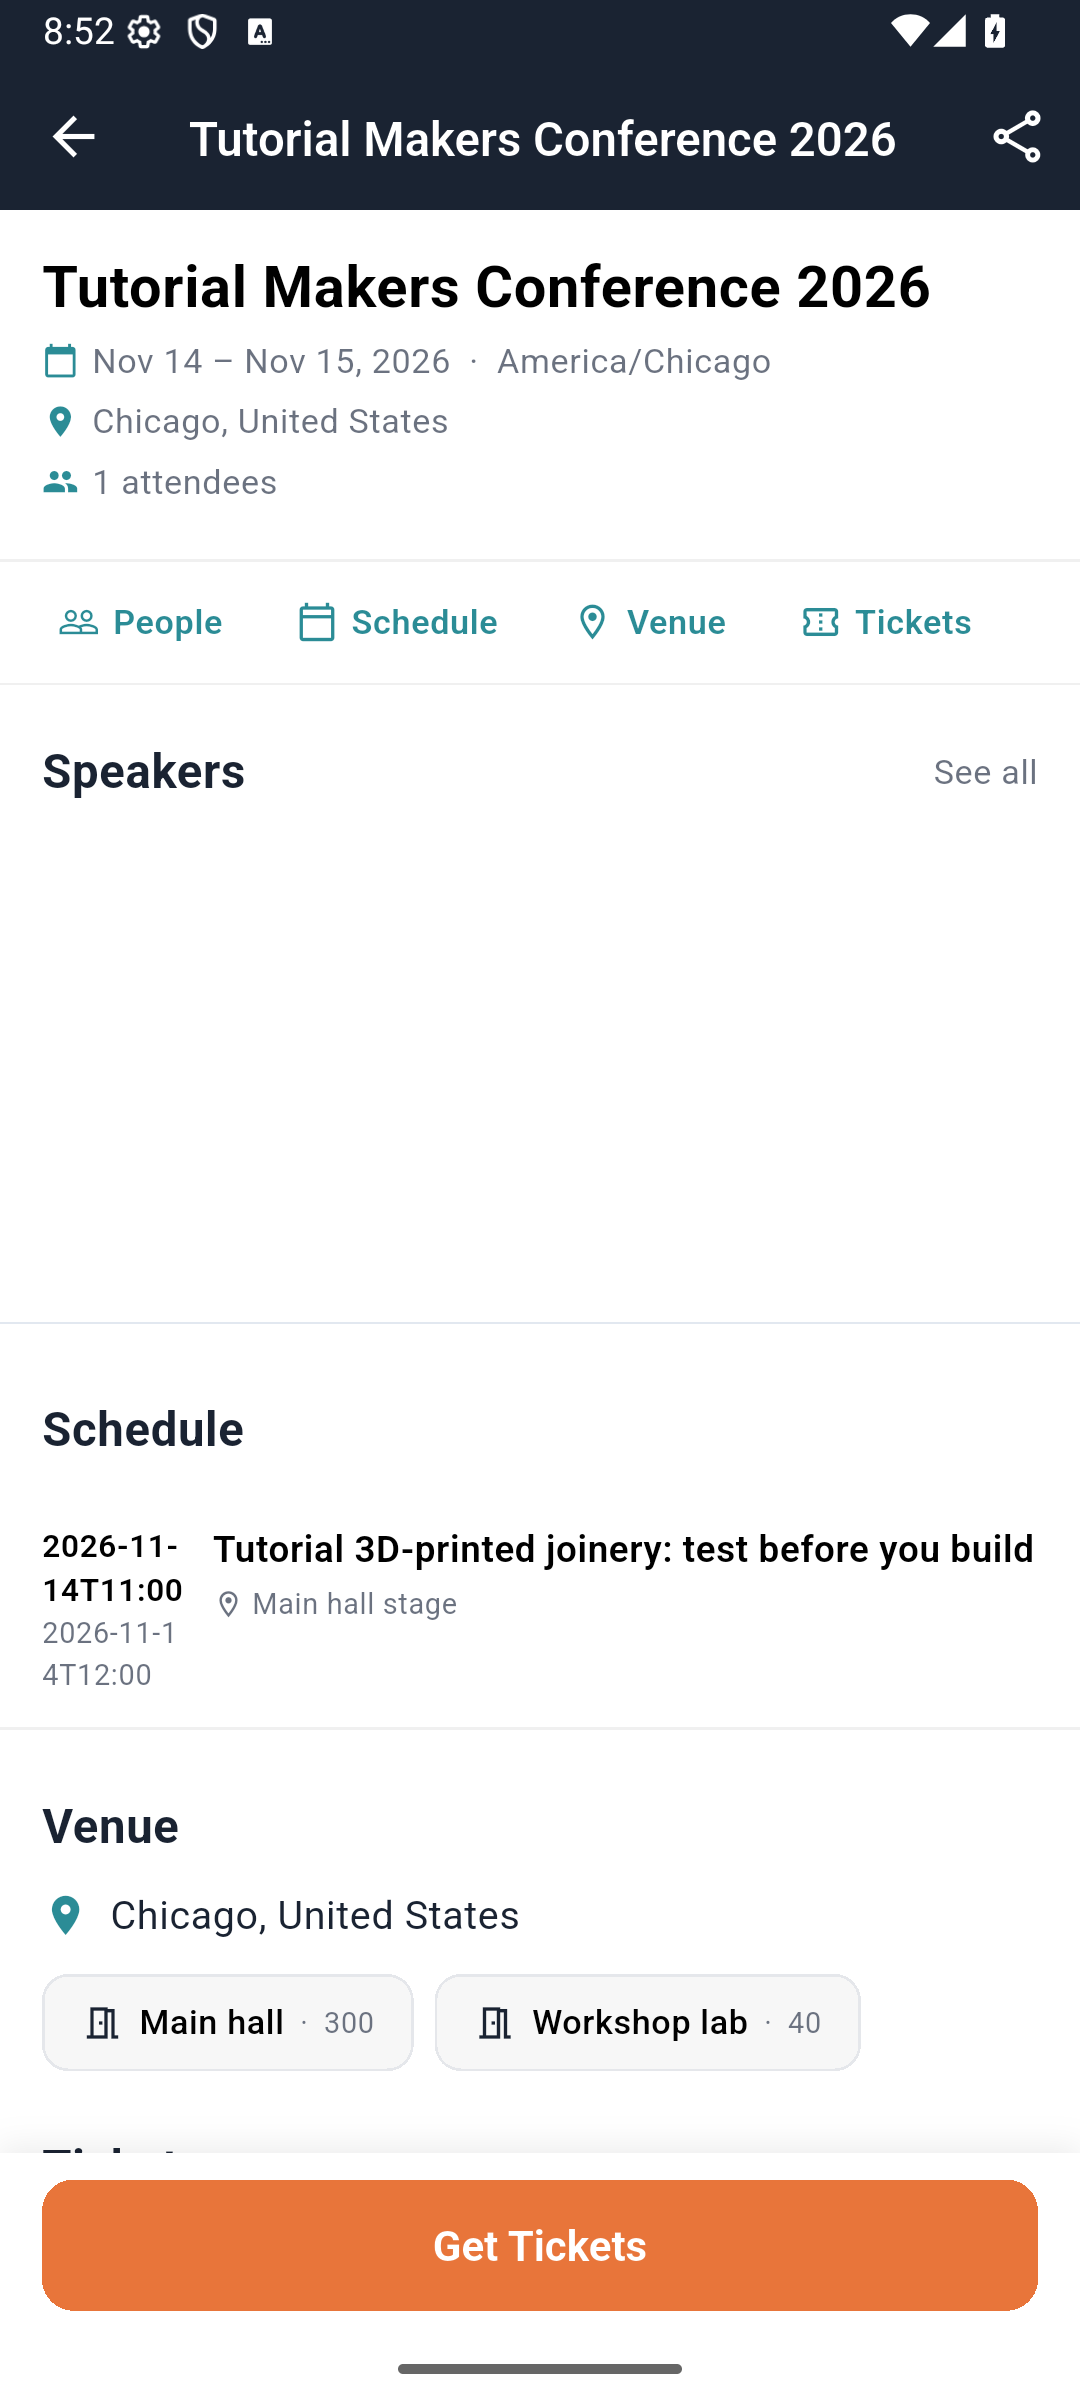
For this exercise, the joinery talk is November 14, 11:00–12:00 at Main hall stage. The event’s operating hours are 09:00–17:00. The dedicated Schedule screen formats the session times more clearly than the raw date-time strings visible in parts of the detail page.
2. Enter the holder details explicitly
Tap Get Tickets. Even though Lina was signed in, the checkout’s Email and Name fields opened empty. Fill both:
- Email: the same address used for your attendee account.
- Name: the name staff should recognize at registration.
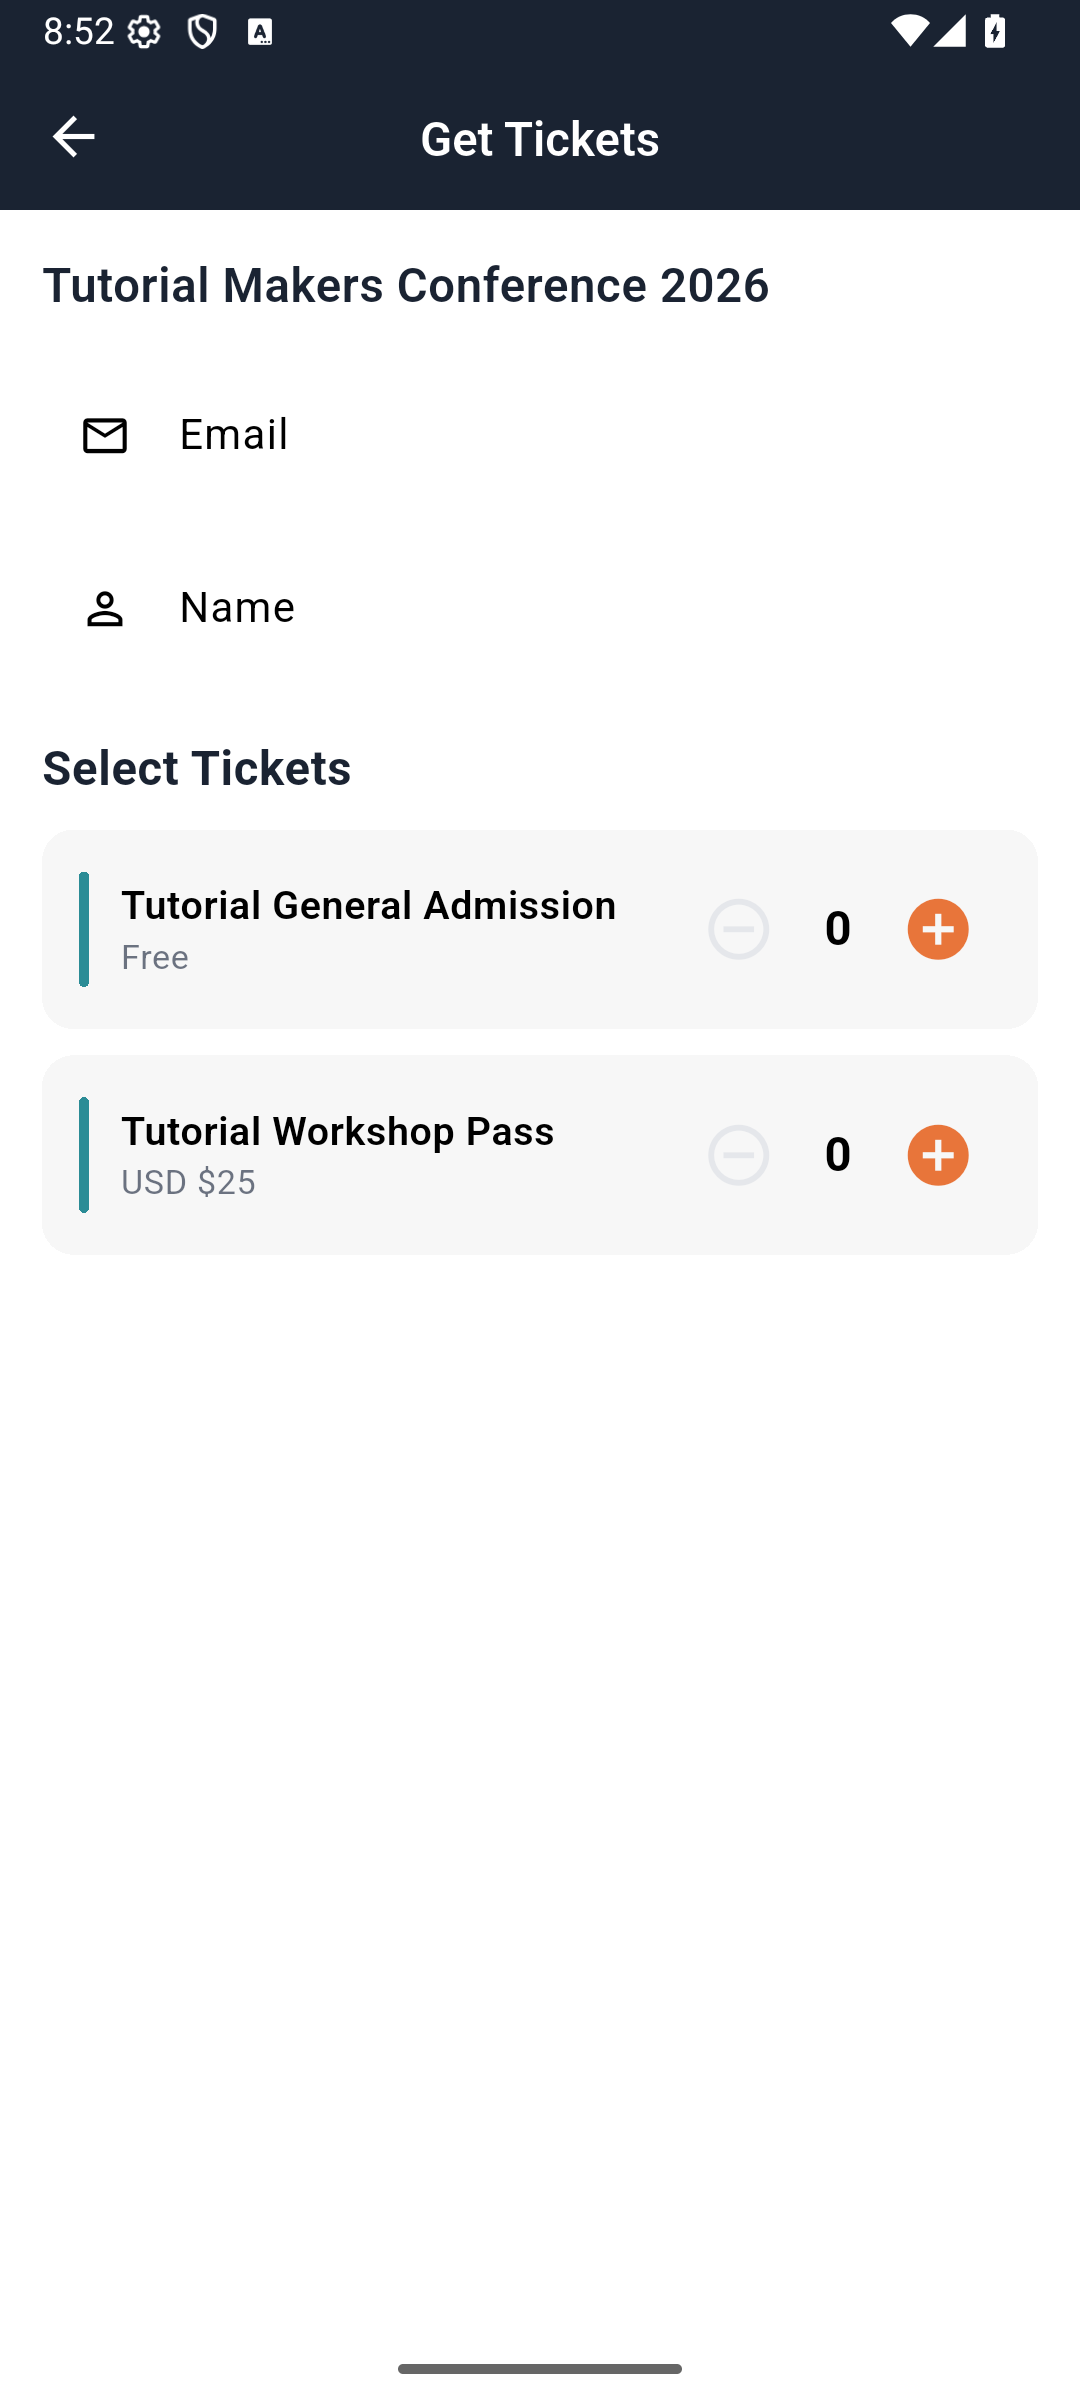
Do not put your colleague’s email here unless the ticket is intentionally for that colleague. The app will look for tickets attached to the signed-in email later.
3. Select one General Admission ticket
Under Select Tickets, tap the orange + on Tutorial General Admission once. Leave Workshop Pass at 0.
General Admission is free and opens the main hall. Workshop Pass costs USD 25 in this example and includes the workshop lab as well. A more expensive type is not automatically the right ticket; choose according to the areas and activities you need.
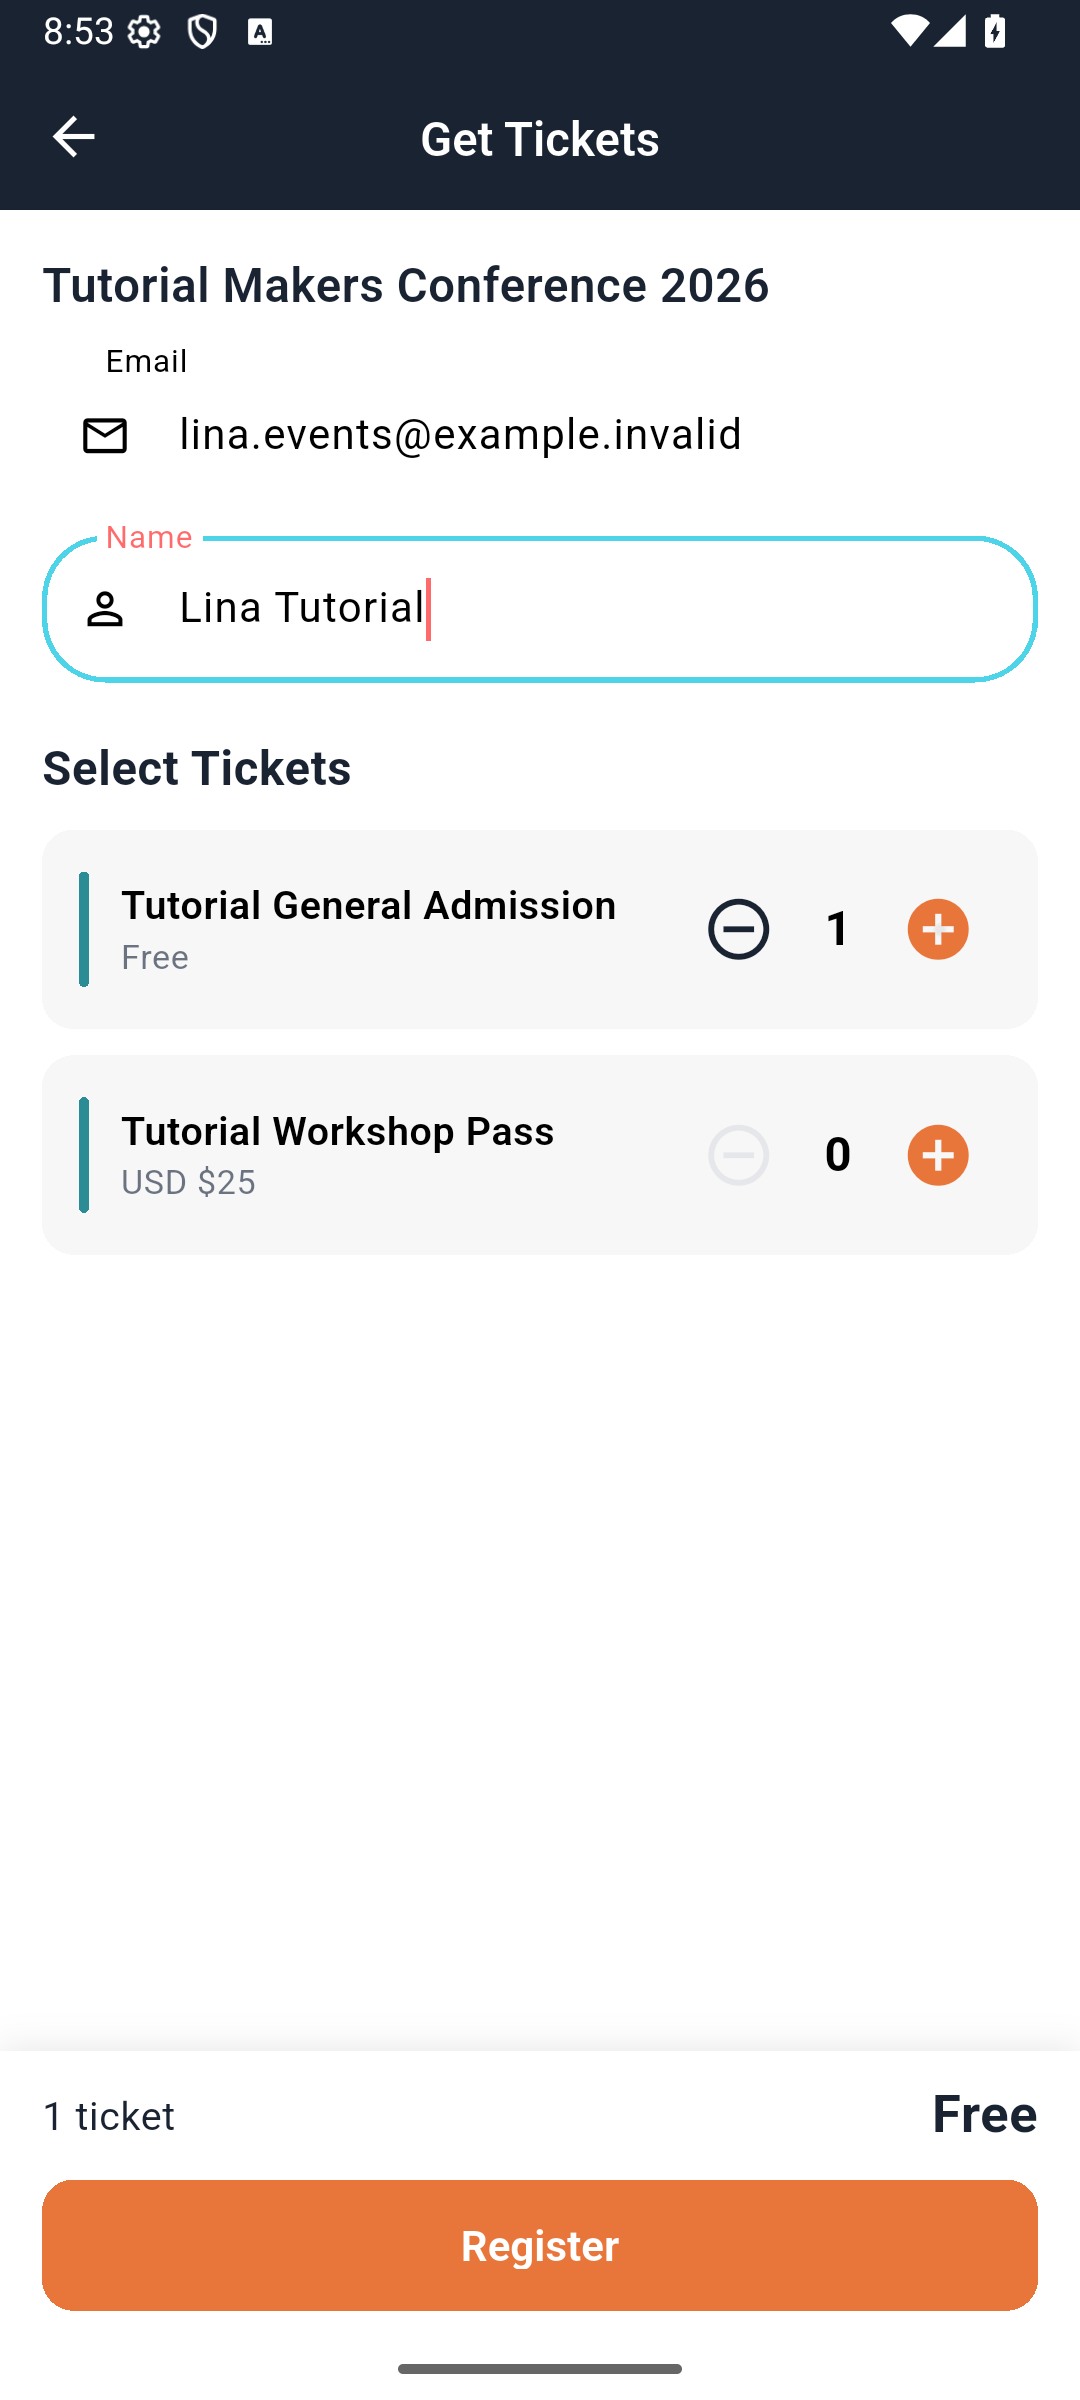
You should see: quantity 1, total Free, and Register. A non-zero total changes the action to Continue to Payment. We are practicing the free path; paid checkout requires the organizer’s separately tested payment setup.
One free ticket per person in this event: General Admission has a per-customer limit of one. Your colleague should register under their own address. Do not use repeated registrations to fix a missing screen without first checking whether the original ticket was issued.
4. Register and read the confirmation
Tap Register once. Wait for Booking Confirmed. Read the booking reference, email, number of tickets and status.
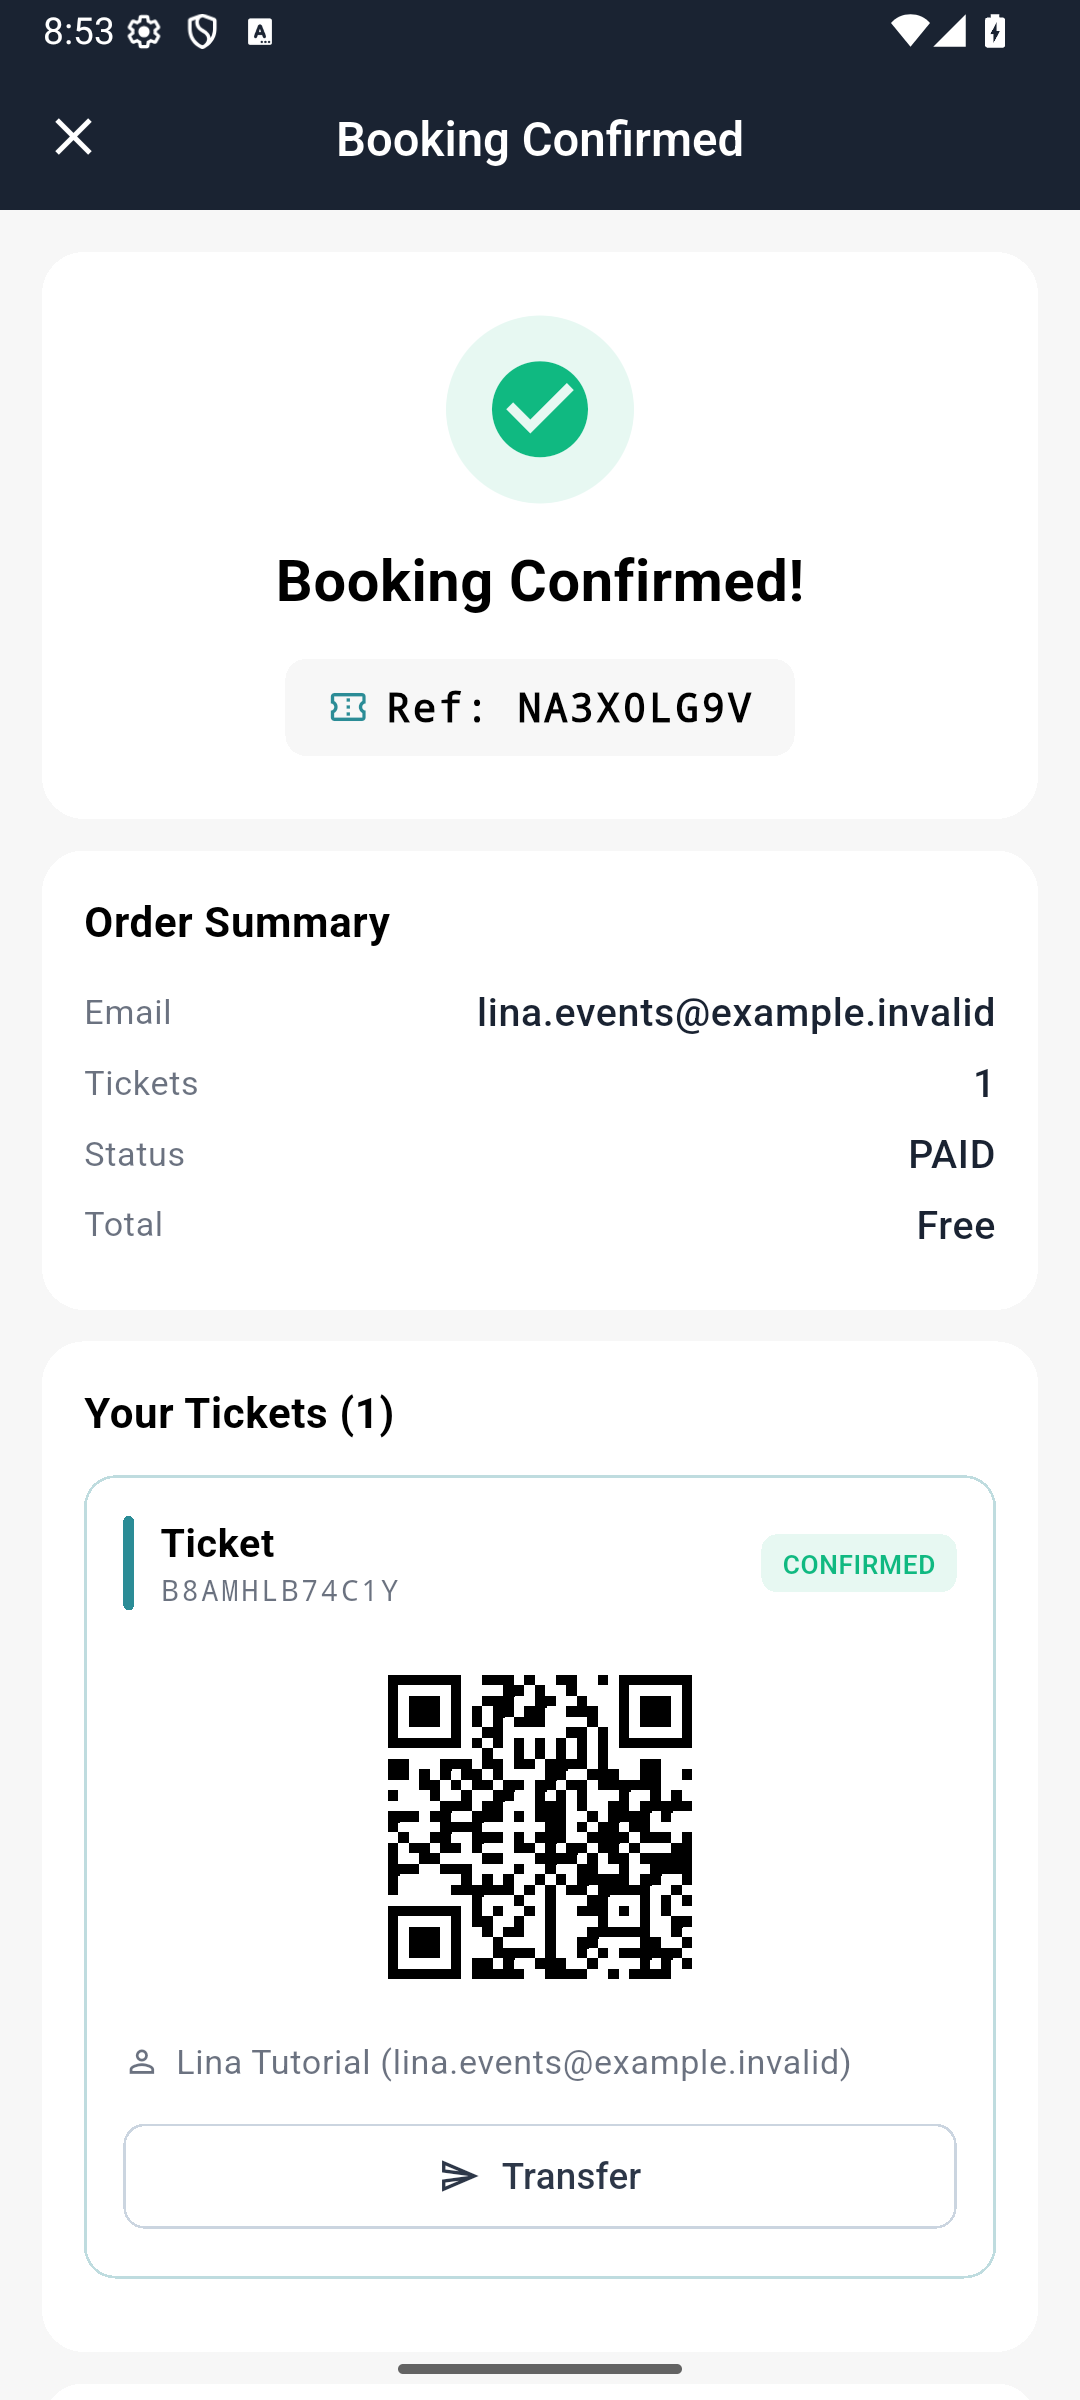
Lina’s example shows reference NA3X0LG9V, Tickets: 1, Status: PAID, Total: Free, and one CONFIRMED ticket. Here PAID means the zero-total booking is settled; no money was charged.
Your reference and ticket code will be different. The booking reference identifies the registration; the ticket identifies an individual admission right.
5. Reopen the app and find the event
Close and reopen EventOxygen. Lina remained signed in, and My Events showed the conference with 1 ticket.
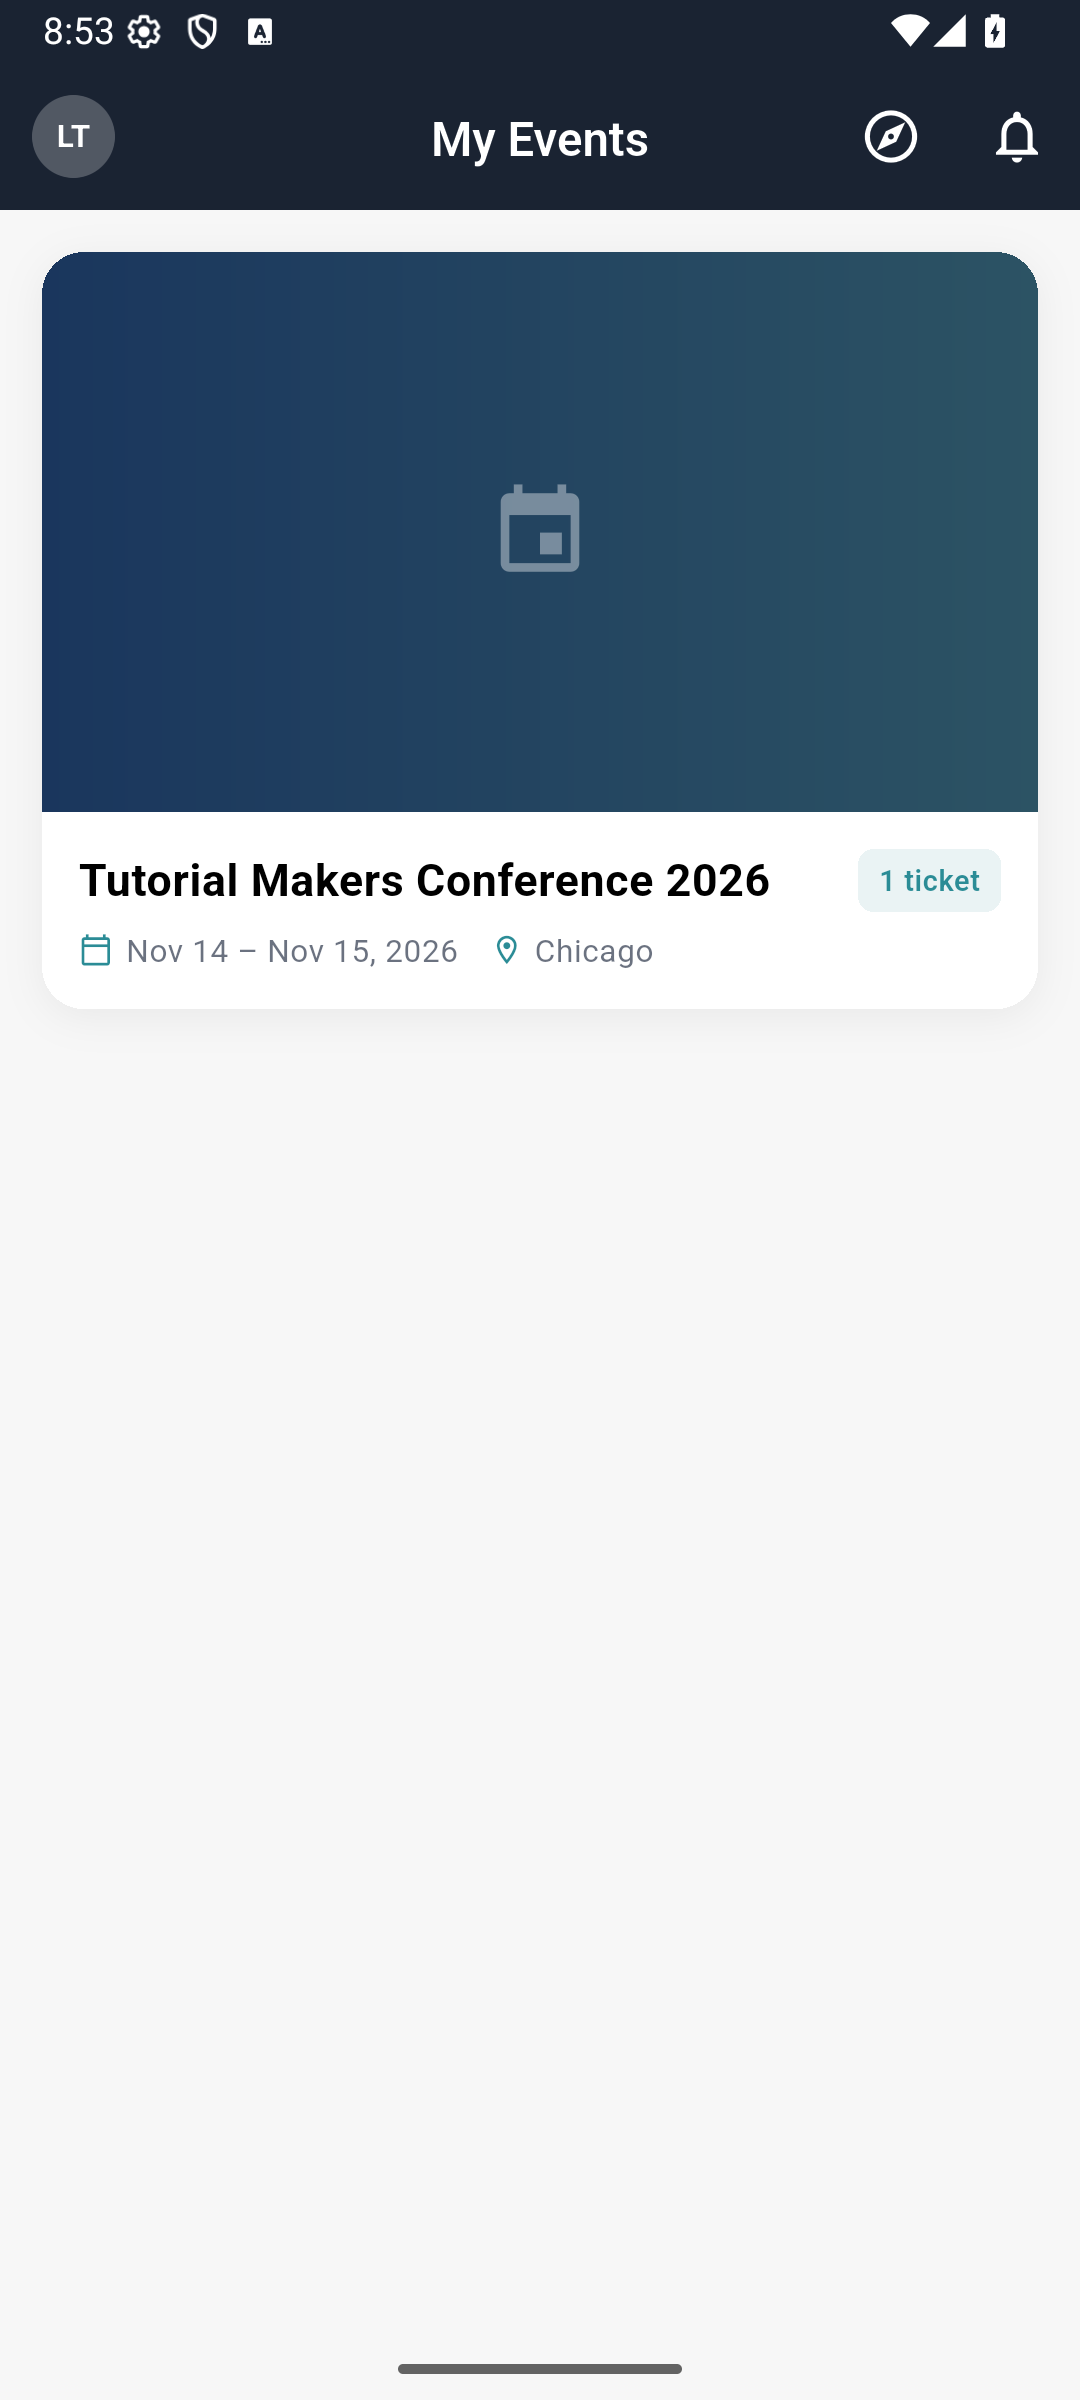
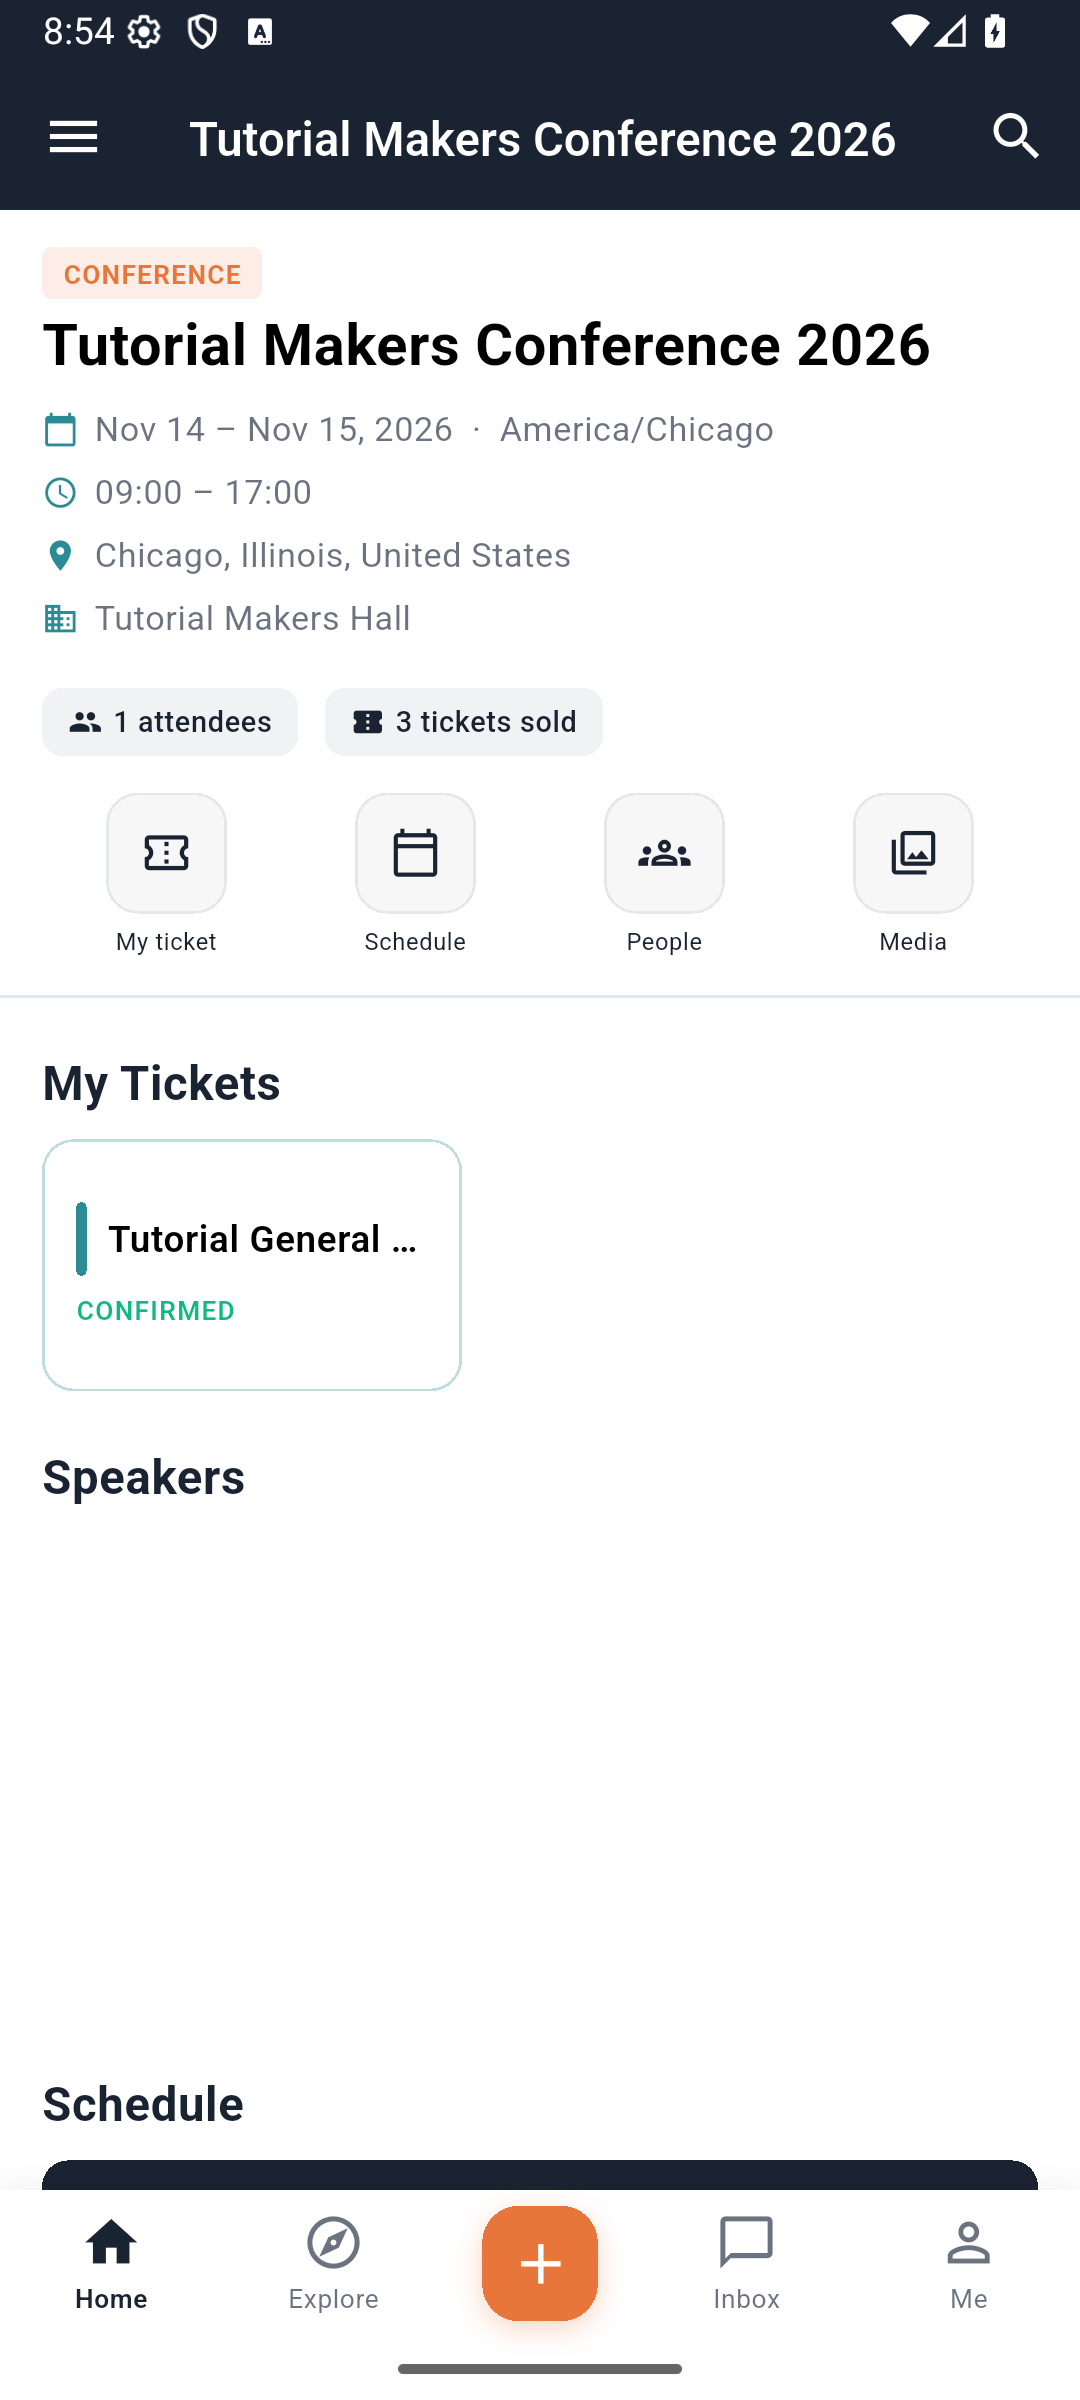
Tap the event card. On its Home screen, choose My ticket. The ticket card shows the event, ticket type, holder, status and QR.
6. Pin the ticket you need most
On a ticket card, open the three-dot menu and choose Pin ticket. Open the menu again: Unpin confirms the pin is set. Pinning places that ticket first in the list on this phone; it does not issue another ticket or change its access. To remove the preference, select Unpin, then reopen the menu and check that it offers Pin ticket again. This return action is verified in the corrected build.

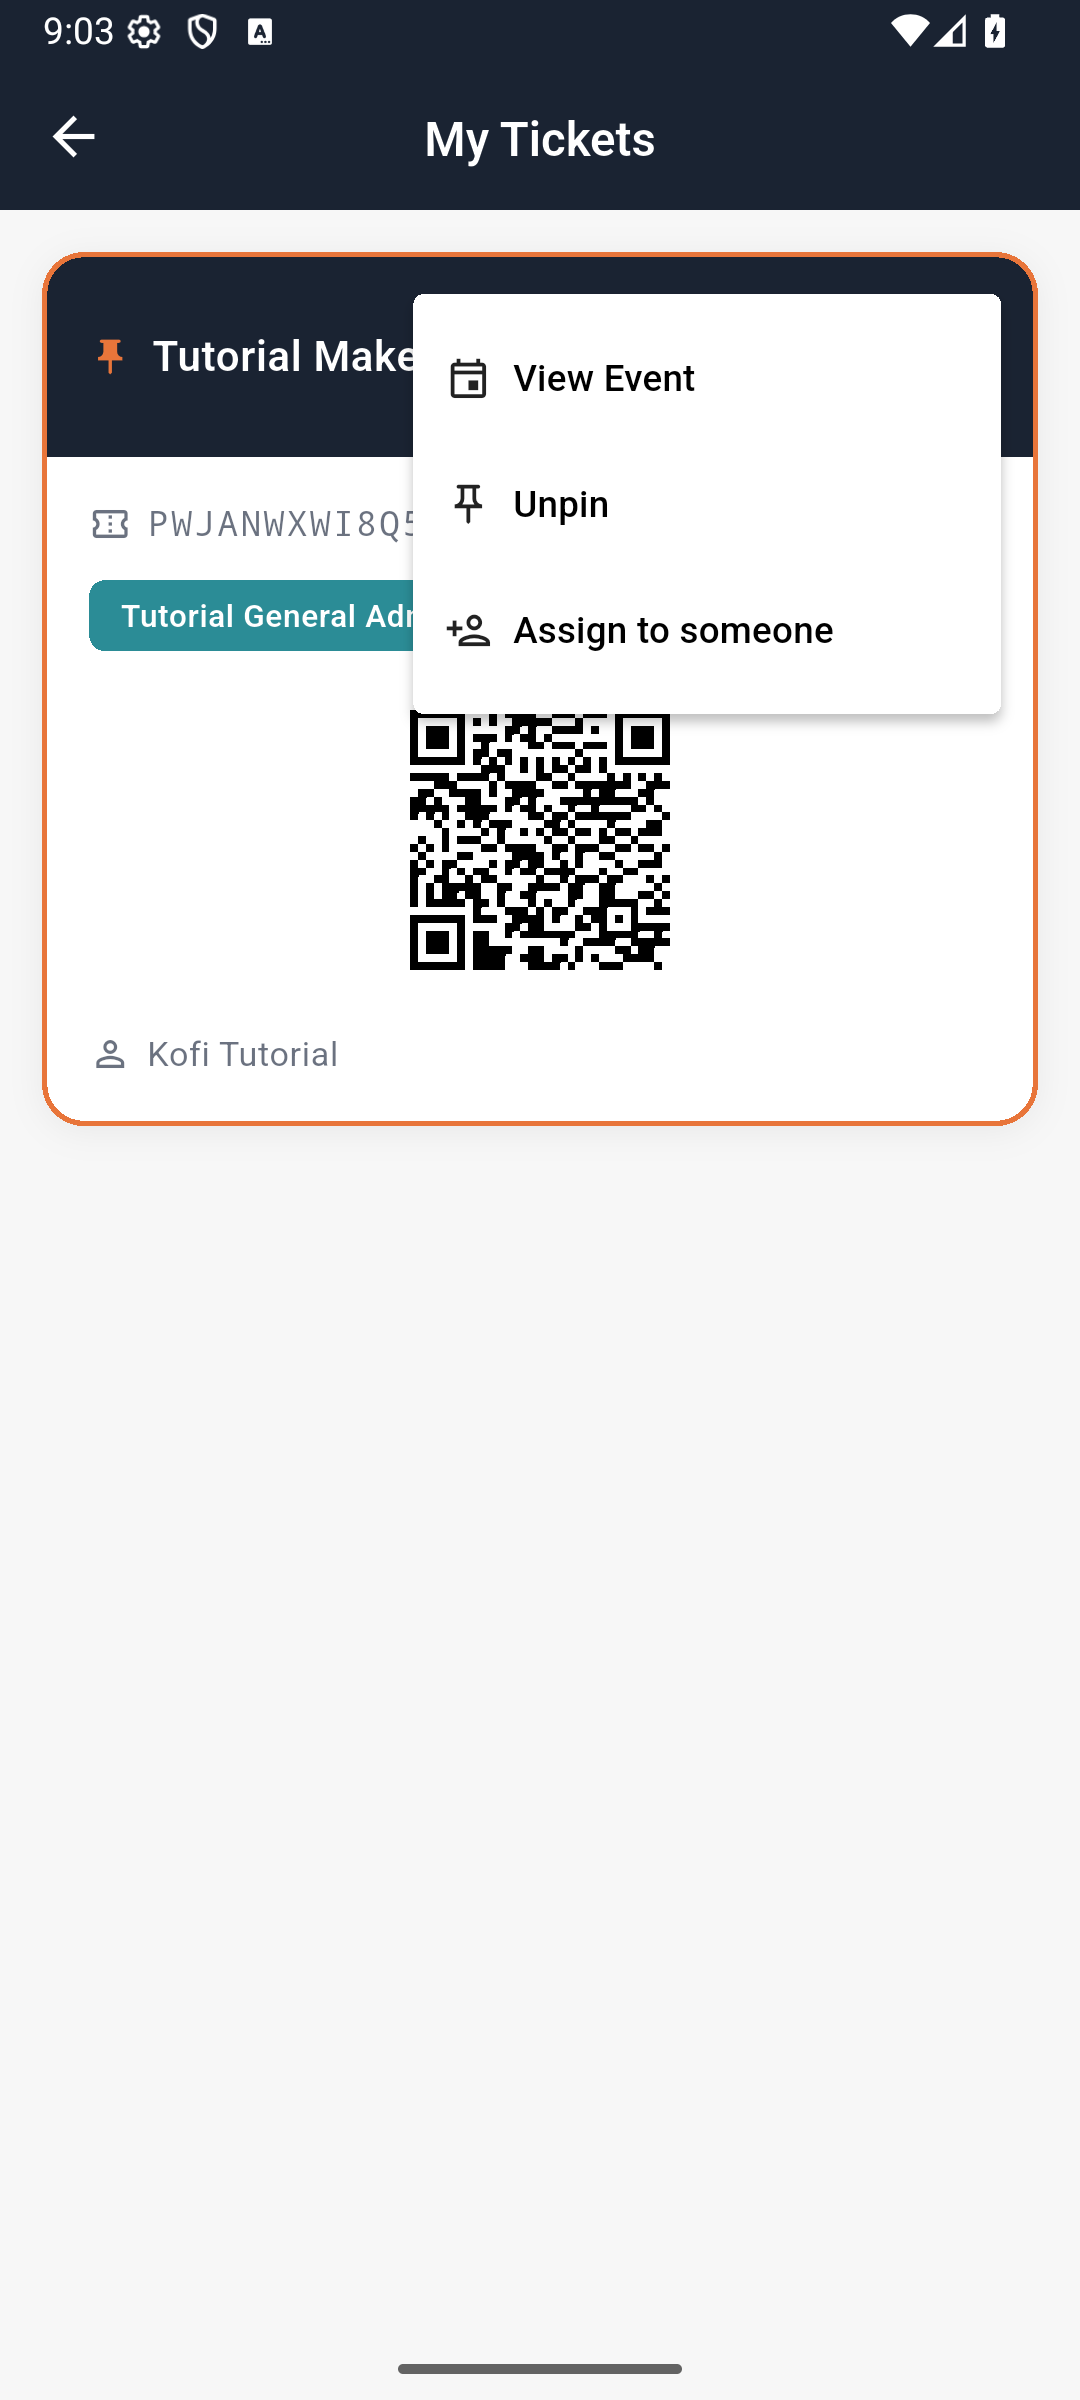
These two captures use Kofi’s existing conference ticket while we practice the second attendee’s side. The controls are the same on Lina’s ticket.
Try it: close the app, reopen your event and point to the holder name, ticket type and status without starting another registration. The illustrated ticket card does not display the holder email; check that email on Booking Confirmed during Part 2, step 4.
Check yourself: is pinning a ticket a reservation for a session? No. It is a local convenience for finding the ticket.
Part 3 — Read the programme and use the right QR
1. Use Schedule from event Home
On Home, tap Schedule. The calendar opens on the first session’s day when sessions are available. Select Saturday, November 14, 2026 for the example. The joinery talk appears at 11:00–12:00, with Main hall stage beneath it.
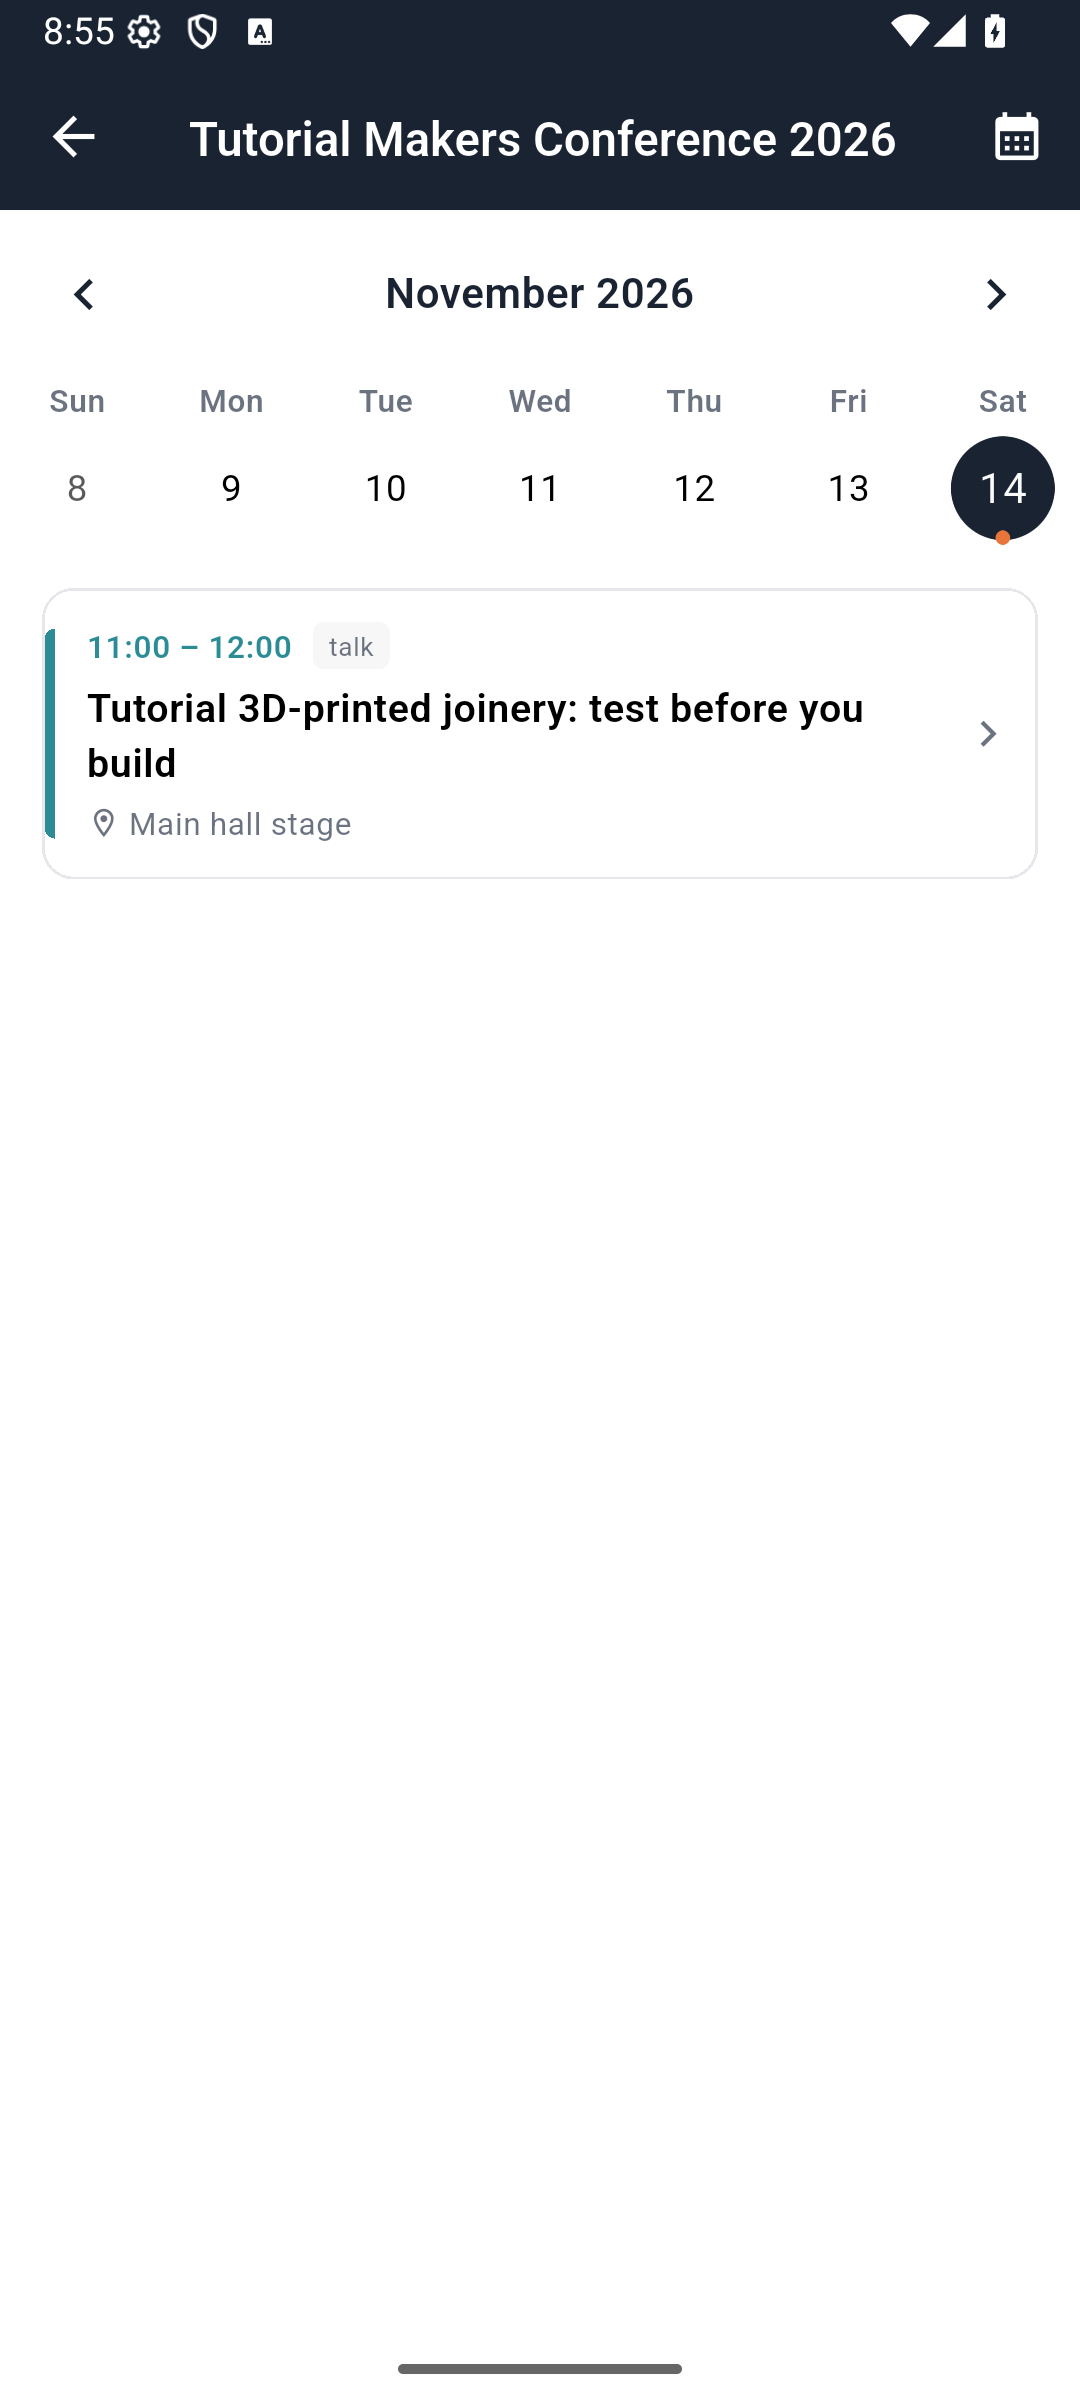
Tap the talk to read its description and room. The session detail in this build displays full date-time strings in its time row; use the event date and timezone when planning your day.
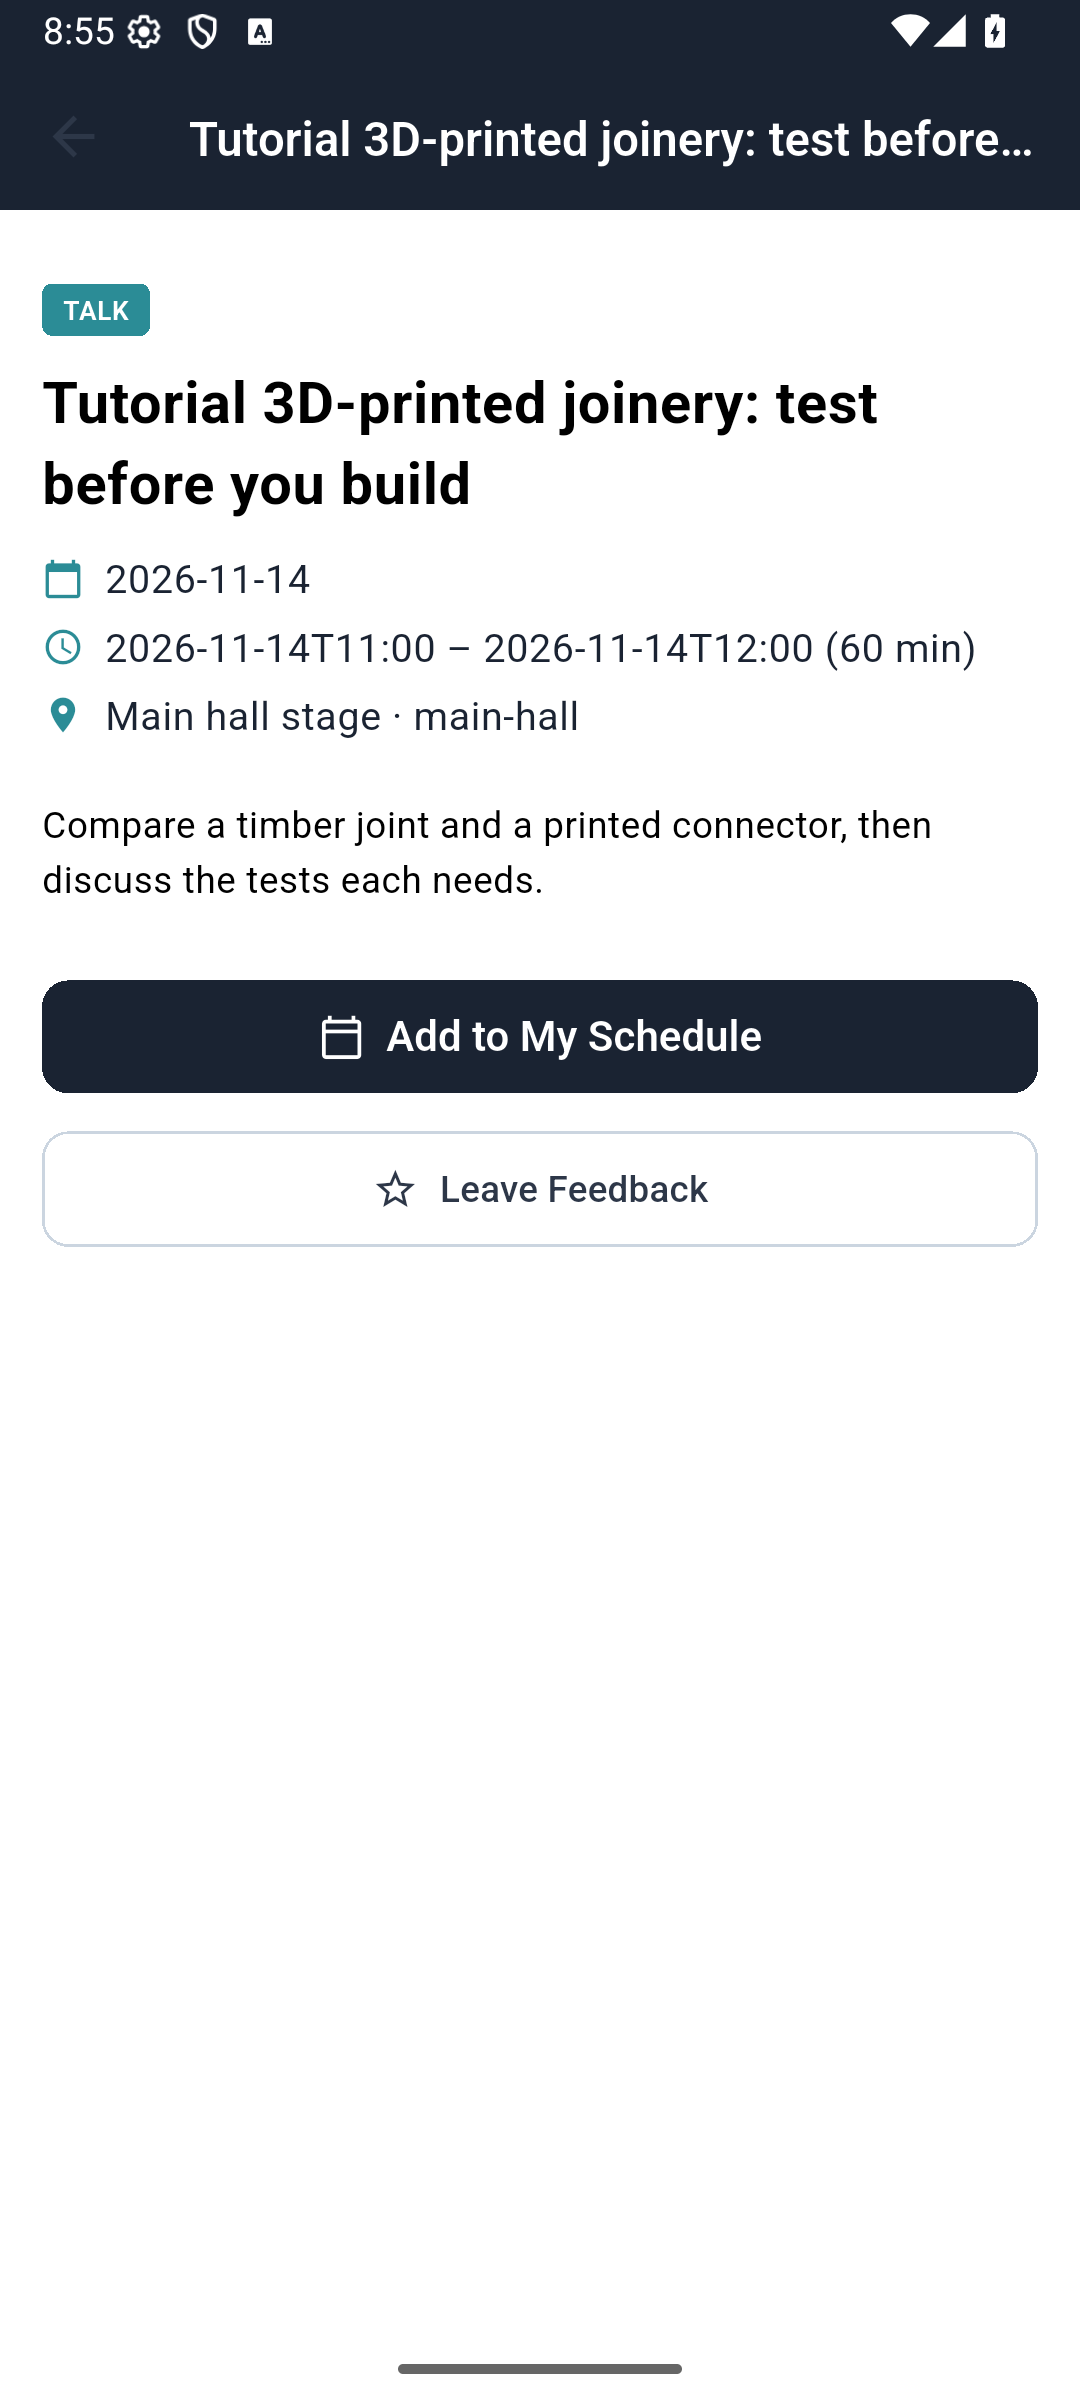
To keep this talk in your personal list:
- Select Add to My Schedule on the session detail. The corrected app saves a bookmark under your attendee identity; the button changes to Remove from My Schedule after the API confirms it.
- Leave the session and reopen it. Remove from My Schedule confirms the saved state survived navigation. If the app shows Retry schedule, retry the read before assuming the session is unsaved.
- Return to event Home, open the upper-left menu, and choose Bookmarks. The screen is headed Saved. Select Session to show saved programme entries; this example includes the talk title, day, start time and room.
- To remove it, use the entry’s trash icon or return to the session and choose Remove from My Schedule. Saving is personal organization, not a seat reservation, ticket purchase or admission.
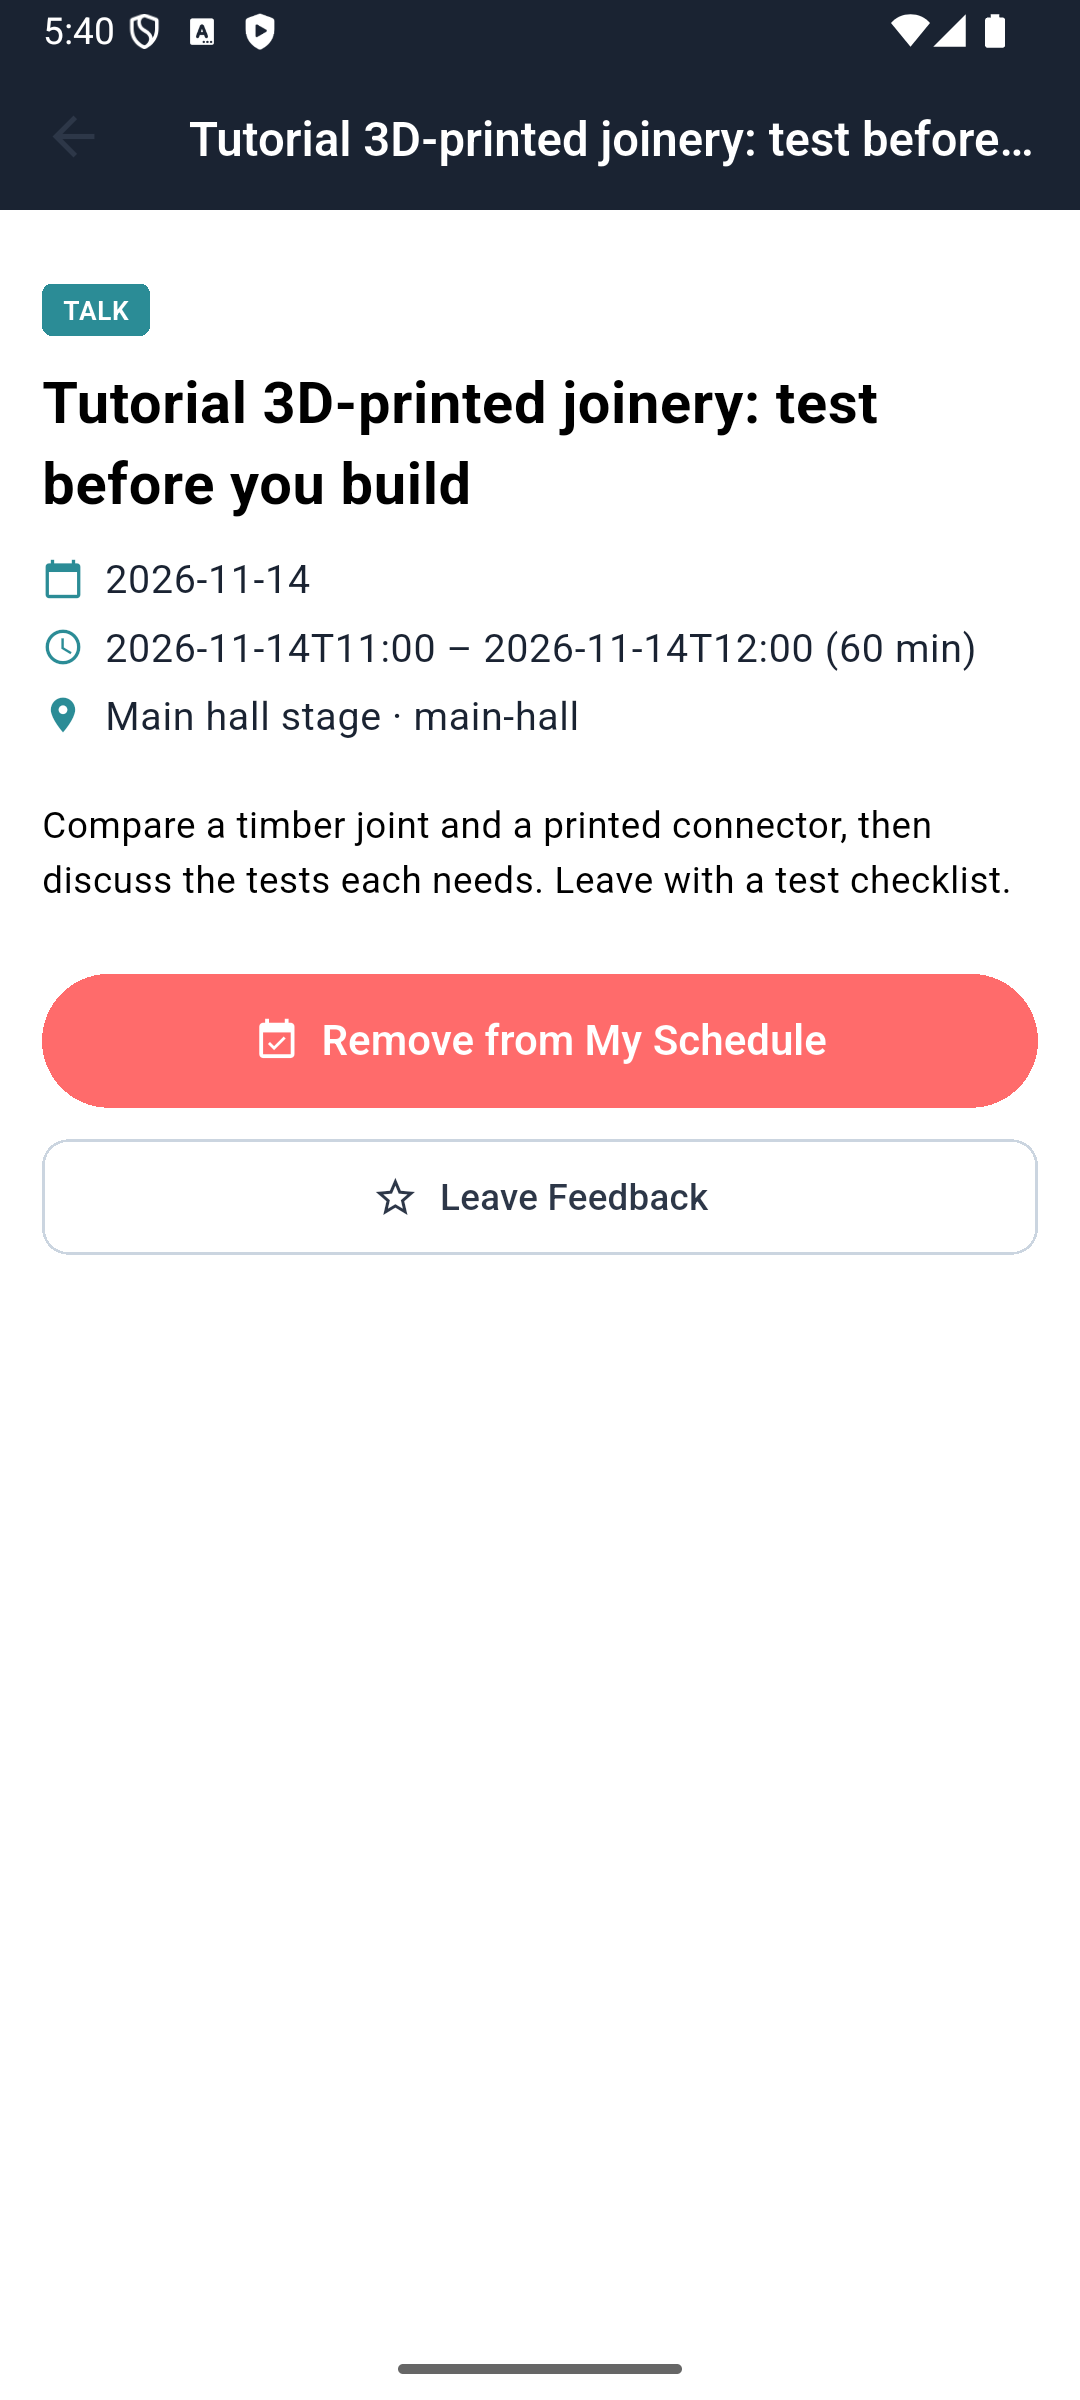
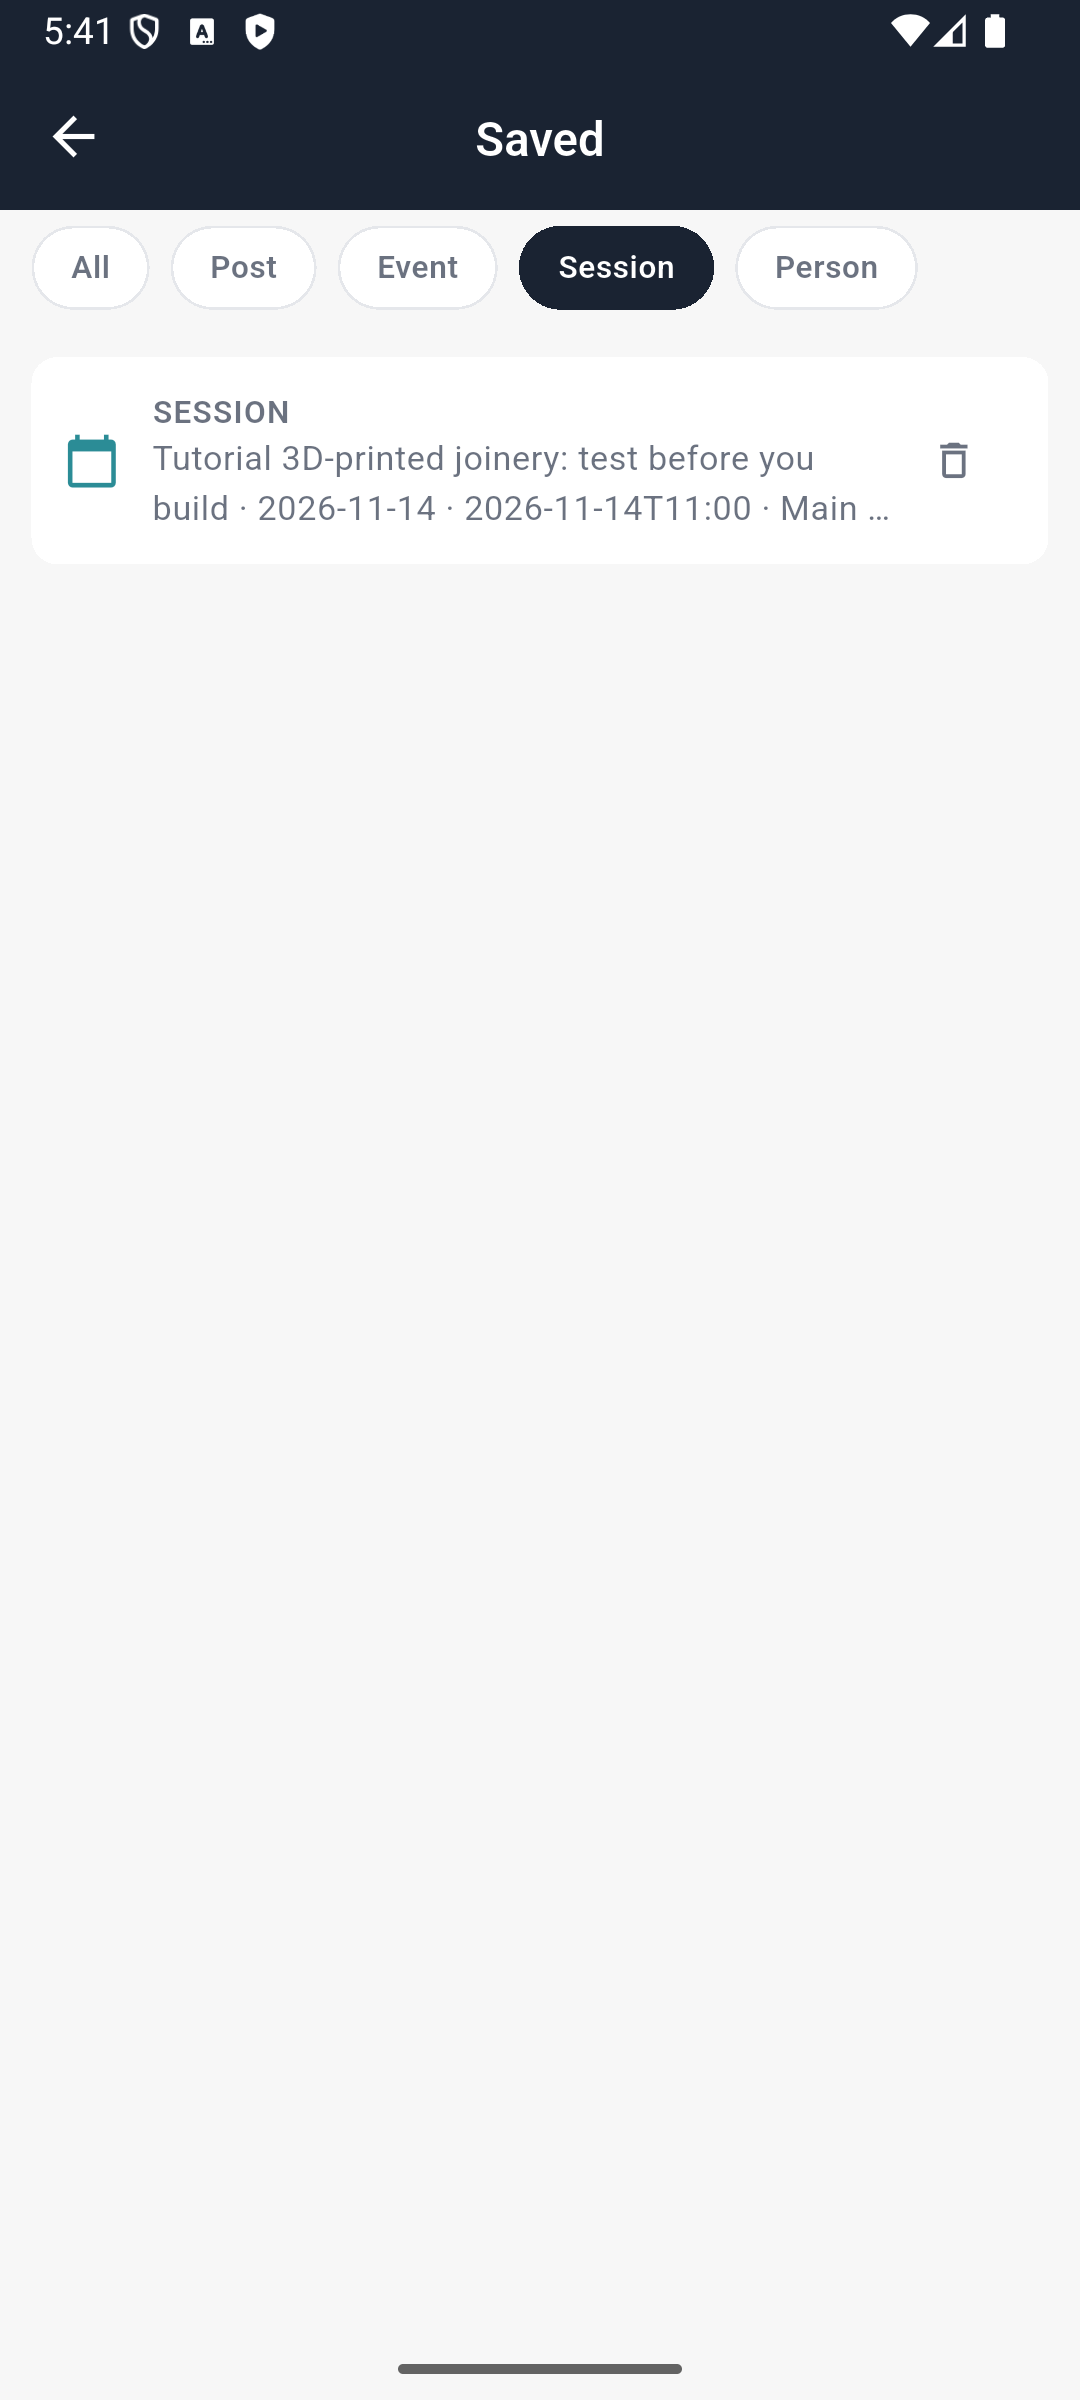
The 24 September local Android review verified saving, reopening and the saved-list entry with the fresh practice partner account. Earlier builds displayed the button without implementing its action; use your organizer’s updated build if tapping it does nothing.
2. Present the admission ticket to staff
Return to Home → My ticket. This is the code associated with your admission. Staff use Appmint Mobile, select the correct Check In mode and zone, and process your ticket.
For this rehearsal, staff used Manual Lookup with Lina’s holder email. That is a useful fallback when a camera cannot read a screen. It still checks the saved ticket and creates a server-side admission result.
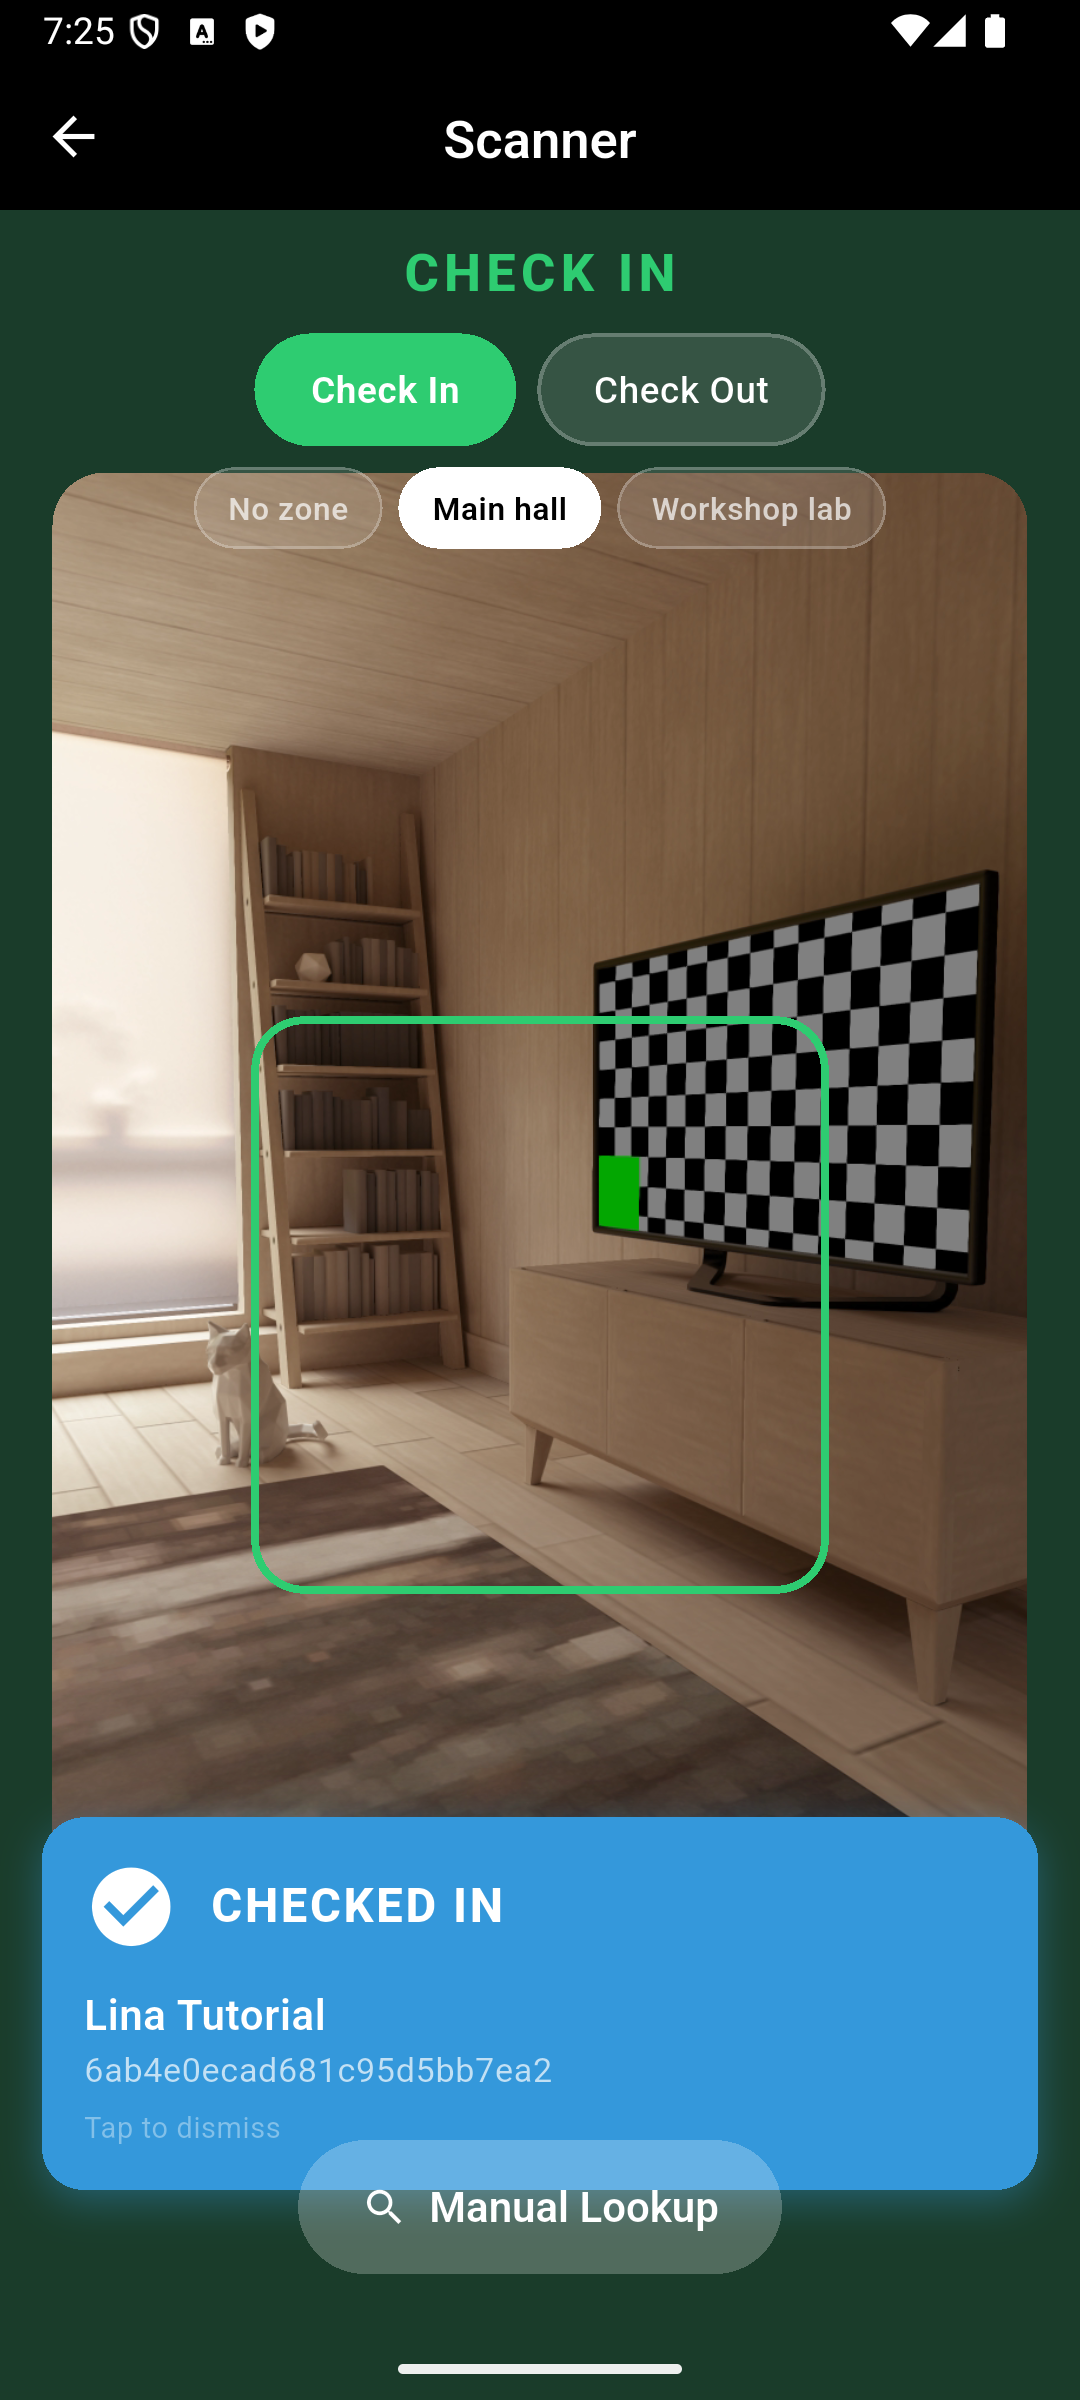
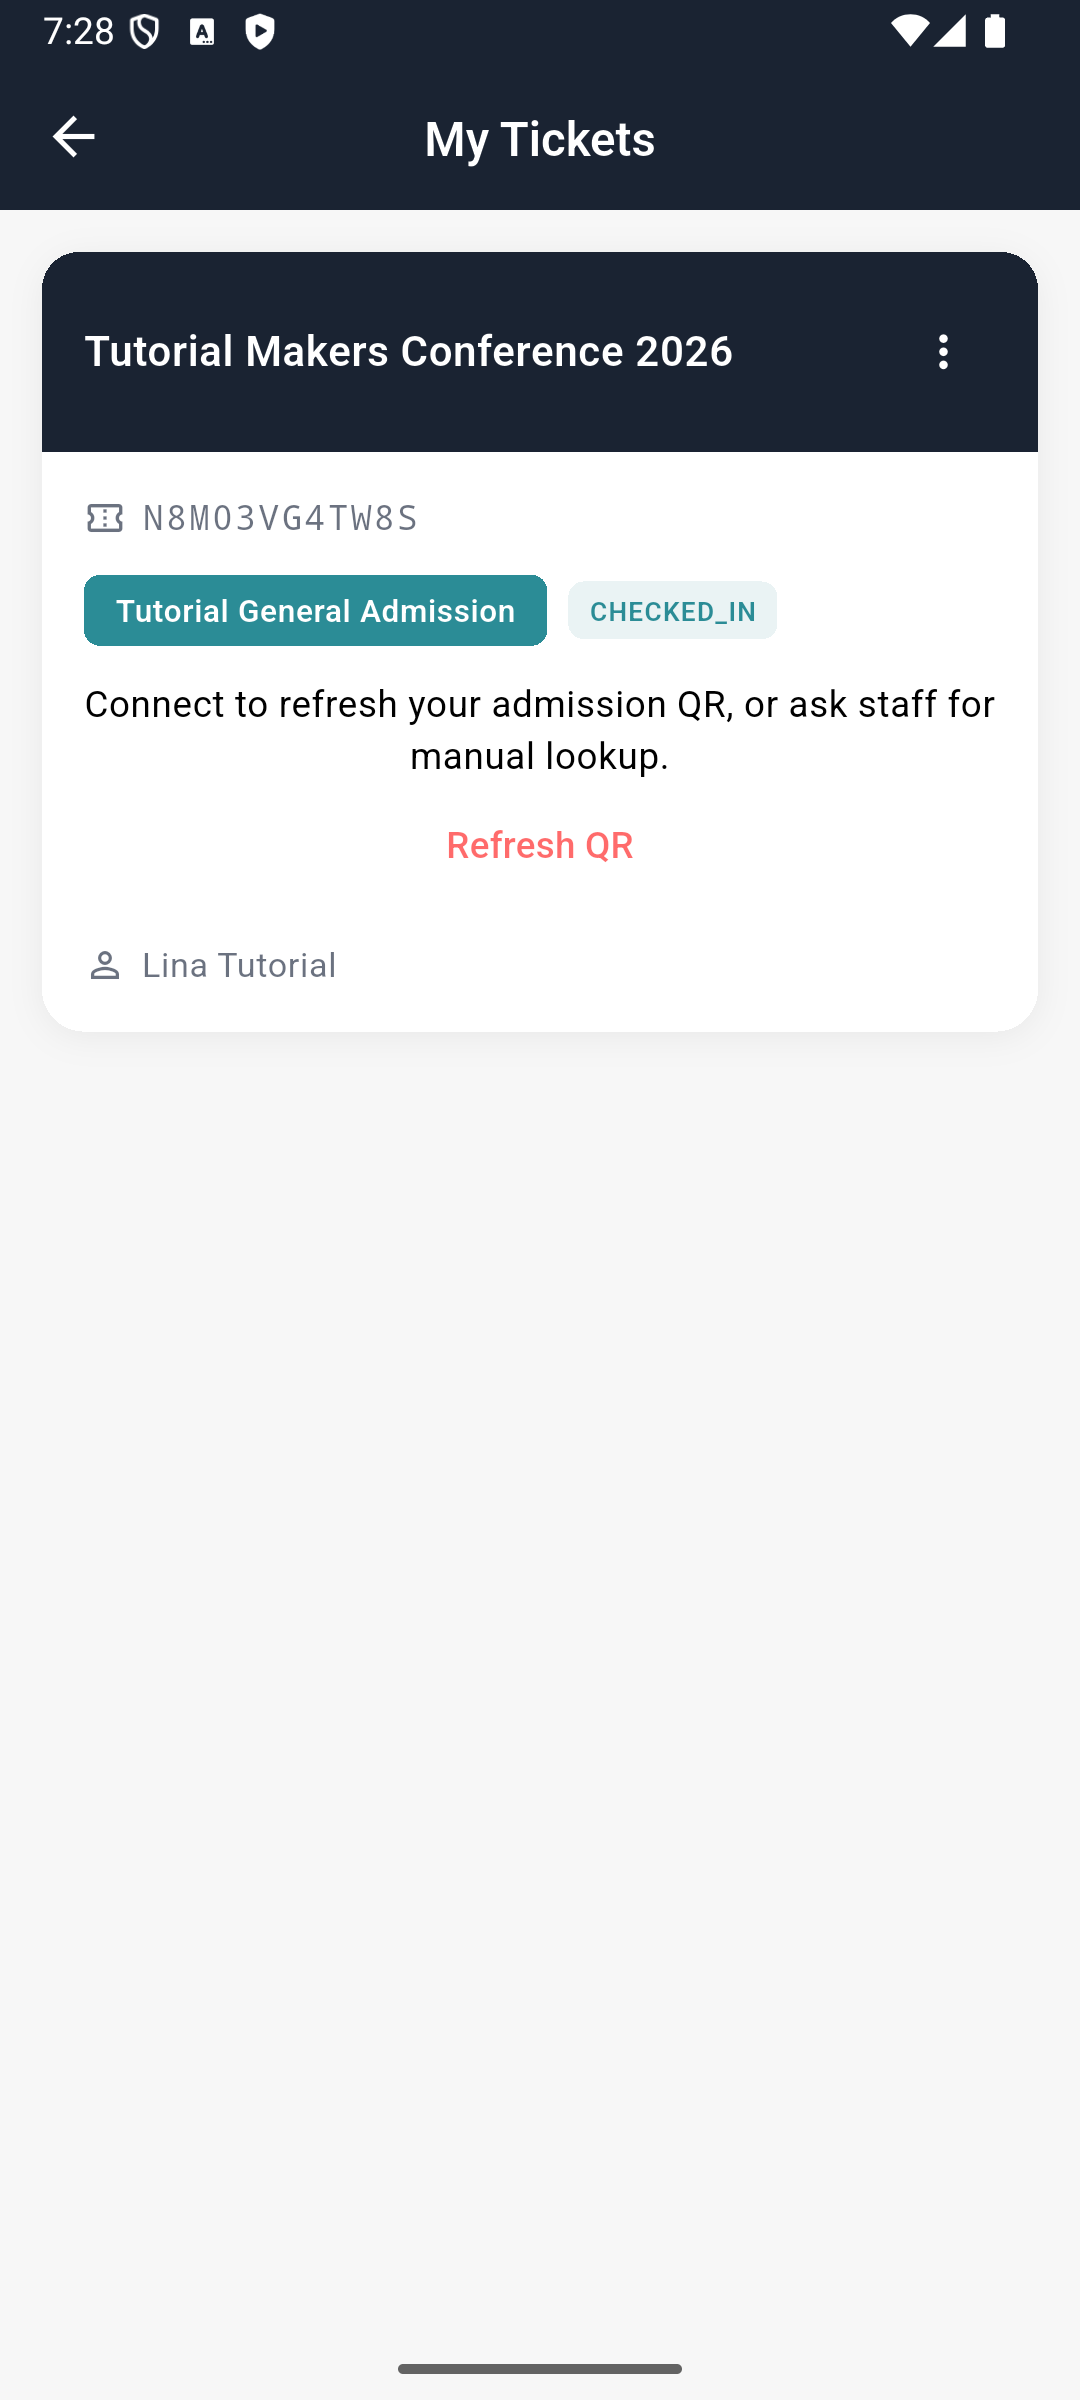
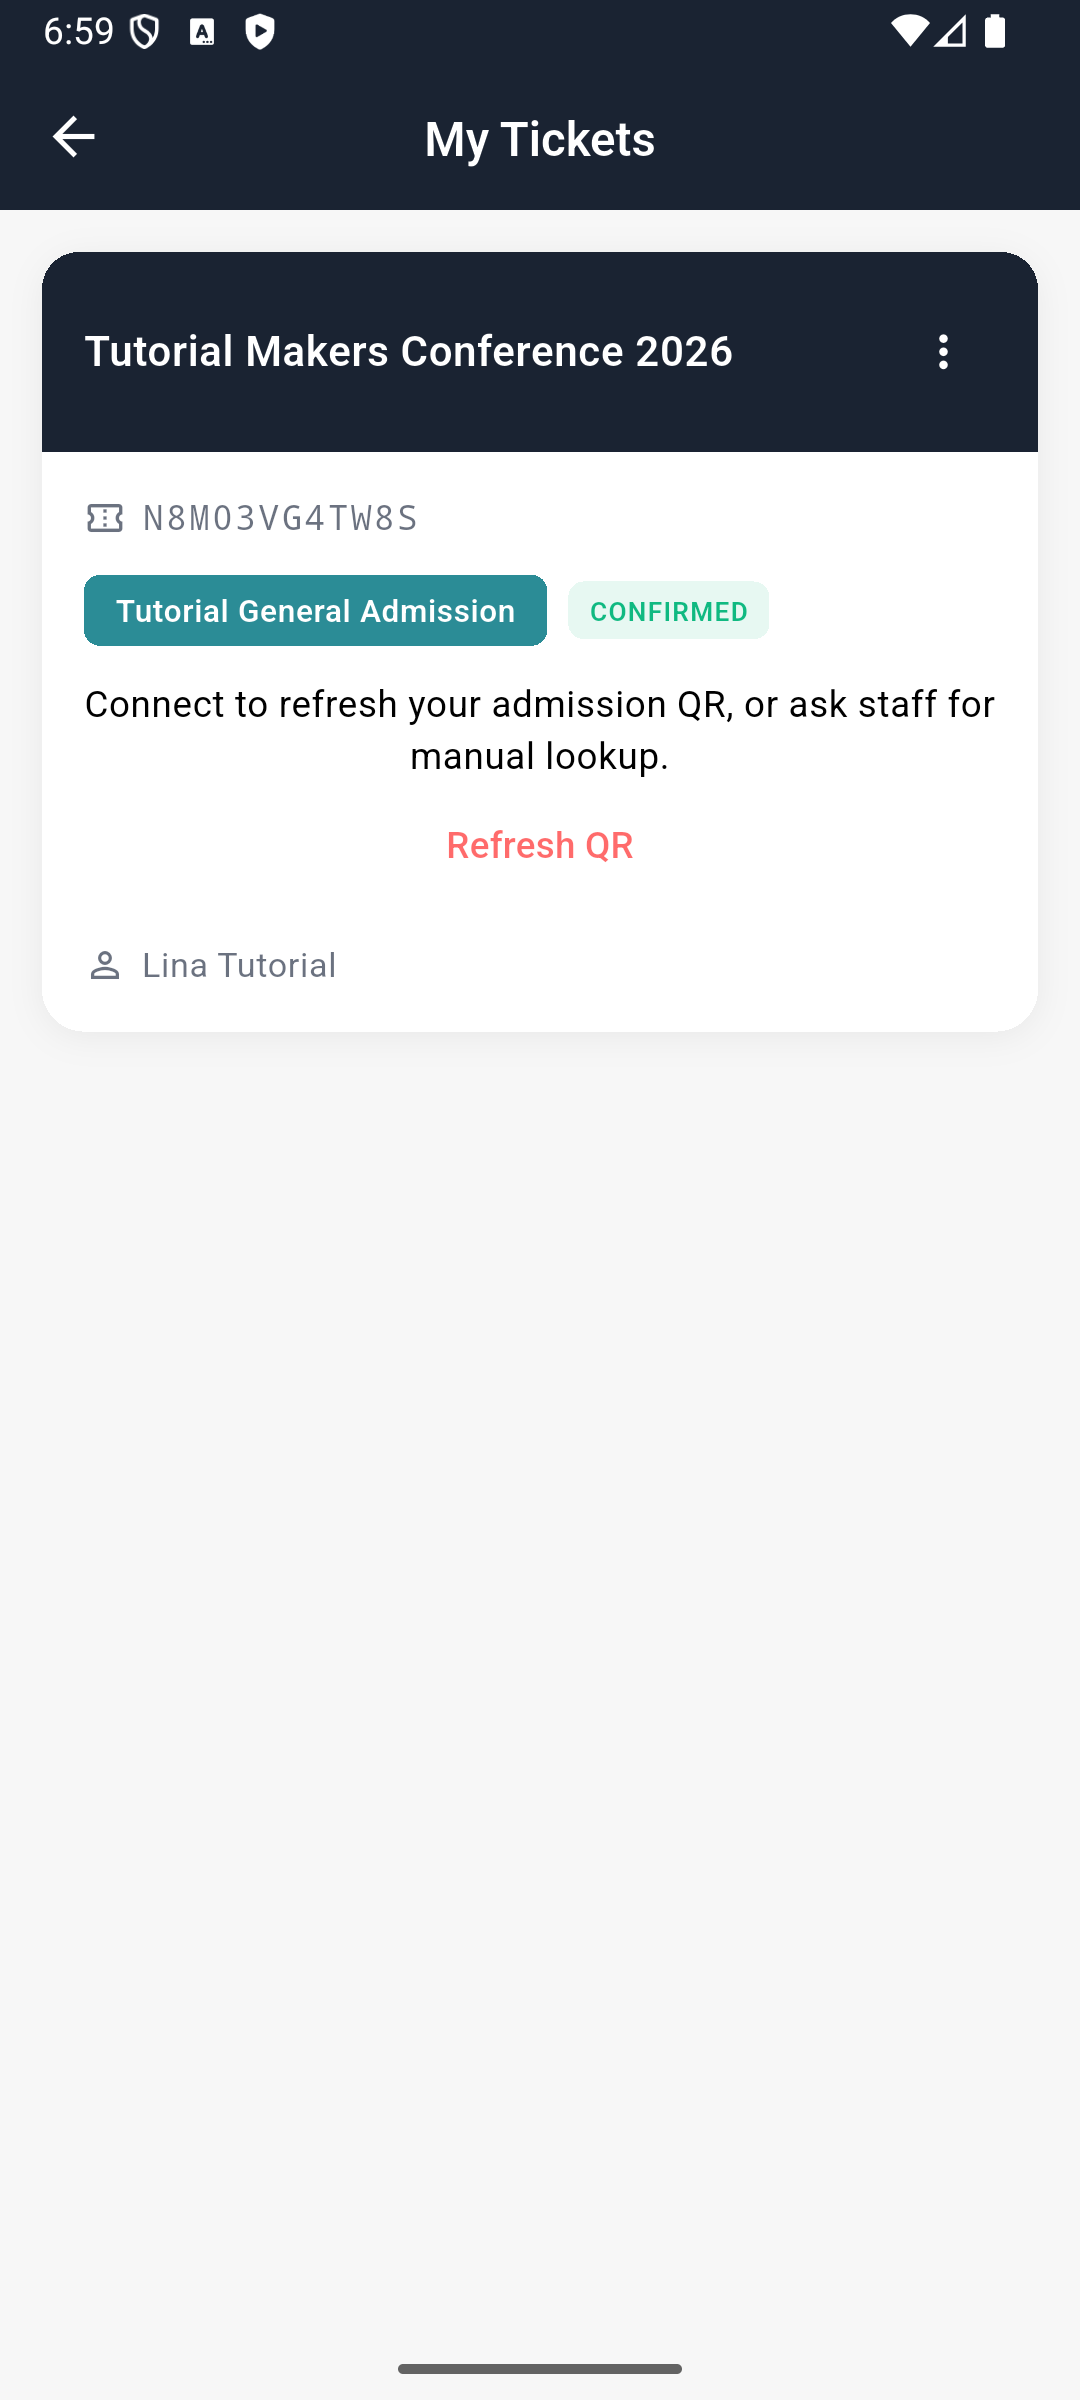
After staff admission, reopen the ticket in EventOxygen. Lina’s card changed from CONFIRMED to CHECKED IN, and the saved ticket contained an entry movement in main-hall.
General Admission does not include the workshop lab. A zone refusal is an access decision; it does not necessarily mean the account or phone is broken. Staff can check the ticket type and direct you to registration if you need different access.
Present the live ticket, not an old screenshot. The corrected app fetches a fresh admission QR and renews it while the ticket remains open. Codes have a short validity window. If the connection fails, the code disappears and Refresh QR appears. Reconnect and tap it, or ask staff for holder-email lookup. A profile QR is still not an admission ticket. Physical camera decoding has not been tested in this emulator rehearsal.
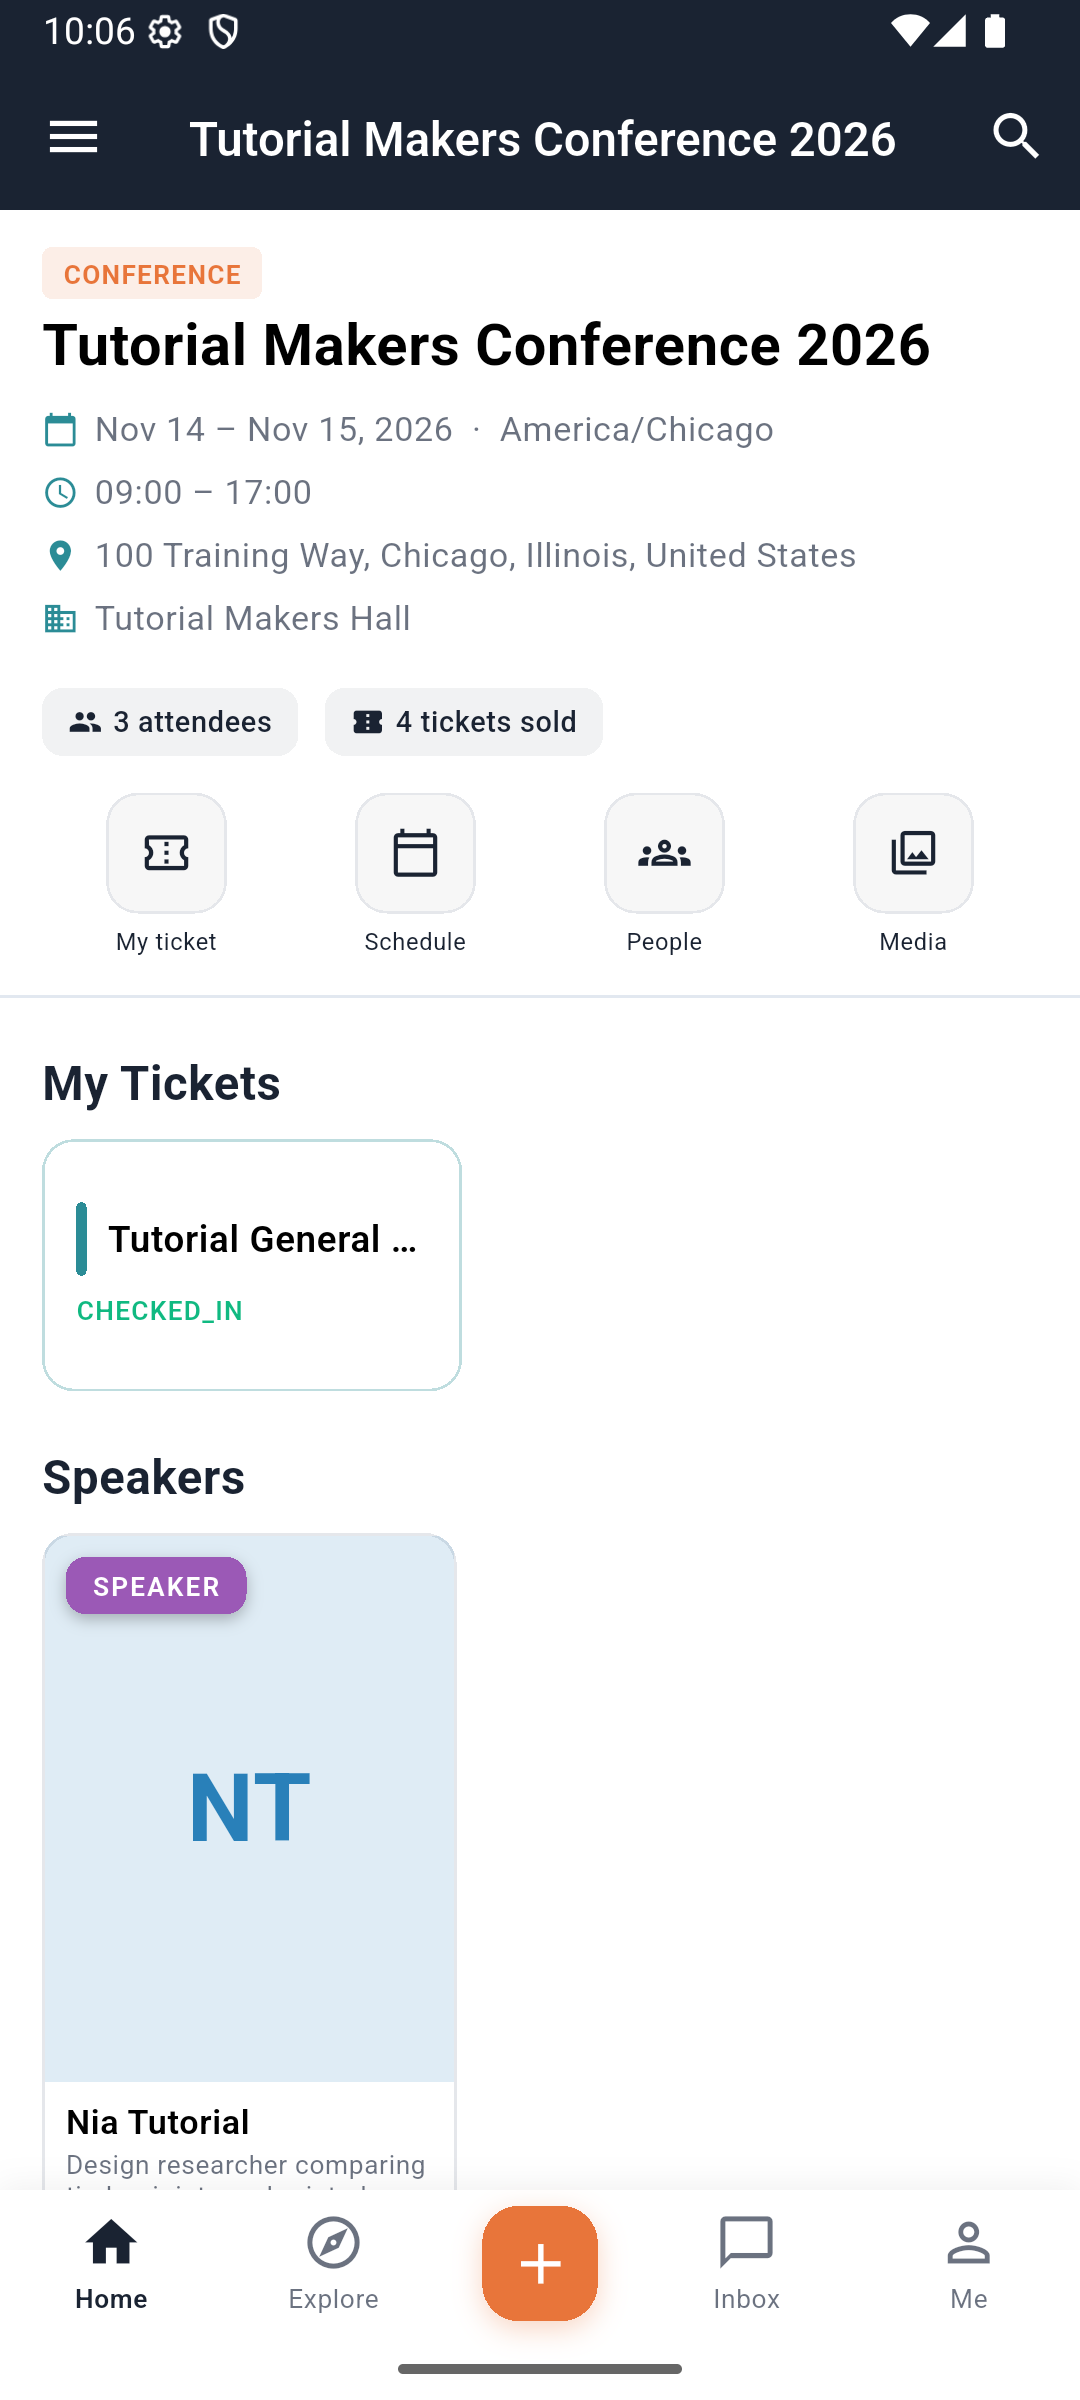
After staff confirm admission, open Home → My ticket to fetch the latest ticket. Check for CHECKED_IN, then press Android Back to return to event Home. The card under My Tickets should show the same status. This confirms that the attendee app reflects the staff action; it does not submit another check-in.
3. Find your profile QR separately
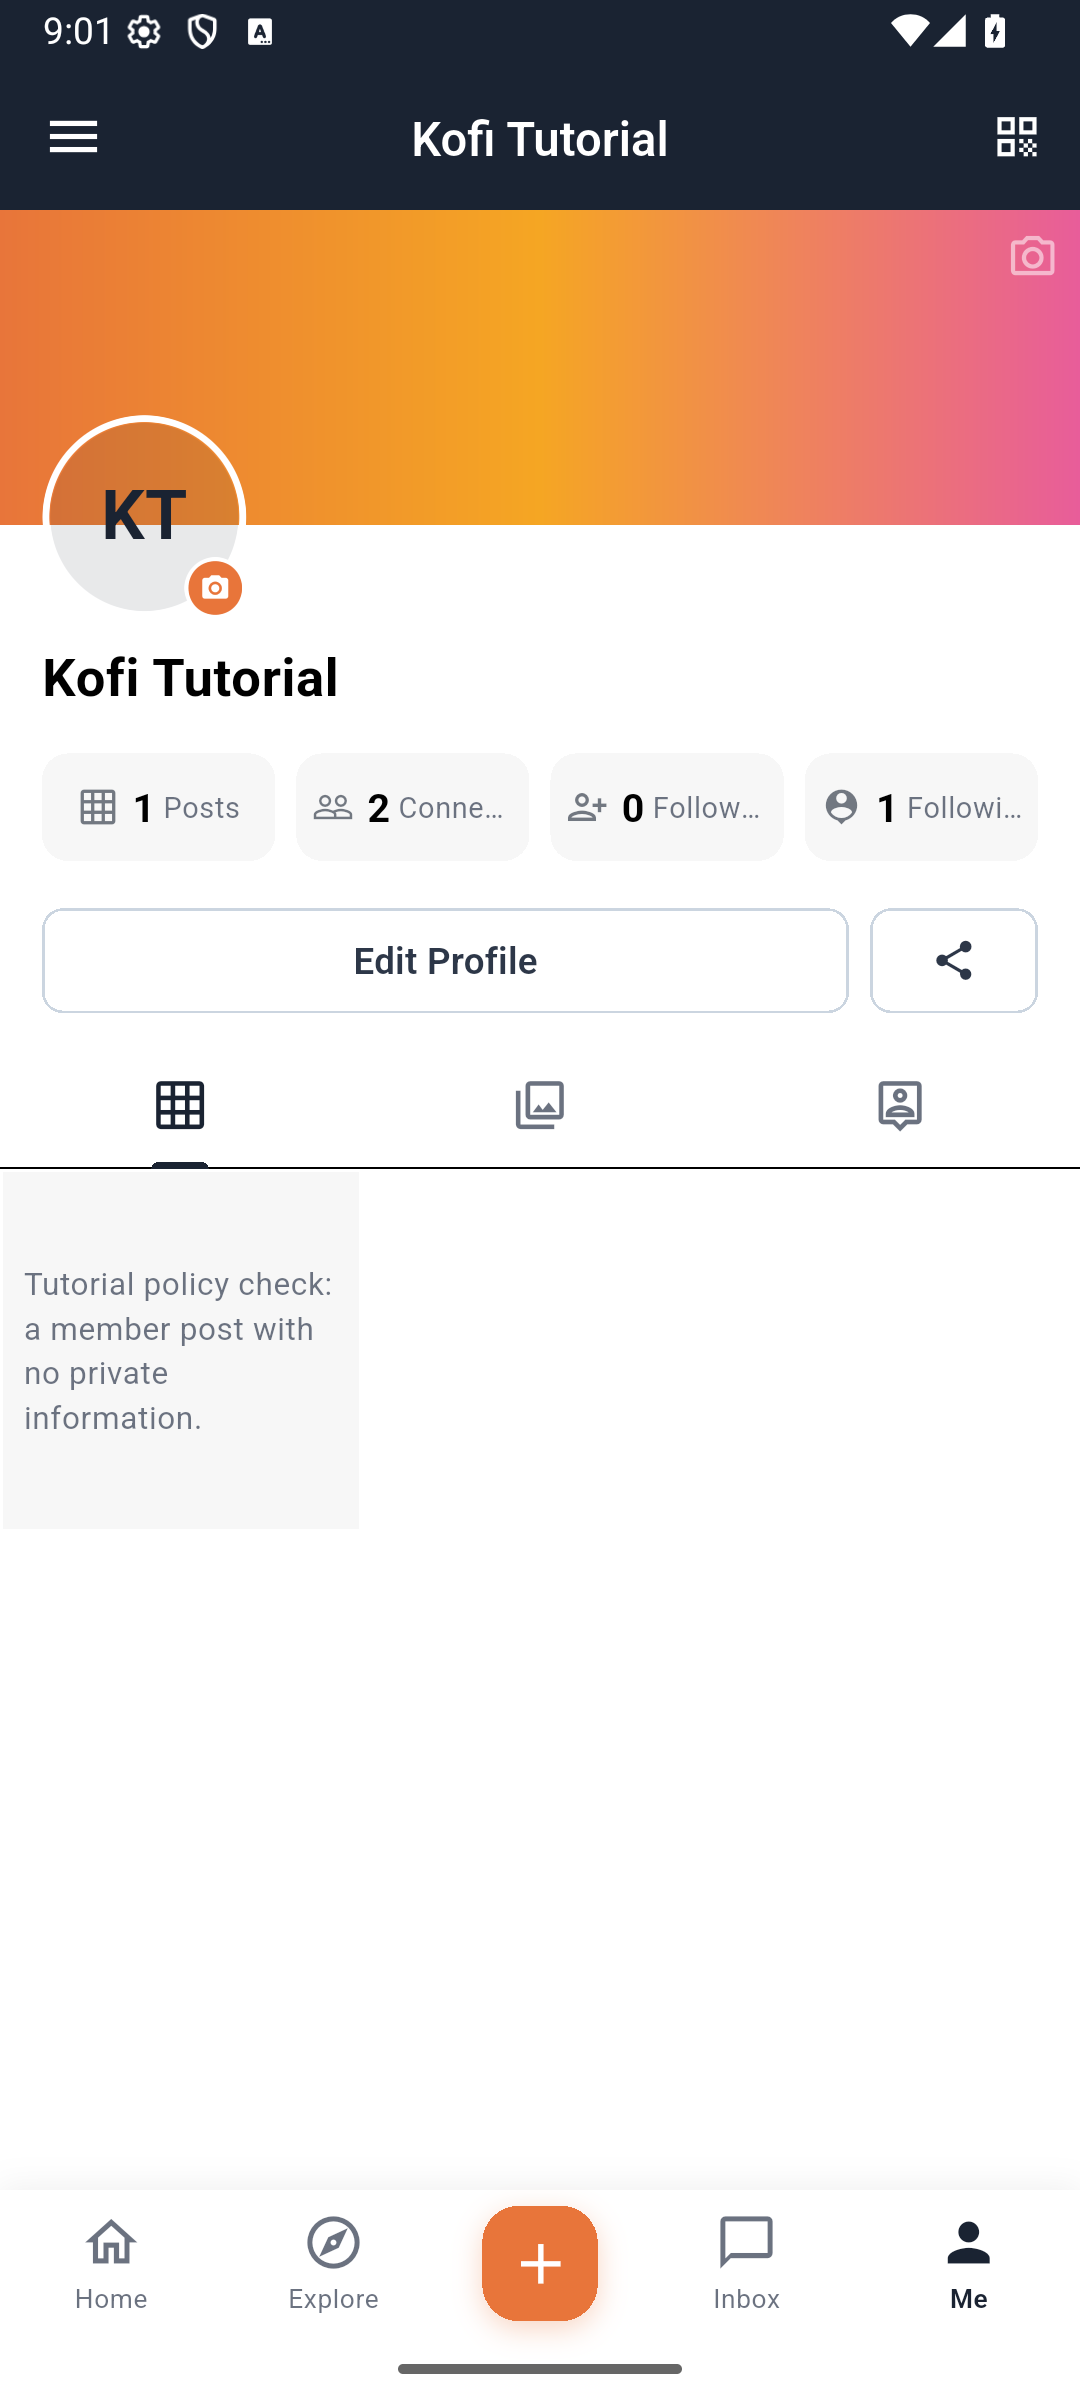
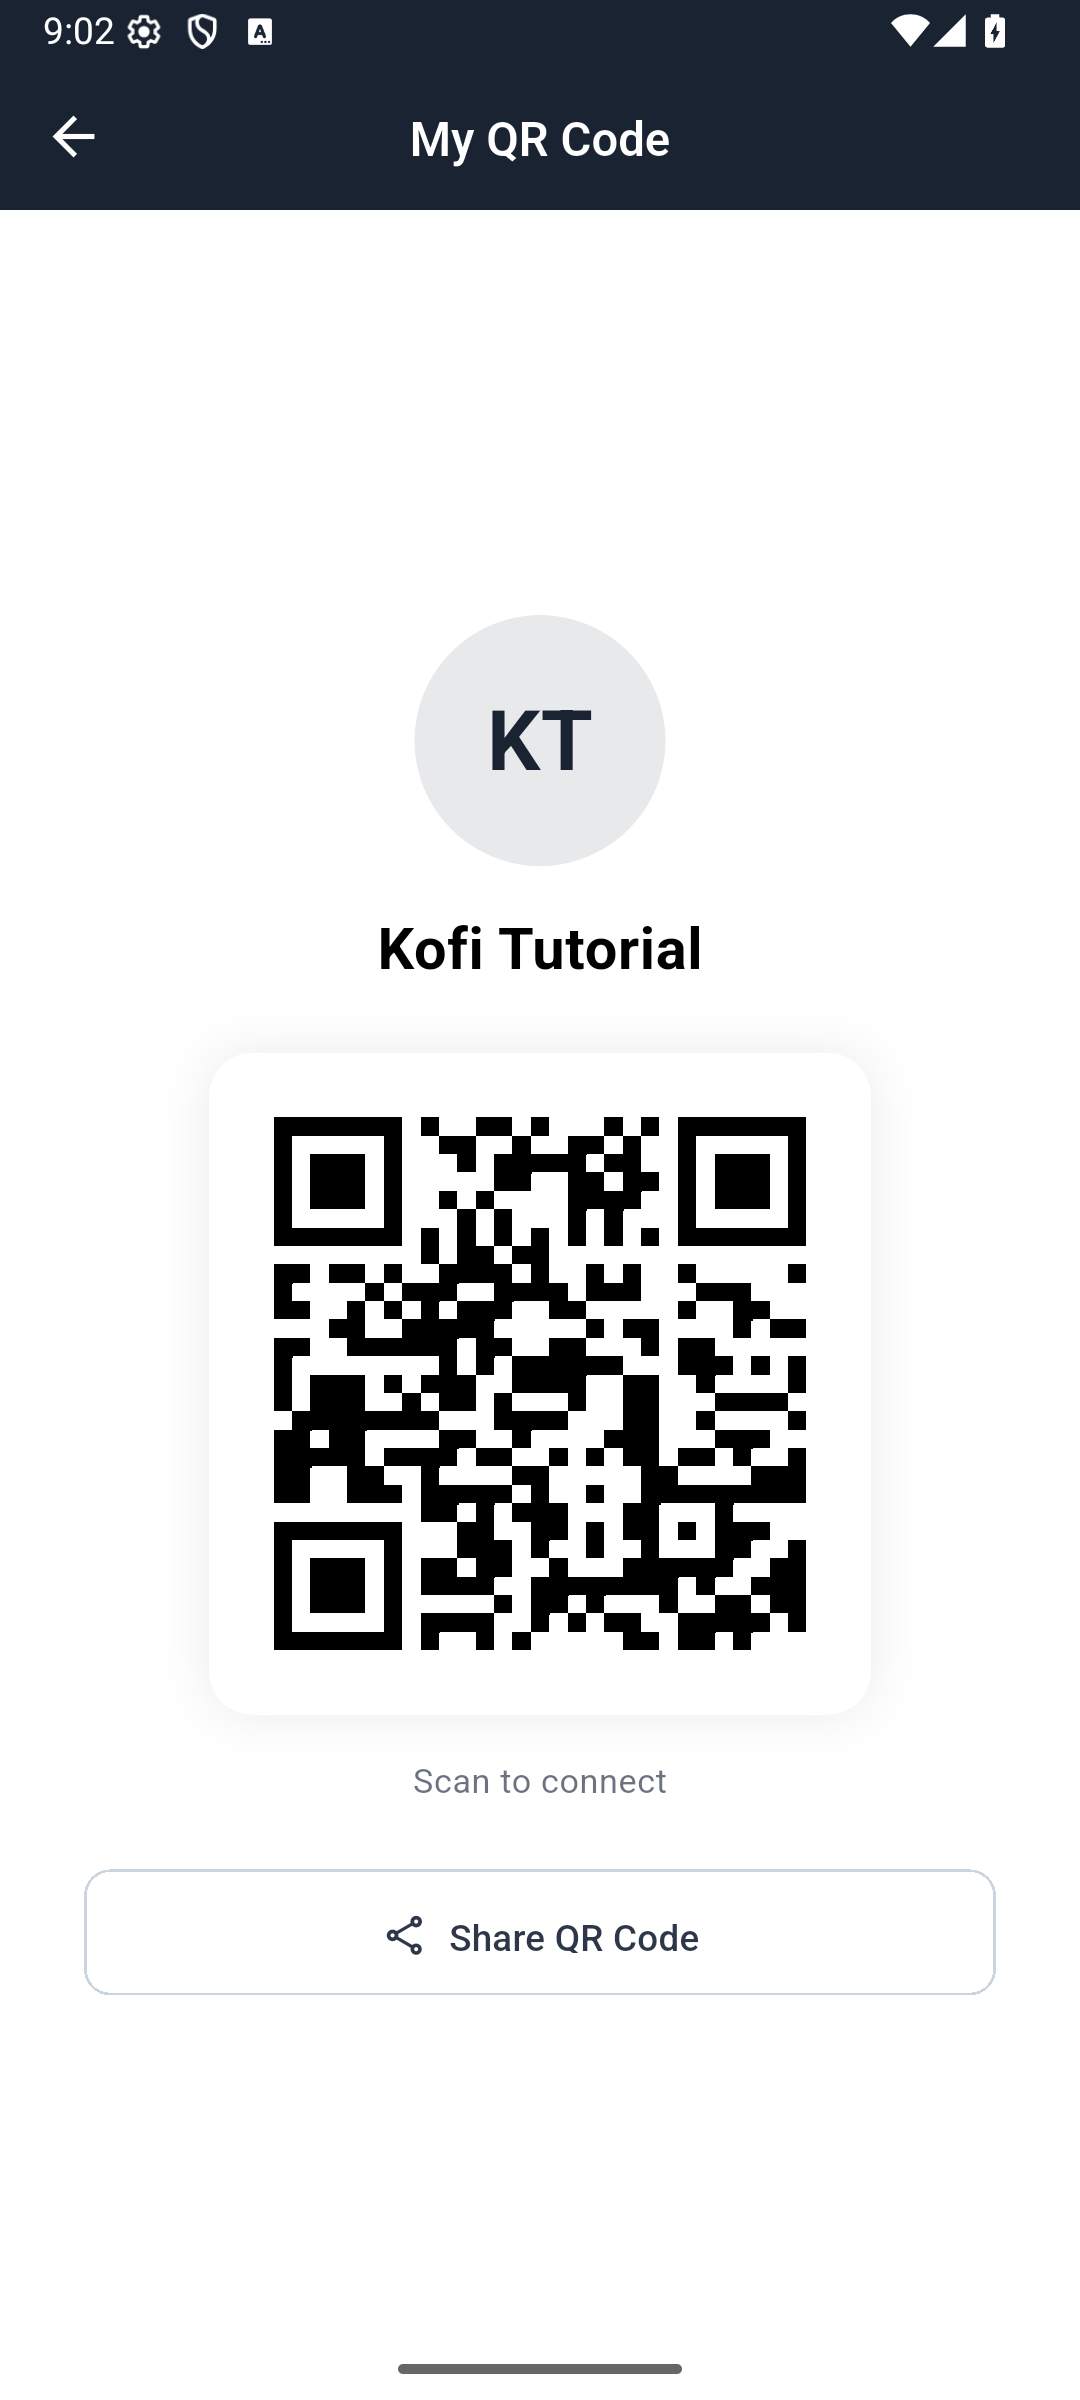
Tap Me, then the QR icon at the top right. This opens My QR Code, with your name and Scan to connect.
| Code | Where you open it | What it represents |
|---|---|---|
| Ticket QR | Home → My ticket | An admission ticket for a particular event. |
| Profile QR | Me → QR icon | Your attendee identity for connecting with people. |
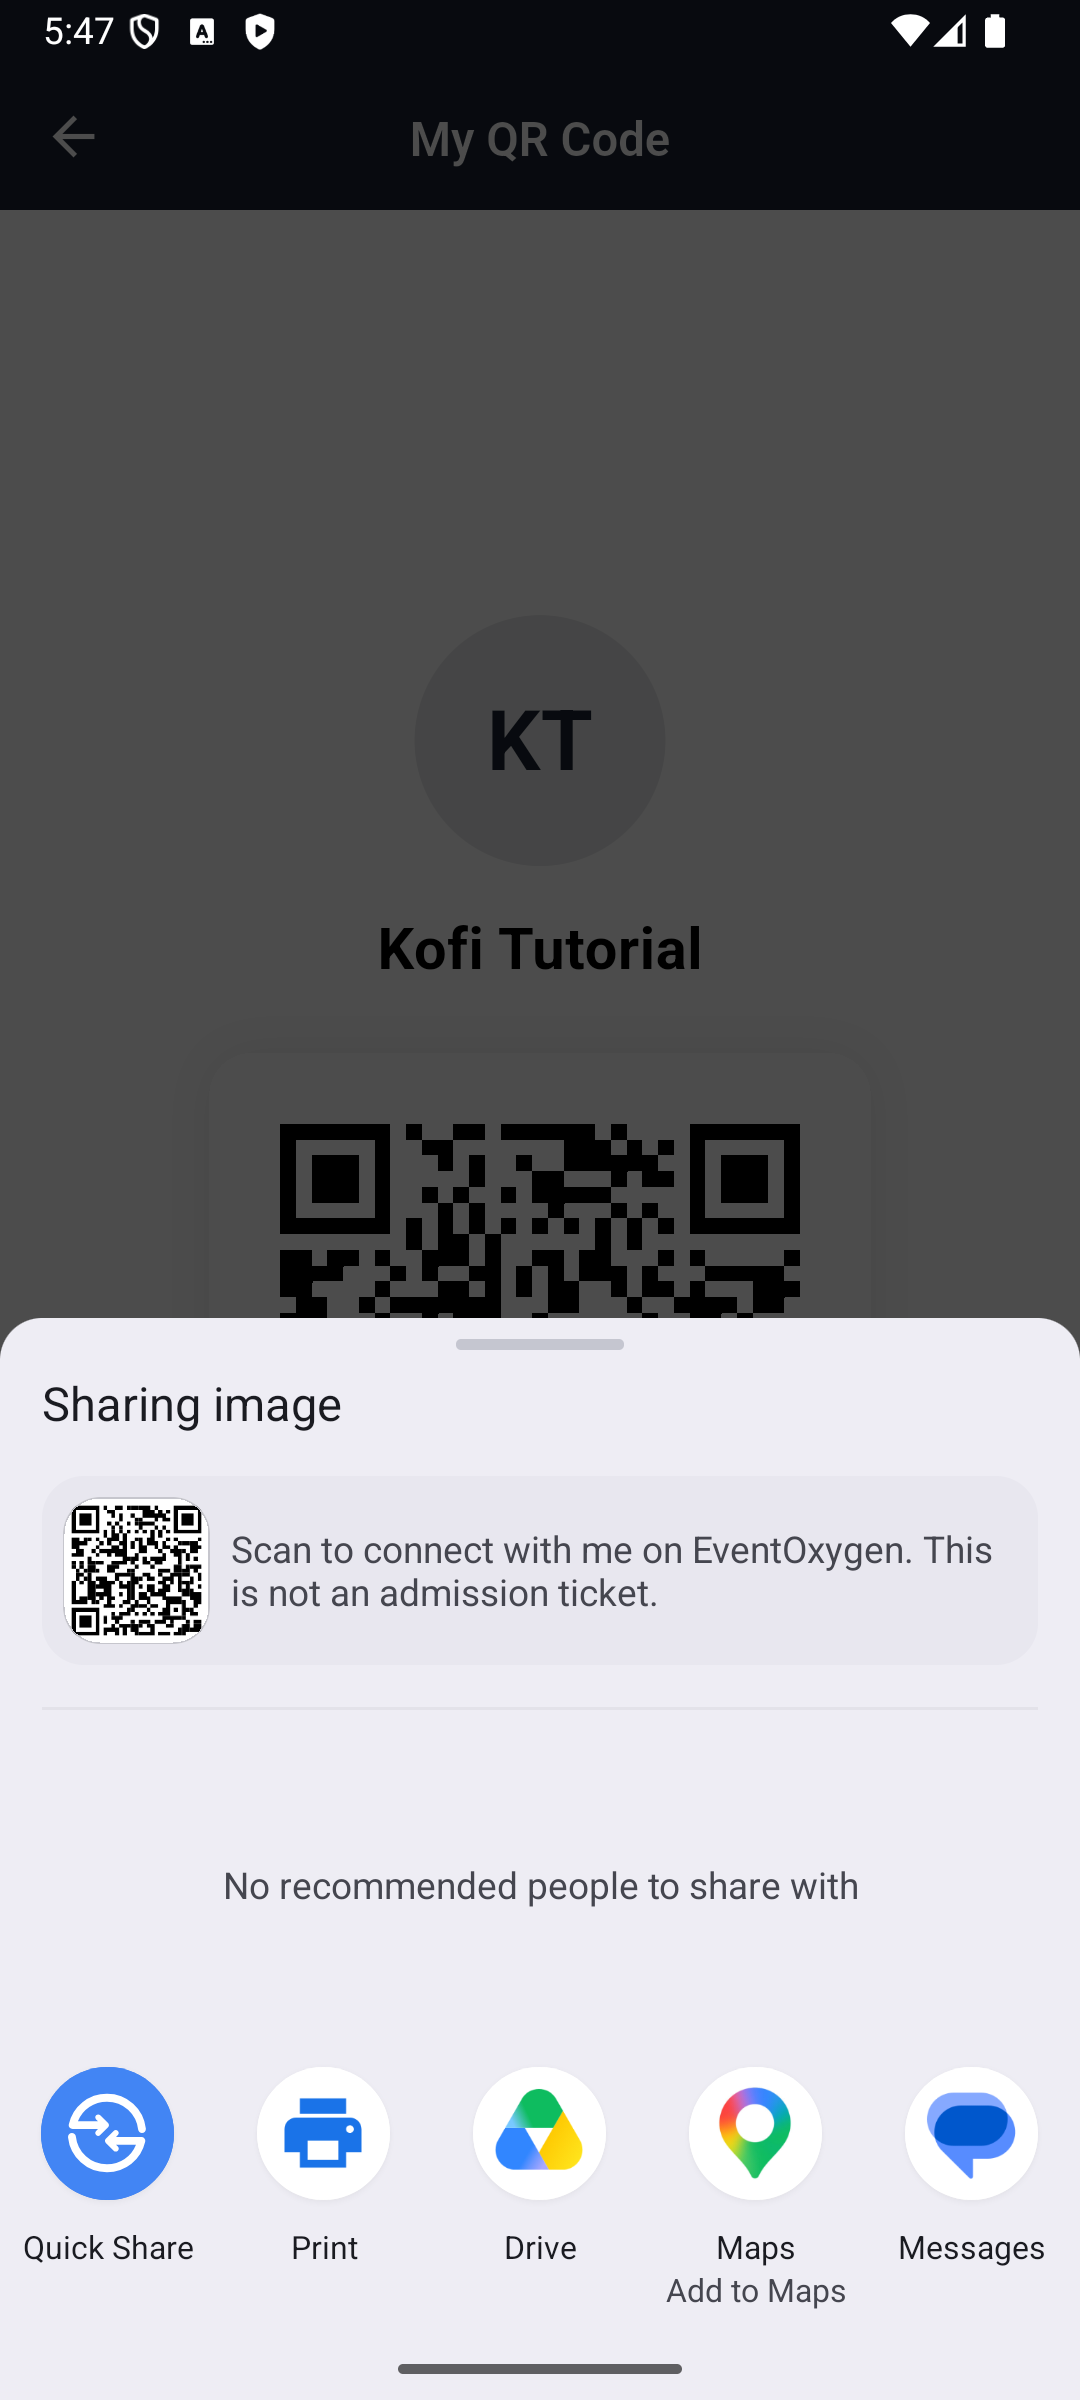
To share this profile code, choose Share QR Code. The corrected Android build generates a PNG and opens the system Sharing image chooser. Select your intended destination yourself, or press Back to cancel. Opening the chooser does not send the image. The 24 September local test verified the image chooser and cancelled without selecting a recipient; delivery through another app was not tested.
Try it: have your practice partner ask for your admission ticket, then your profile. Open the correct screen each time.
Check yourself: does a second admission attempt always fail? No. The organizer’s re-entry rules decide that outcome. The staff rehearsal demonstrates both an accepted repeat and a refusal after re-entry is disabled.
Part 4 — Connect and keep the conversation
1. Find the person in People
From event Home, tap People. Use Search people or the role filters. This directory contains the event’s confirmed participant records. In the example, Nia is a Speaker and Kofi is an Attendee participant.
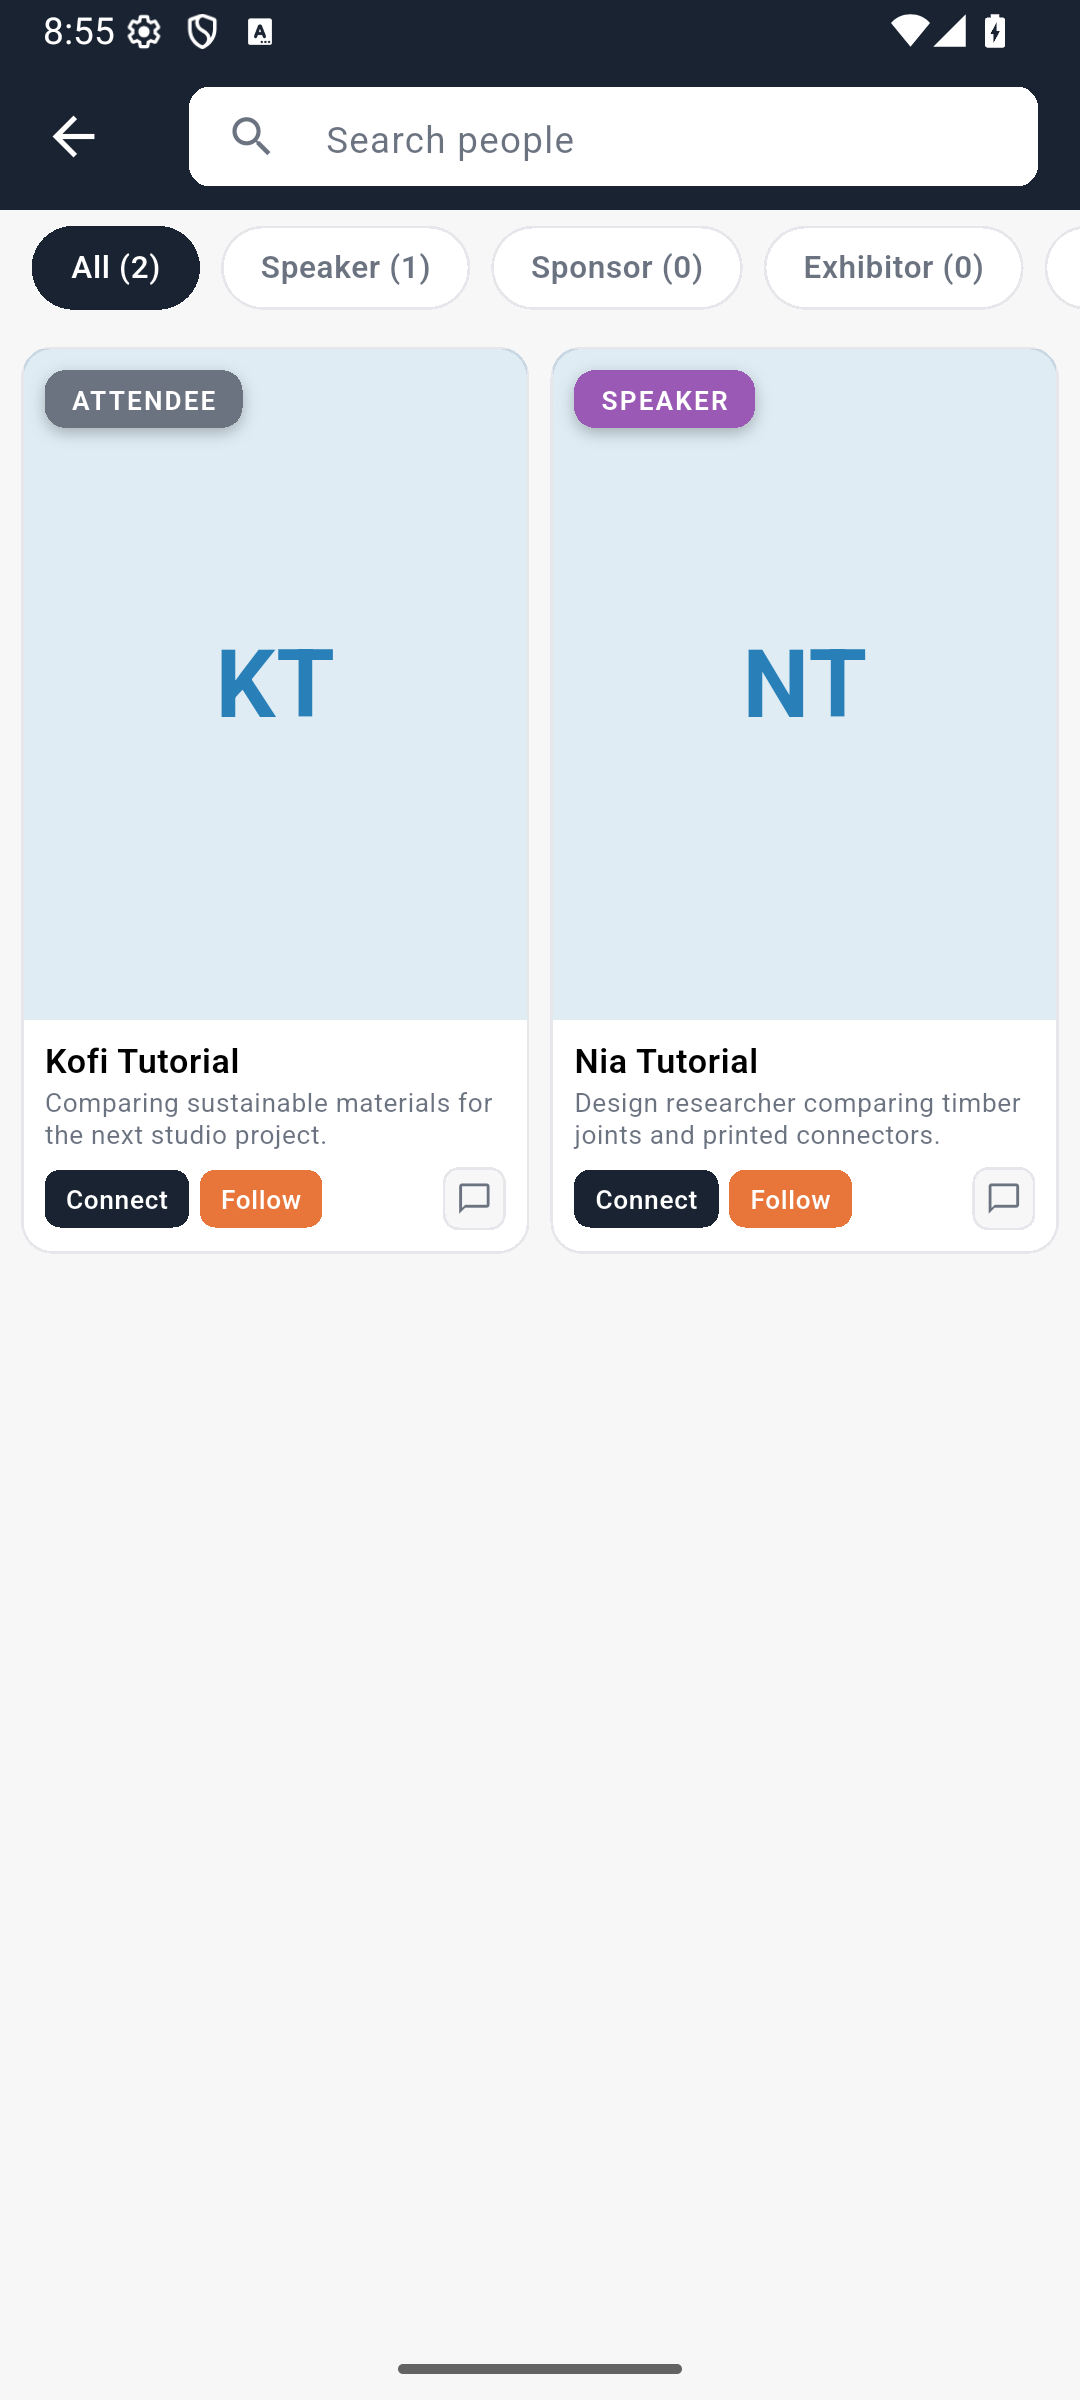
A ticket and a directory listing are separate. Kofi already had a ticket, but the organizer added his confirmed participant record before he appeared here. If you cannot find someone, check with them or the organizer instead of assuming they have not registered.
2. Send a connection request
On Kofi’s card, tap Connect. The card changes to Pending. Open the hamburger menu, then Connections, to see the sent request.
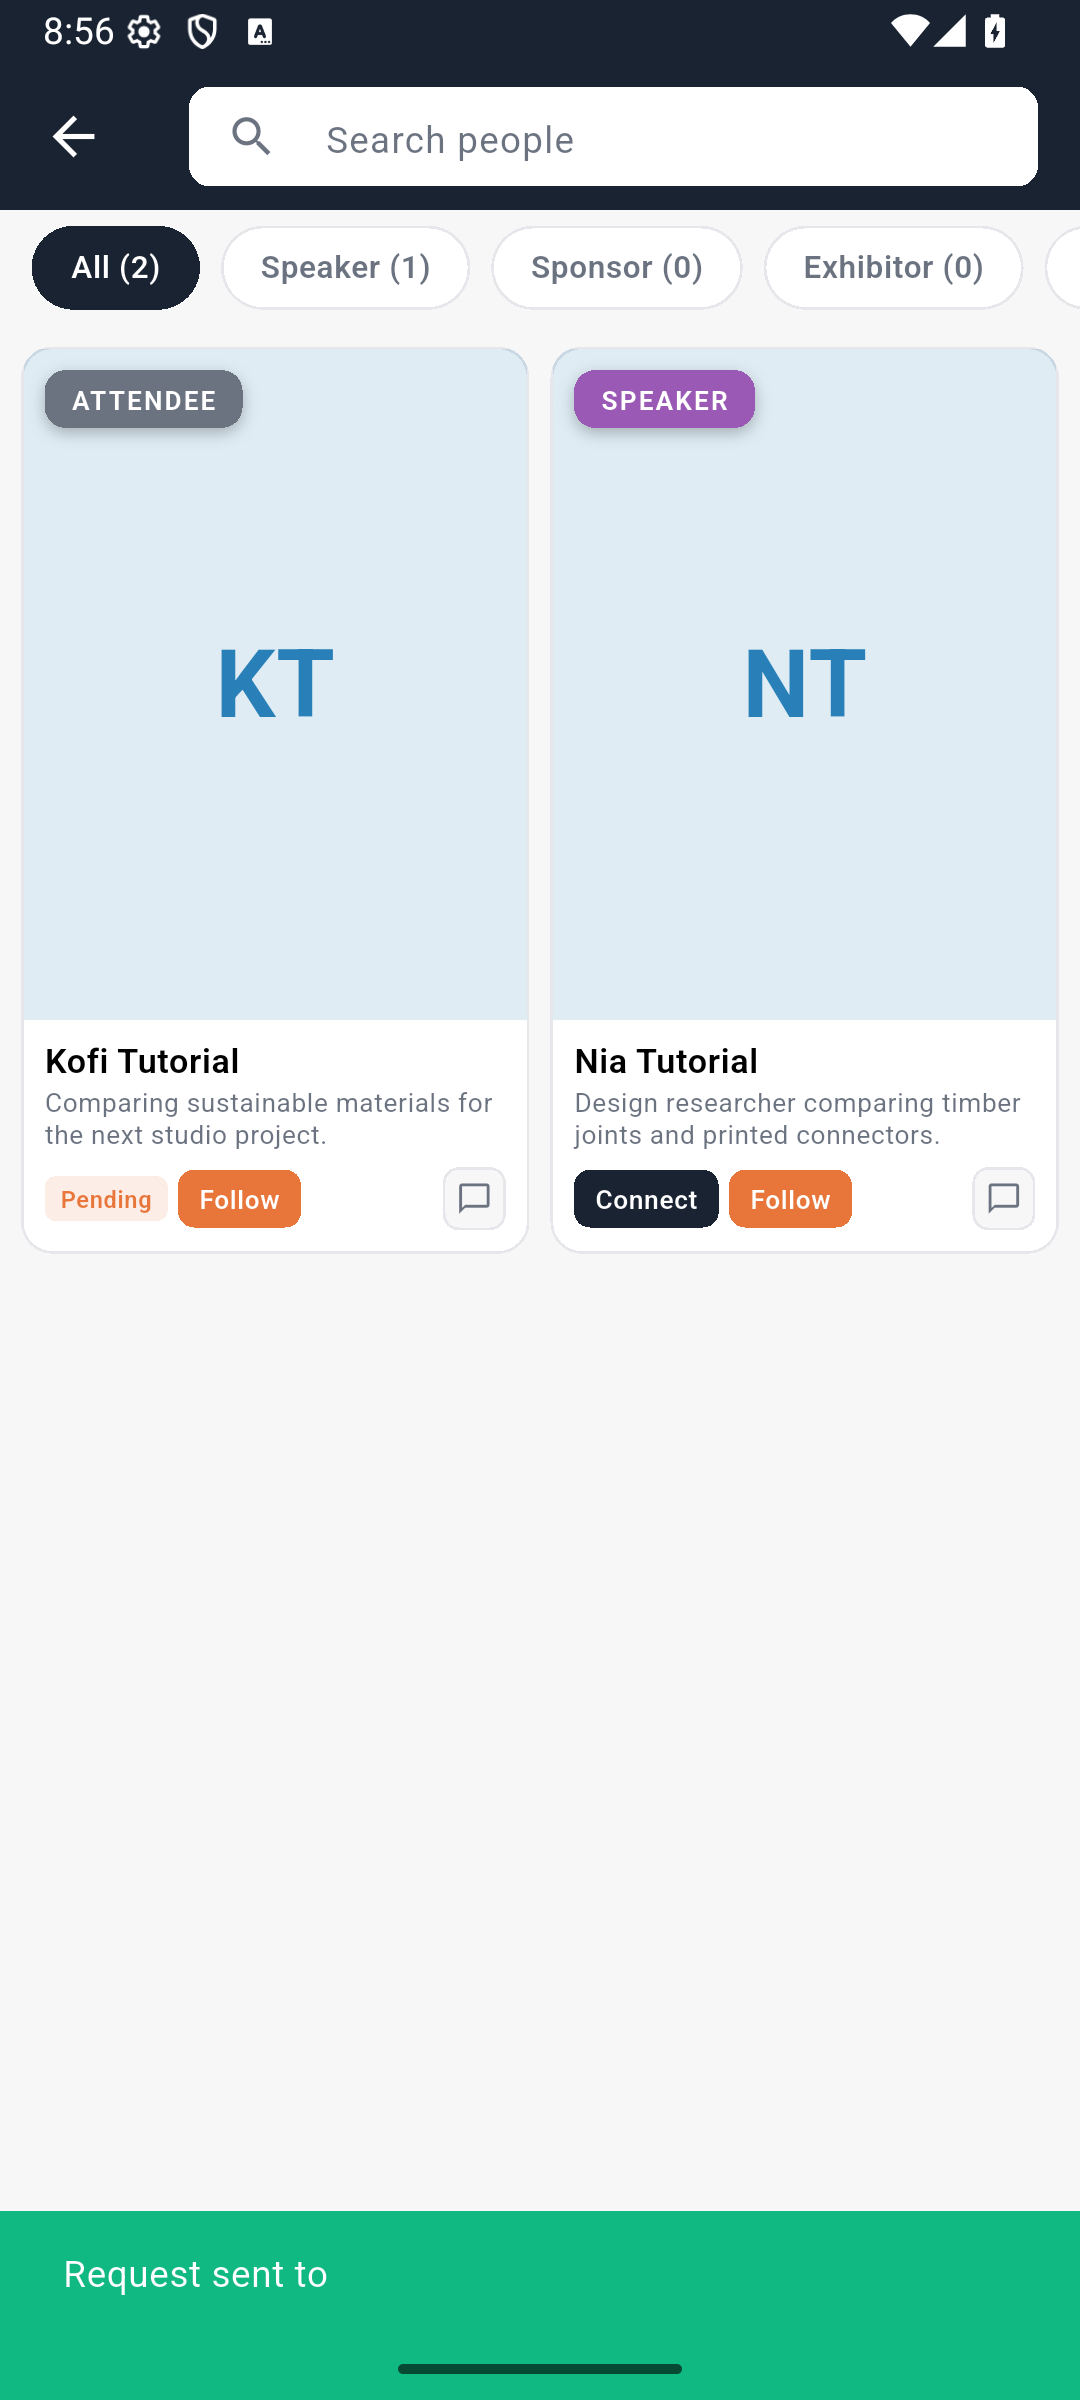
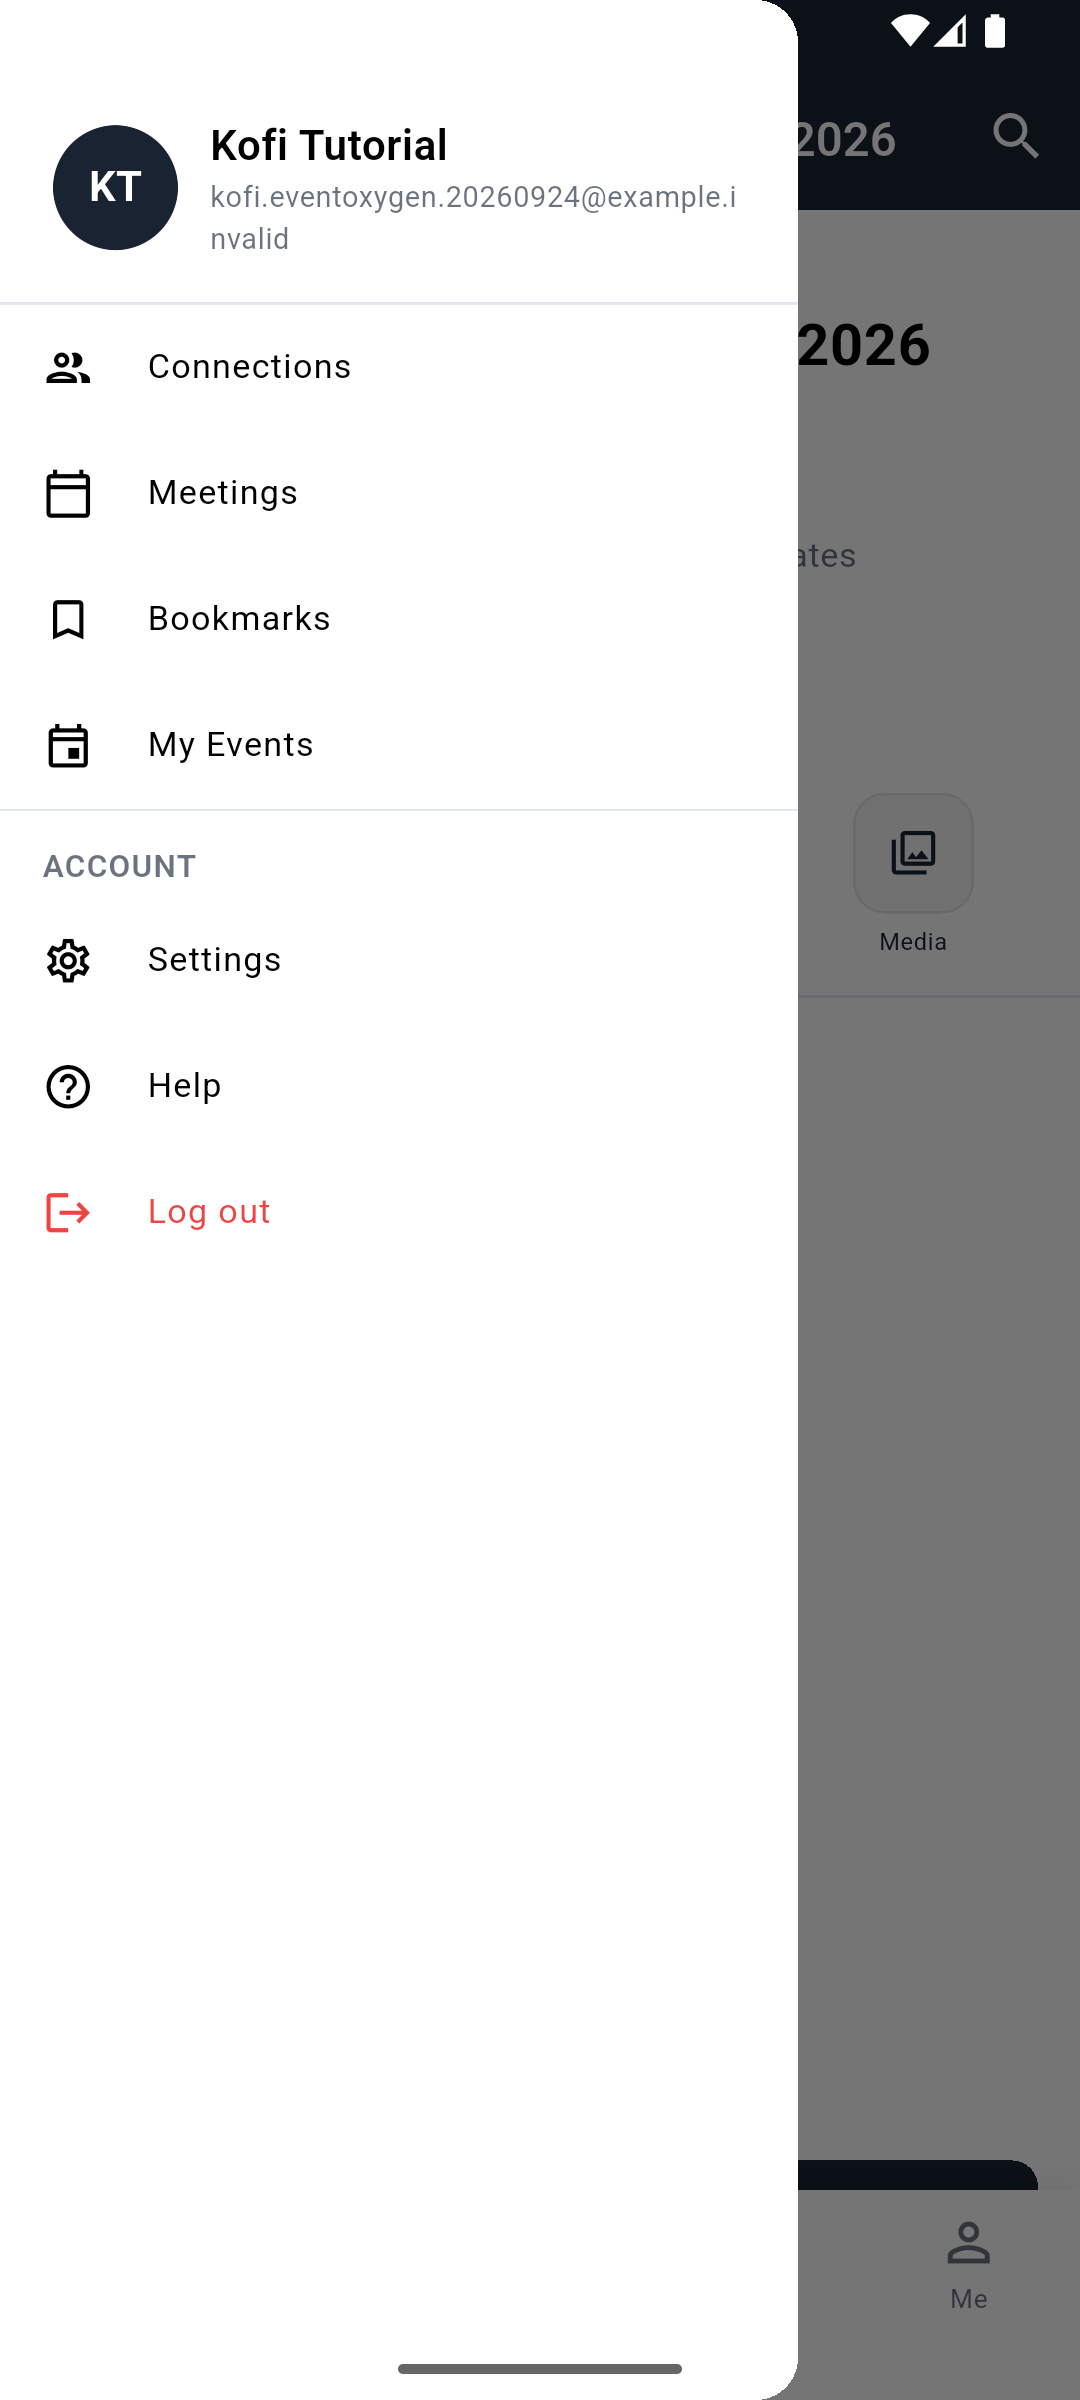
This capture locates the hamburger icon; it does not show the opened drawer. Open the menu to find Connections.
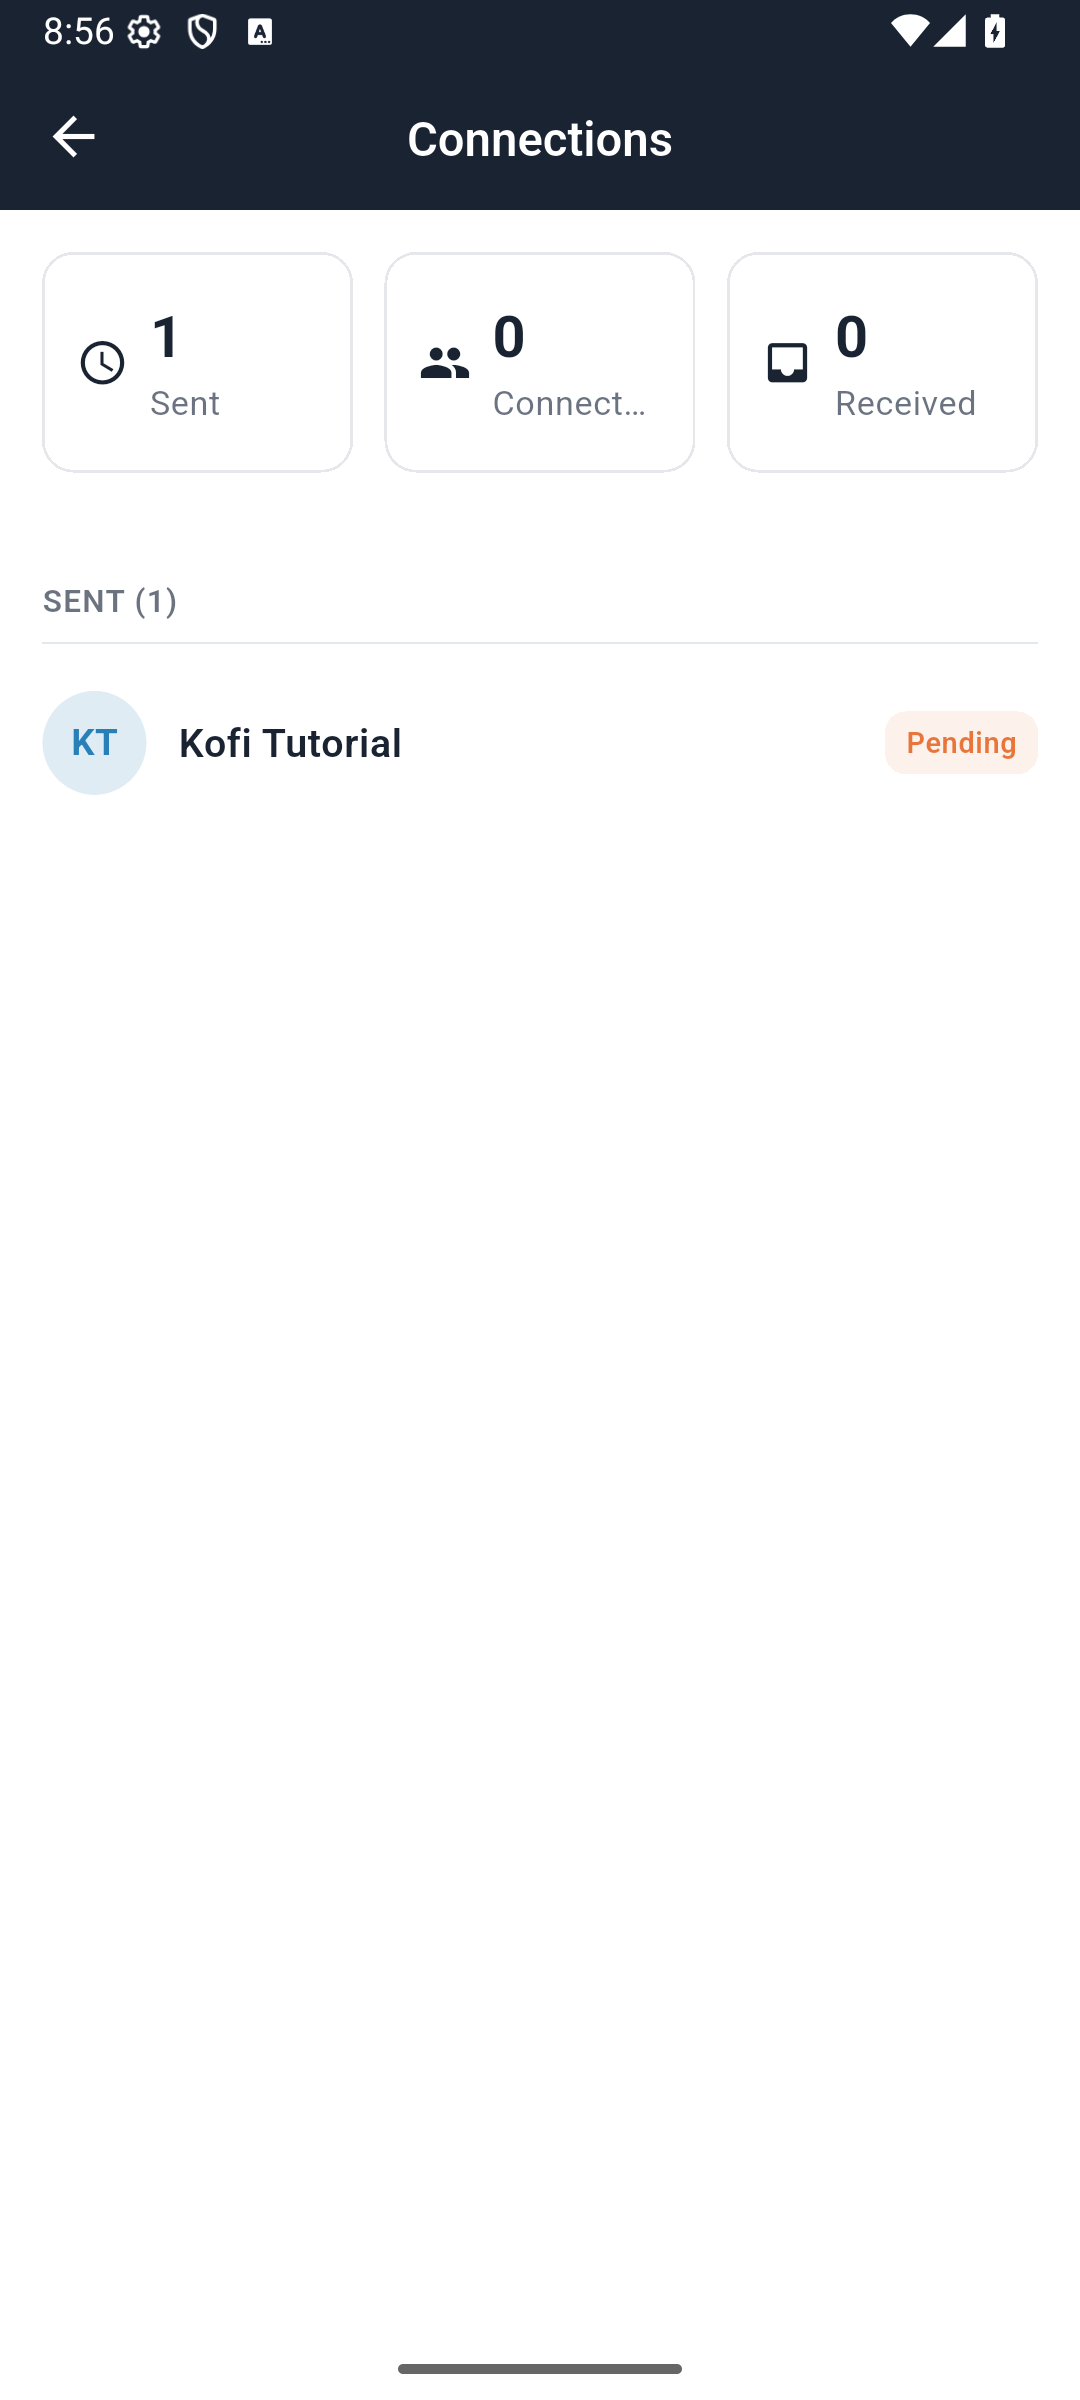
Pending means a request exists; the other person has not accepted it yet. Avoid repeatedly sending the same request.
3. Accept from the other attendee’s account
Your partner opens the same event, then the hamburger menu → Connections. Under REQUESTS RECEIVED, they find your name and tap the green check icon. The adjacent × declines the request; Accept all applies to every received request and is unnecessary for this one-person exercise.

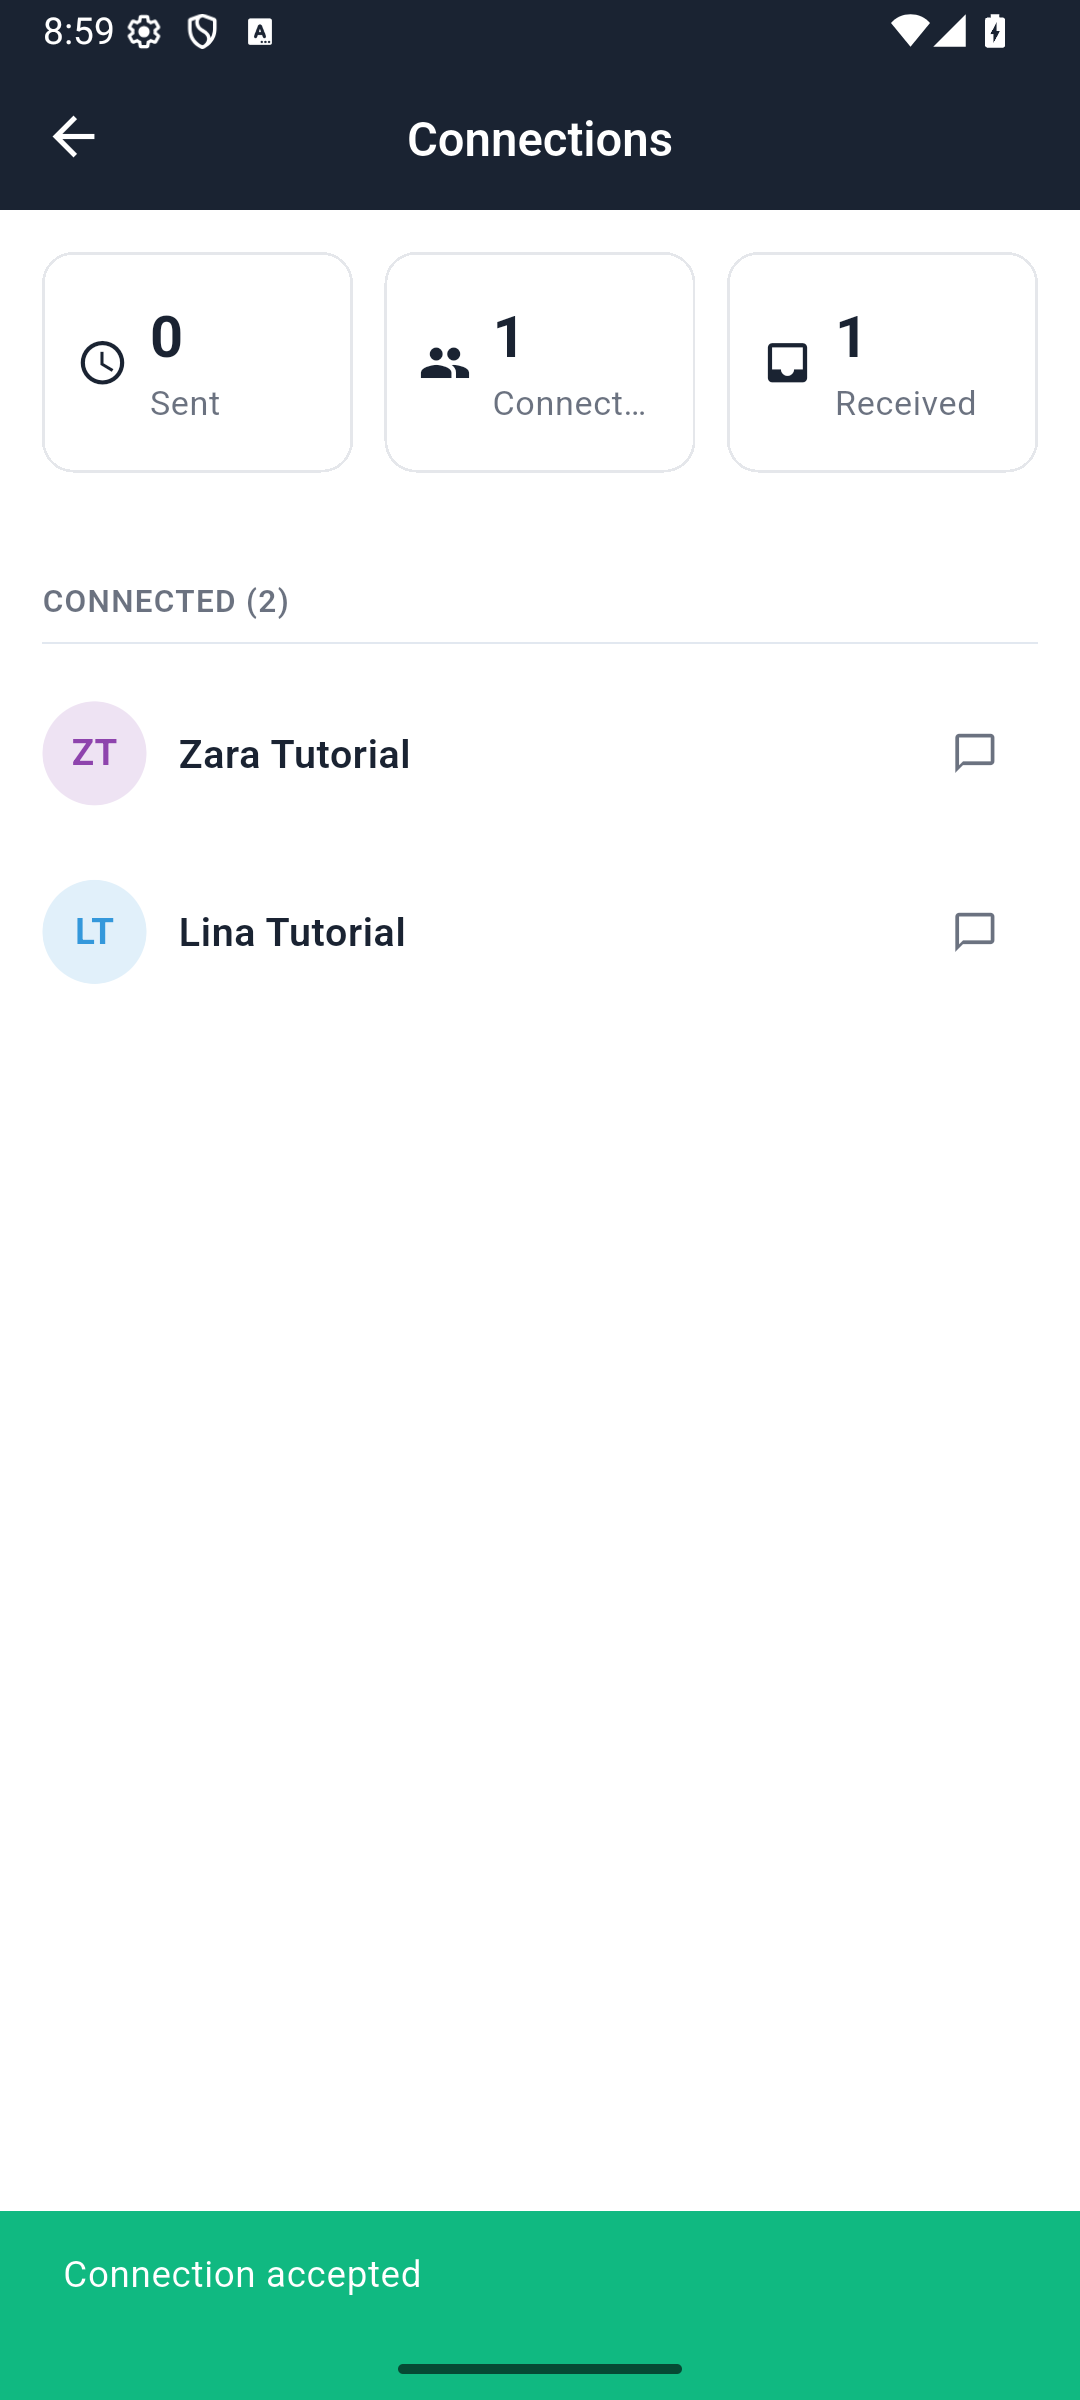
You should see: Connection accepted and the person under CONNECTED. Reopen or refresh the list if the top counters lag behind the row changes. In this rehearsal the row updated before the summary counters.
We practiced the two accounts sequentially on one training phone. If you do the same, choose Log out from the event drawer. The corrected build immediately returns to the signed-out Events list. Sign in as the other attendee; do not merely change an email field inside a booking.
4. Send a useful first message
From Connections, tap the chat-bubble icon beside your partner. Alternatively, open their People card and choose Message.
In Type a message..., write something specific, such as:
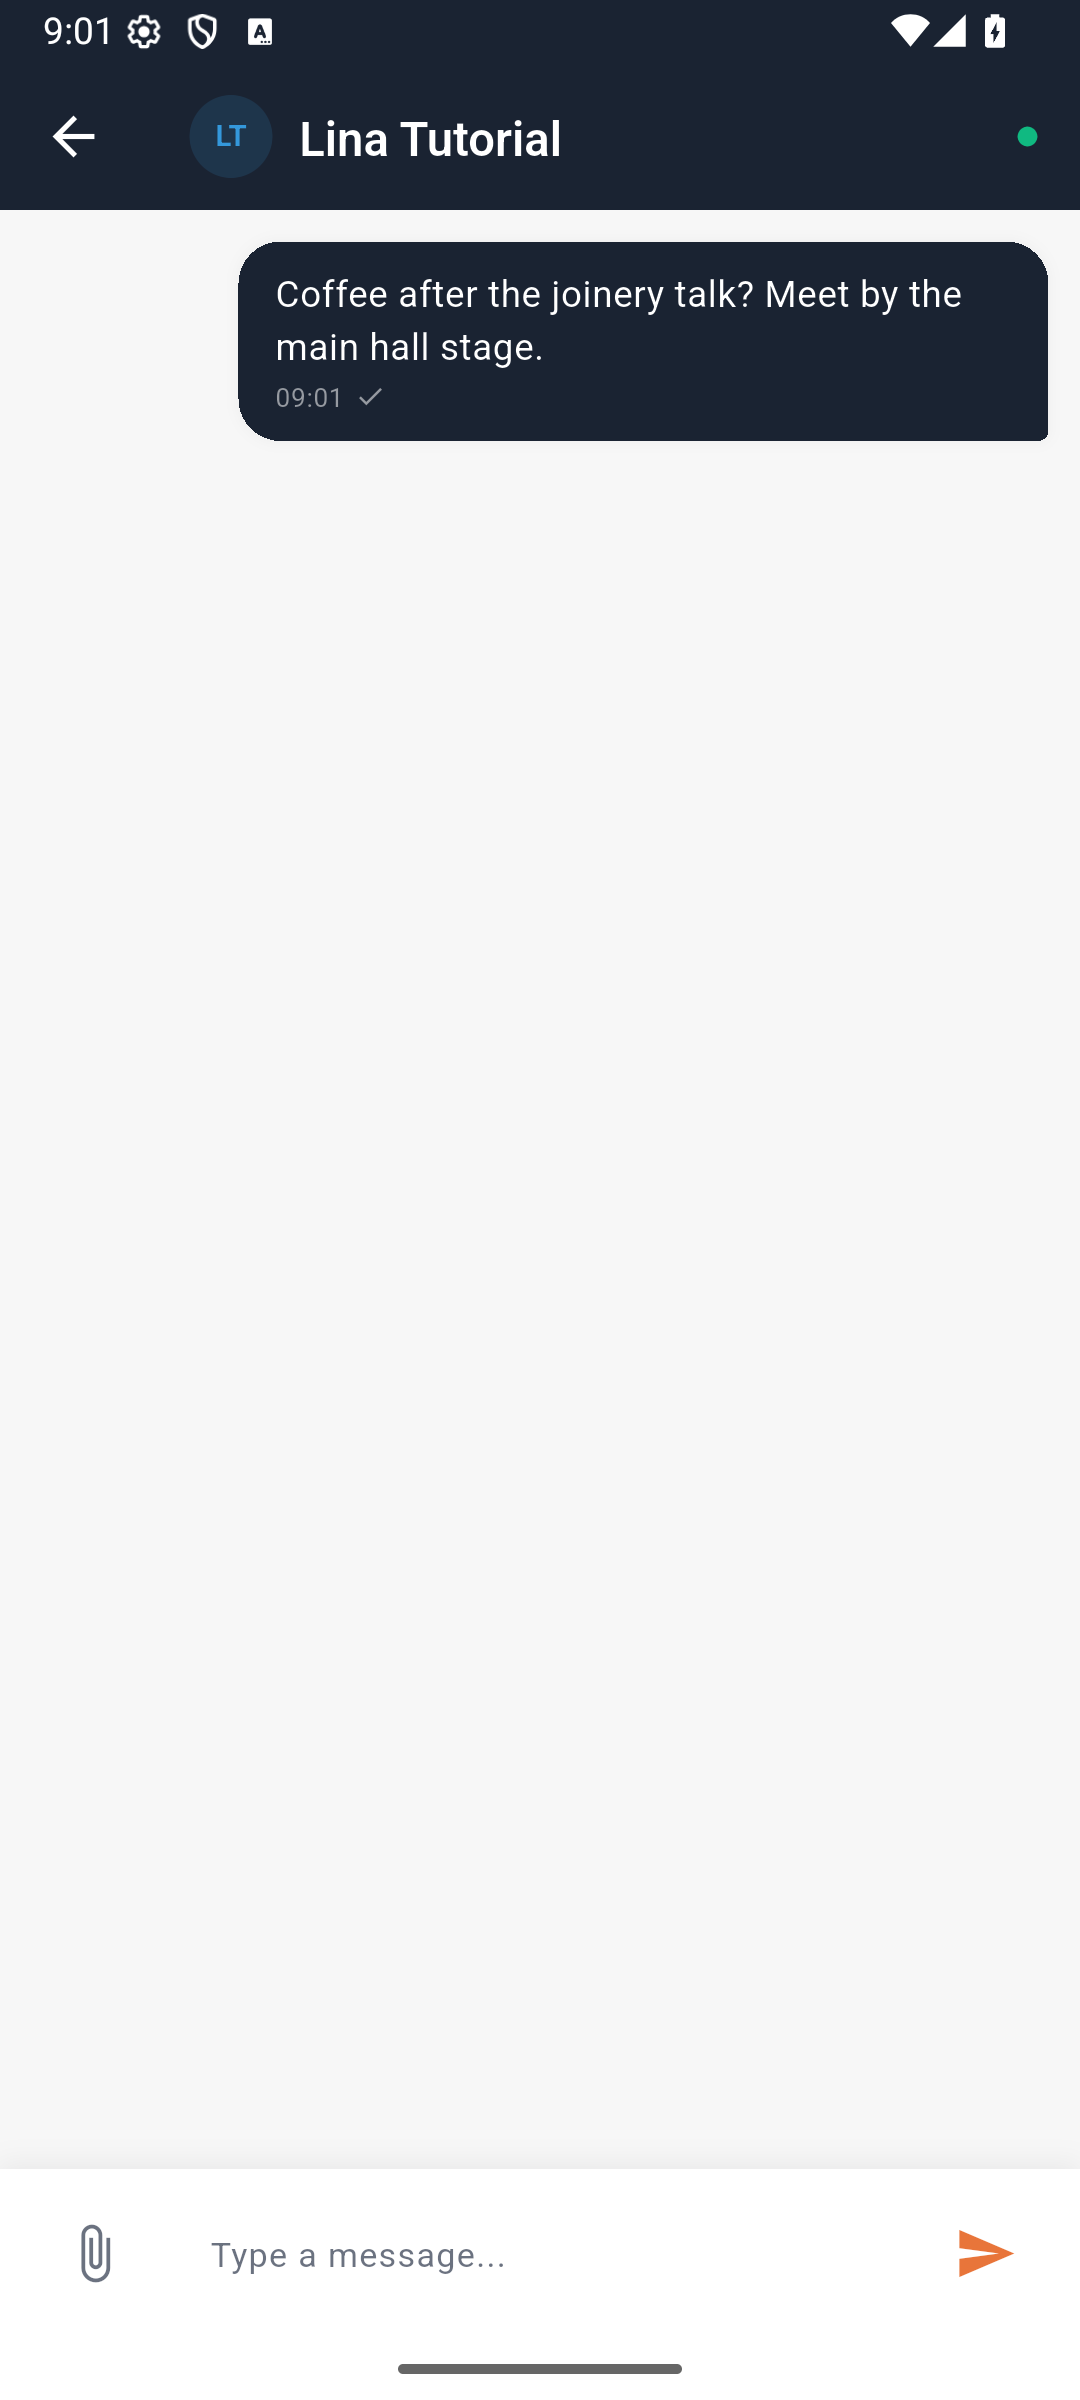
Coffee after the joinery talk? Meet by the main hall stage.
Use the send arrow or the keyboard’s submit action. Kofi sent that message to Lina in the rehearsal.
Lina then signed in and opened Inbox → Messages. The conversation appeared with Kofi’s name, the message preview and an unread count.
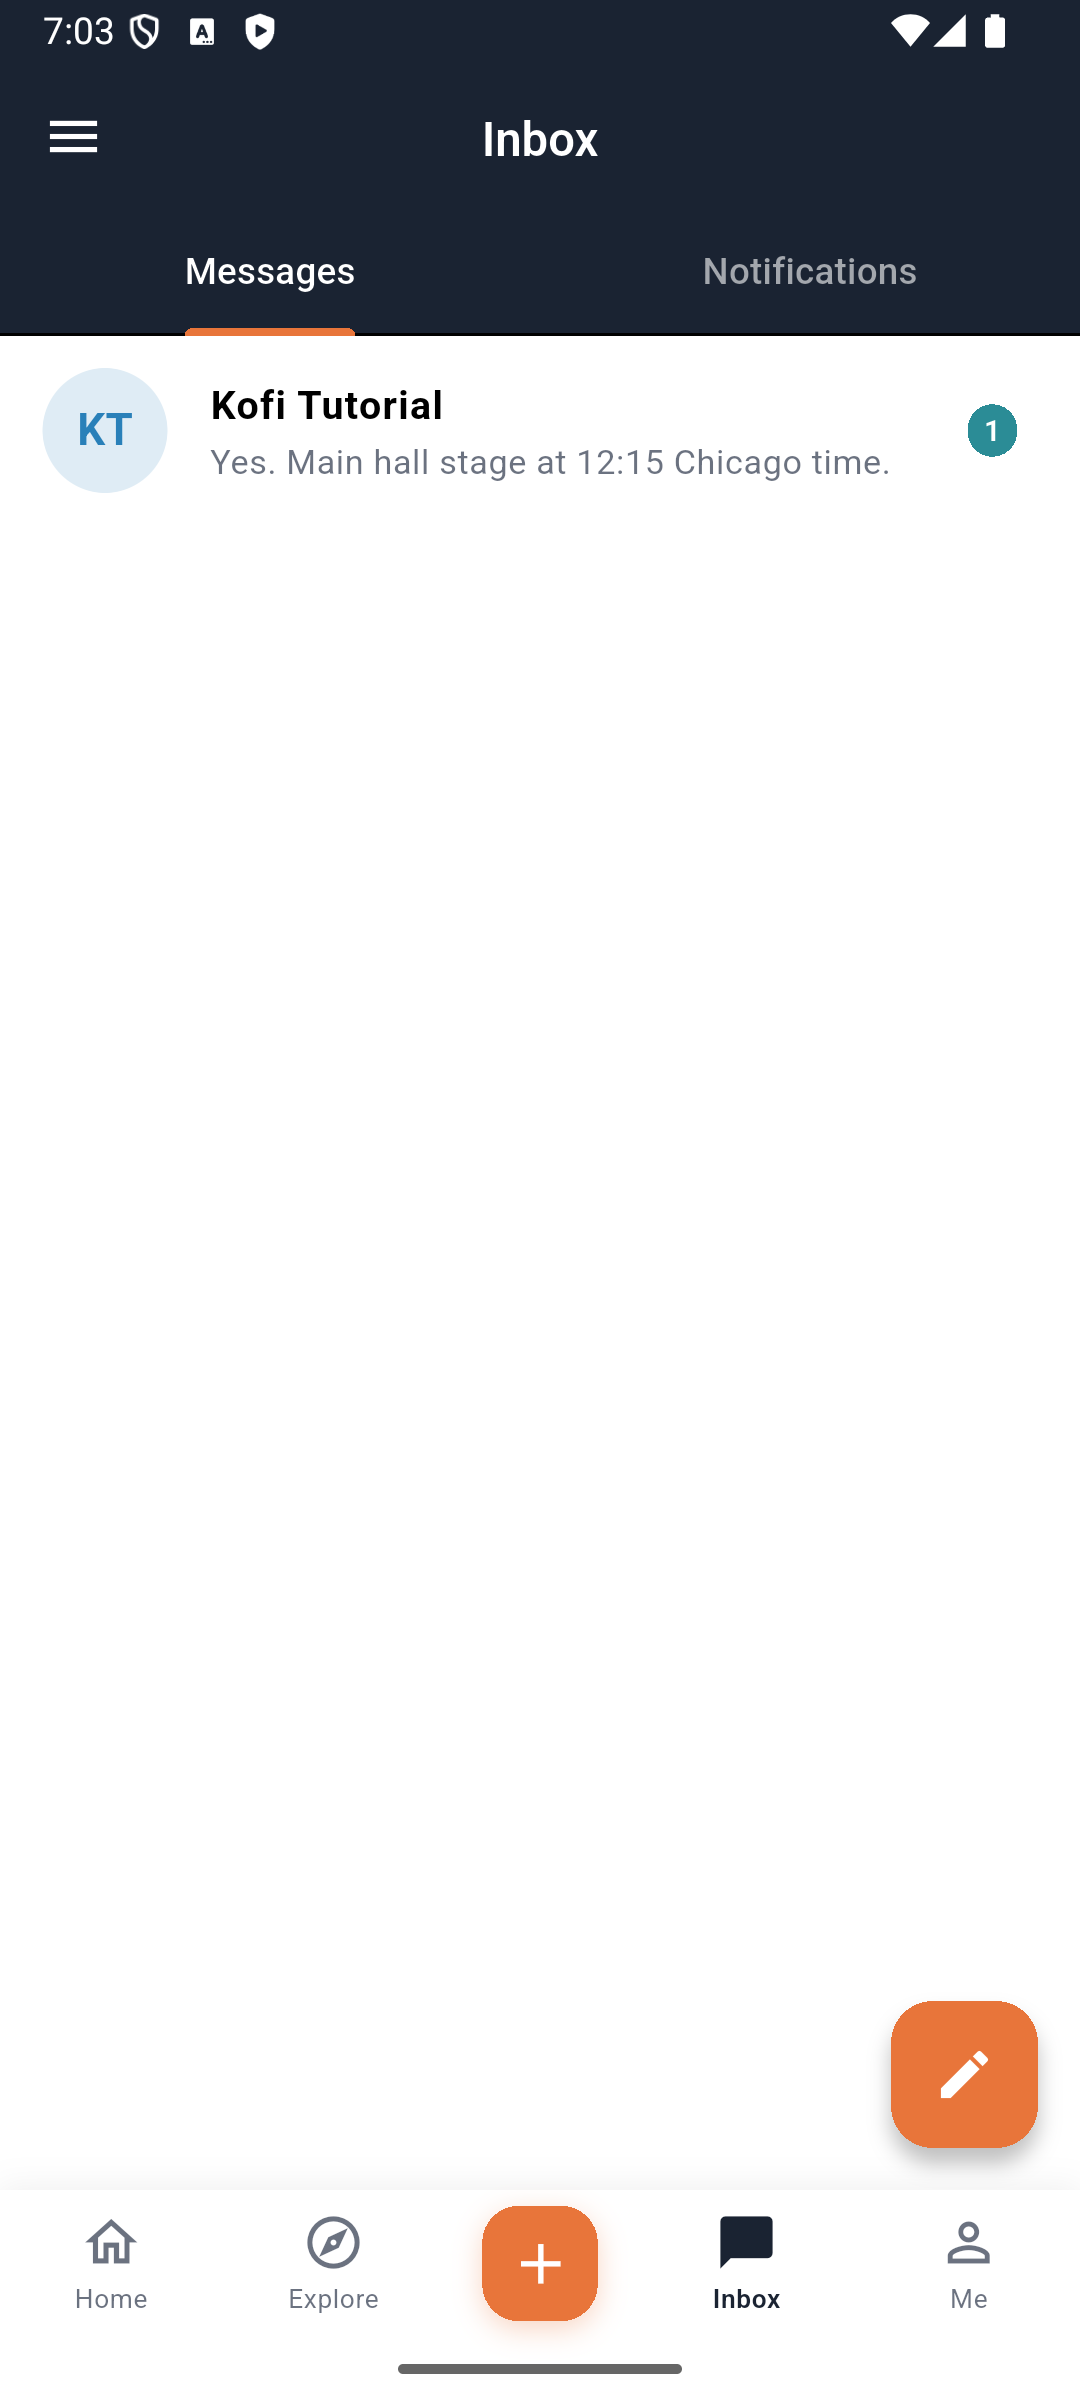
You should see: the same conversation on the recipient’s side. A bubble appearing immediately on the sender’s screen is not sufficient when diagnosing a failed send; reopen the thread or have the recipient check before sending the text repeatedly.
The backend permits direct messages without an accepted connection in some paths. A mutual connection is required for the meeting service. This exercise establishes the connection first so the relationship is clear.
5. Arrange a meeting your partner can accept
Open your connected partner from People or Connections, then select Meet. Check Meeting with before filling the form: the invitation goes to that attendee.
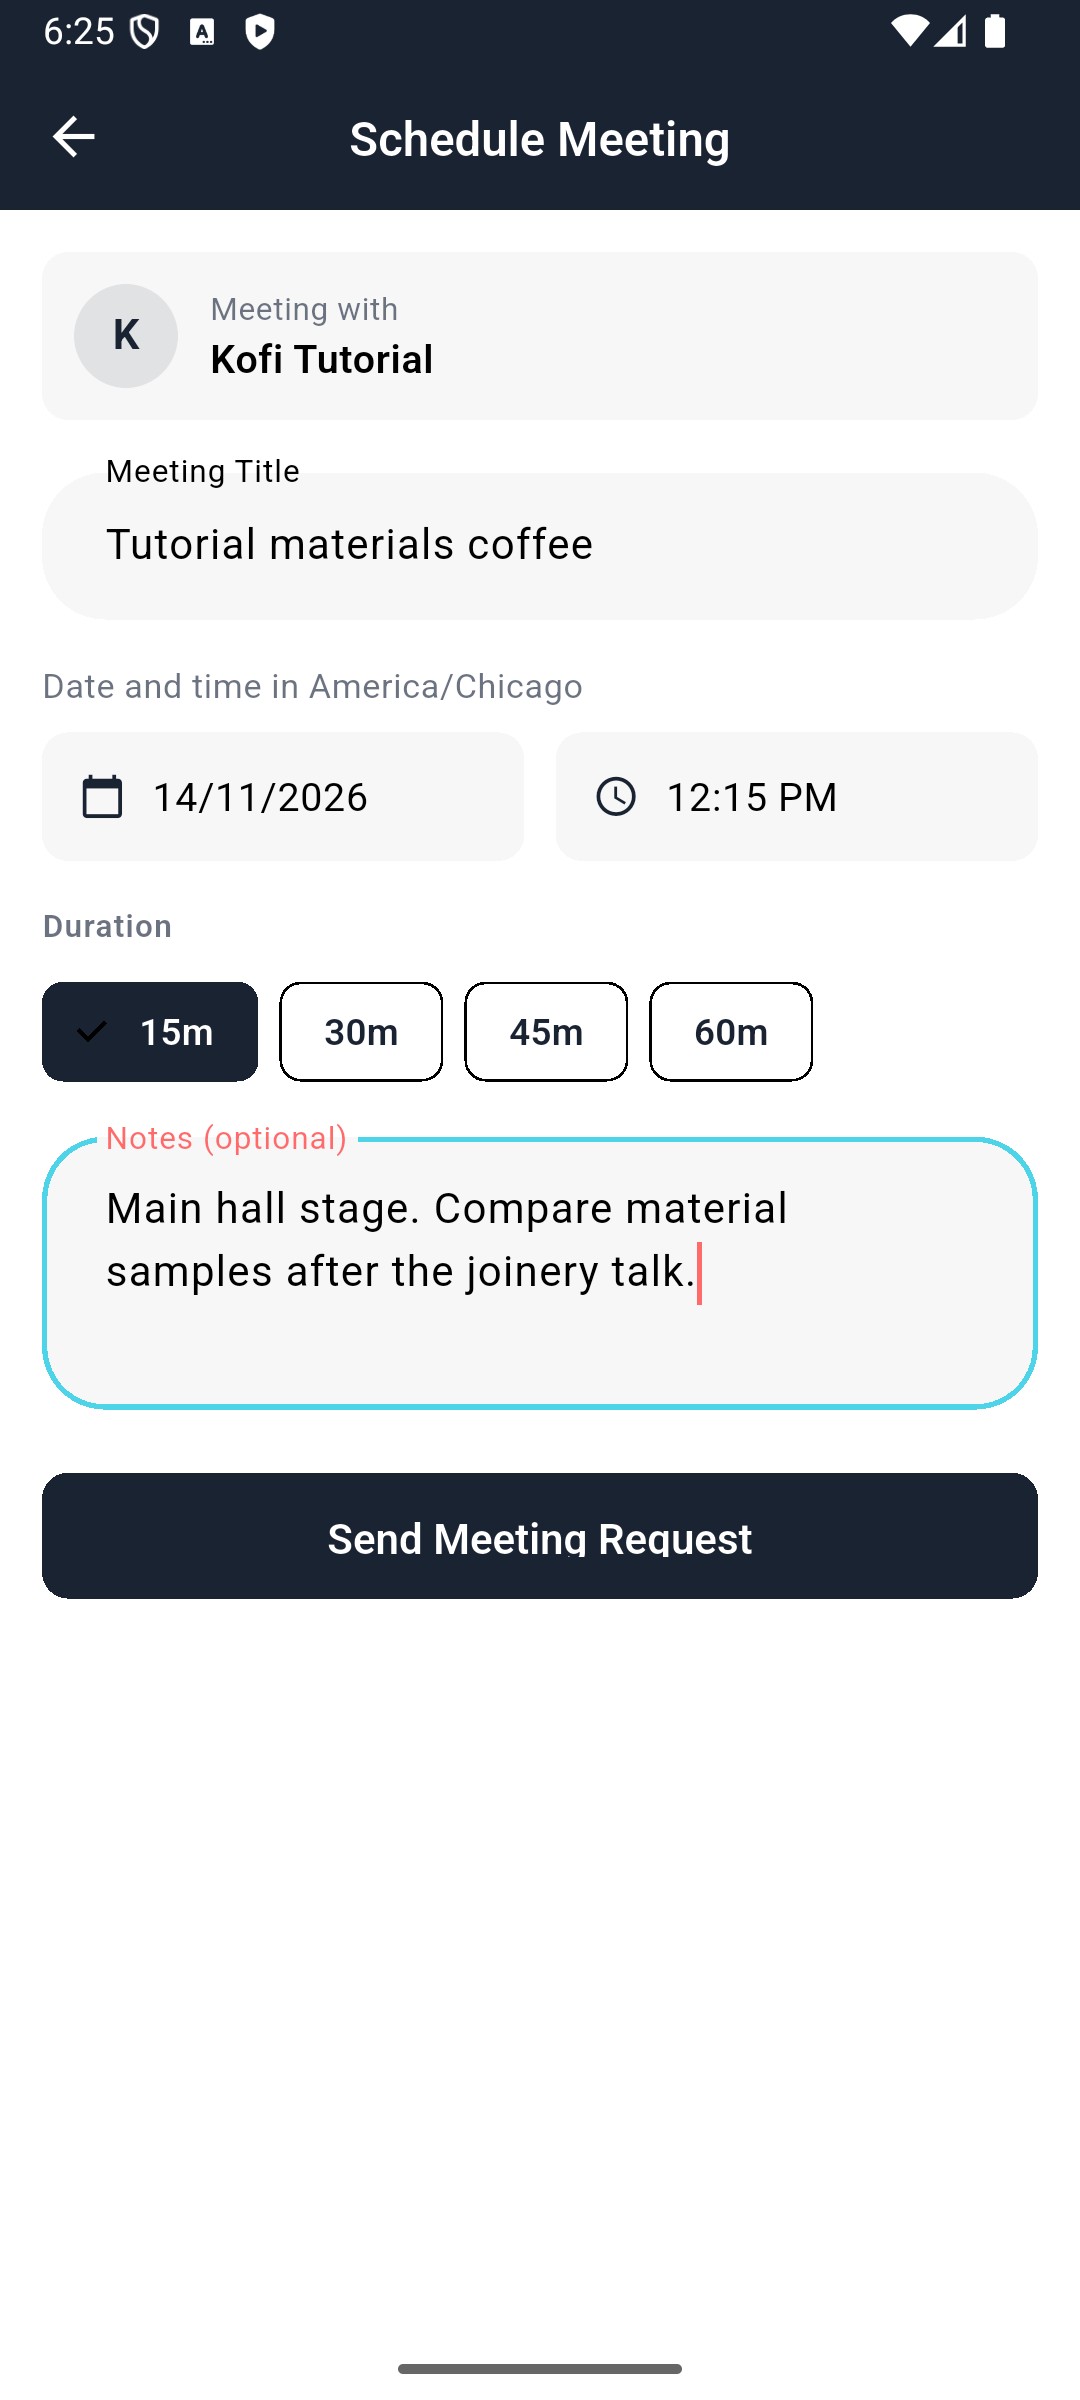
- In Meeting Title, enter
Tutorial materials coffee. A specific title helps you recognize it later among other appointments. - Check Date and time in America/Chicago. The form uses the event's timezone, so the appointment stays tied to the venue even when your phone uses another timezone. For another event, use the timezone displayed there.
- Tap the date. The default is tomorrow, which may be the wrong day for your conference. Move the calendar to November 2026, select 14, then choose OK.
- Tap the time. Select the keyboard icon to switch to text input, enter hour 12 and minutes 15, choose PM, then OK. Confirm the form says 12:15 PM, not 12:15 AM.
- Choose 15m. This meeting starts after the example's 11:00–12:00 talk, leaving time to reach the meeting place.
- In Notes (optional), enter
Main hall stage. Compare material samples after the joinery talk.Put the meeting place in the notes: this form has no separate location field. - Review the partner, 14/11/2026, 12:15 PM, timezone and duration, then select Send Meeting Request once. The success message names your partner and returns you to their profile.
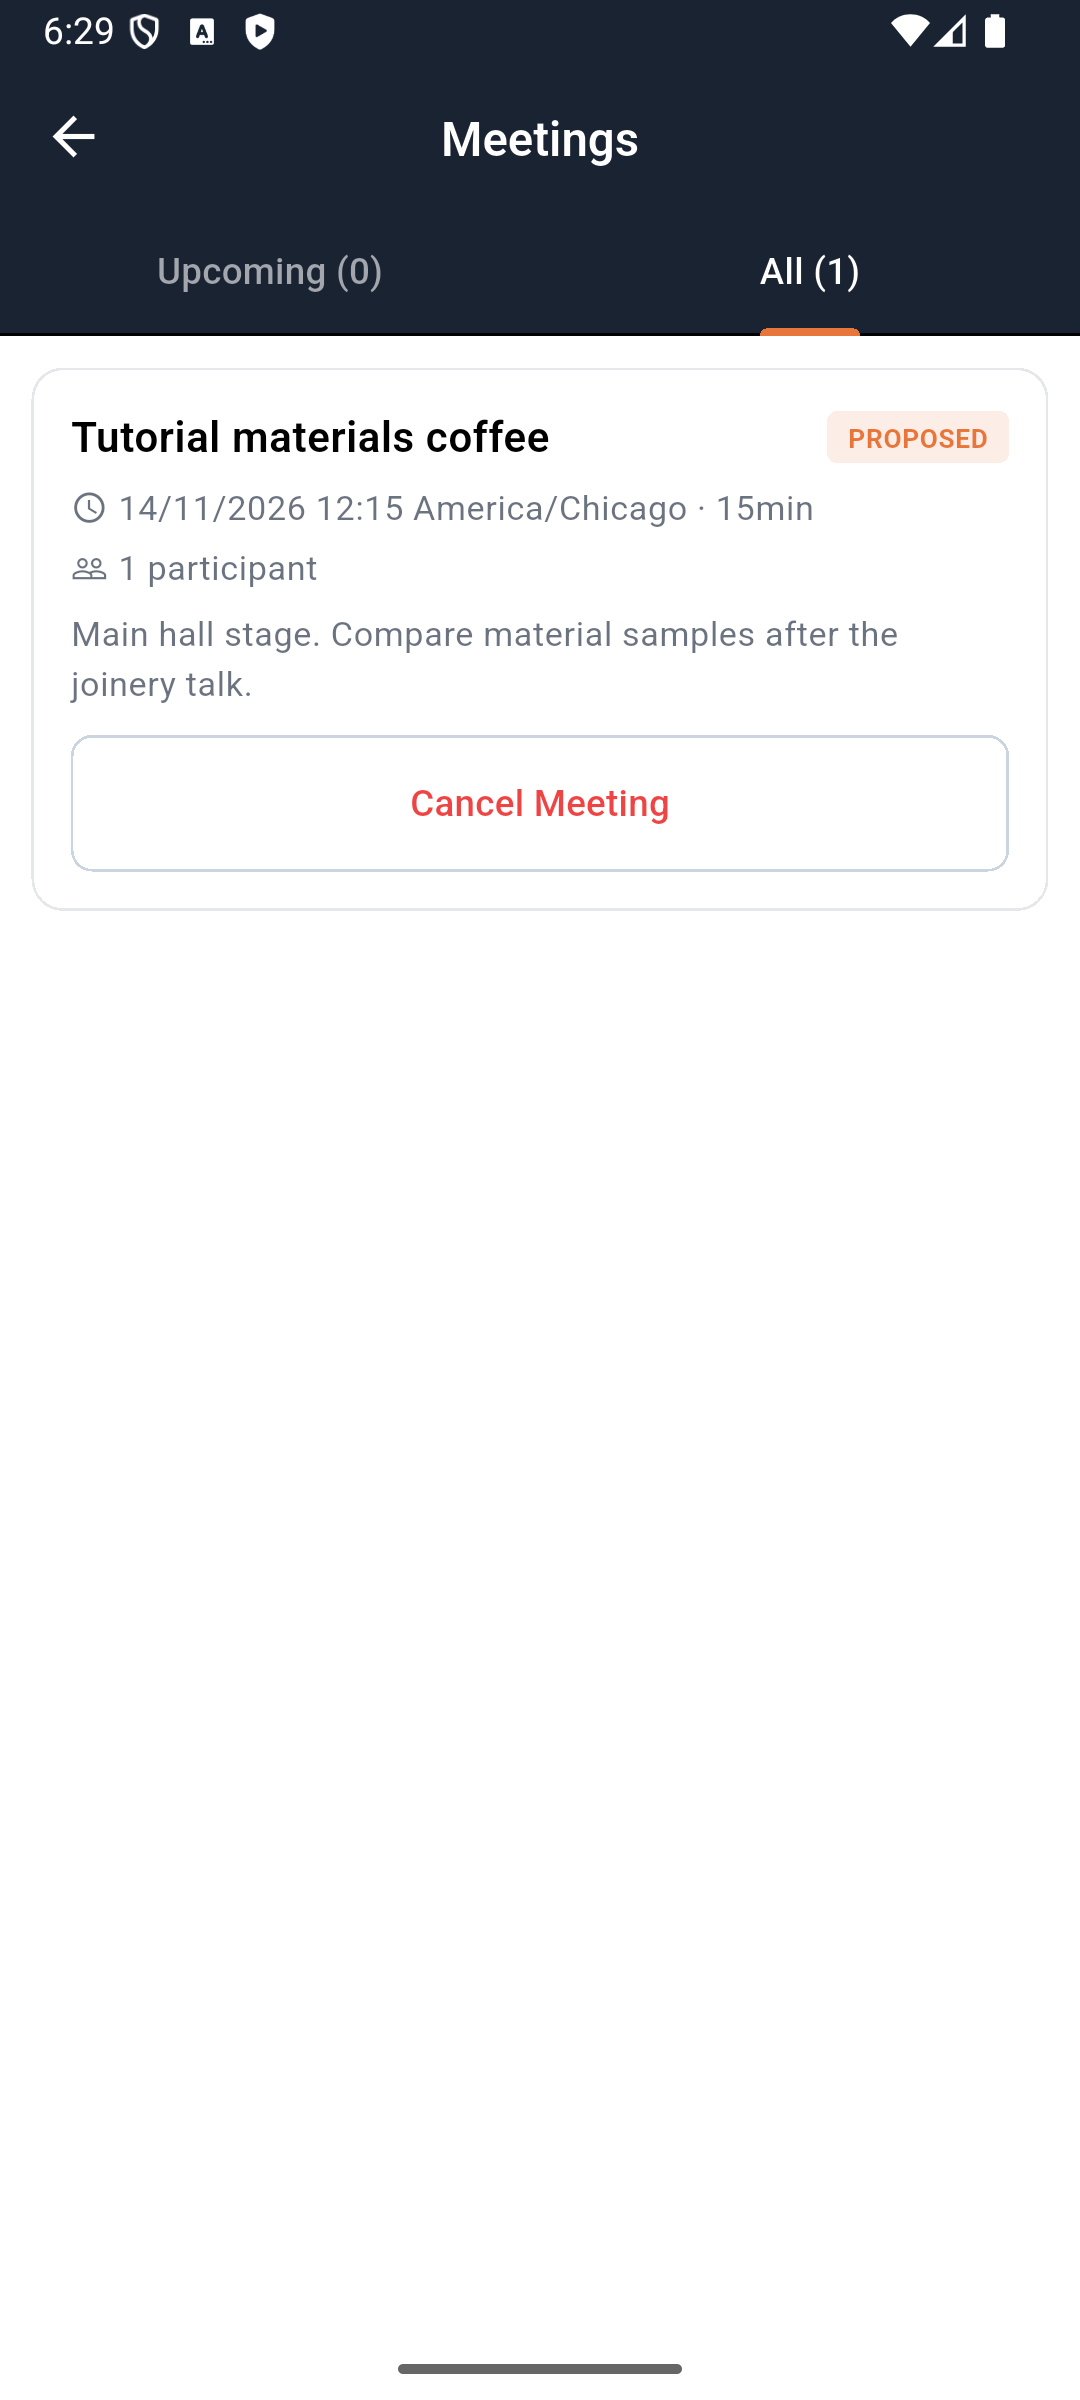
Return to event Home, open the upper-left menu, and choose Meetings → All. Your appointment should say PROPOSED, show 14/11/2026 12:15 America/Chicago · 15min, and include your notes.
Why Upcoming can still be empty: Upcoming lists confirmed future meetings. A proposal awaiting your partner's response belongs under All. Do not create it again because Upcoming says zero.
Now ask your practice partner to sign into their own attendee account, open the same event, and choose menu → Meetings → All. Their copy has Decline and Accept. They should read the date, time, timezone and notes before choosing Accept.
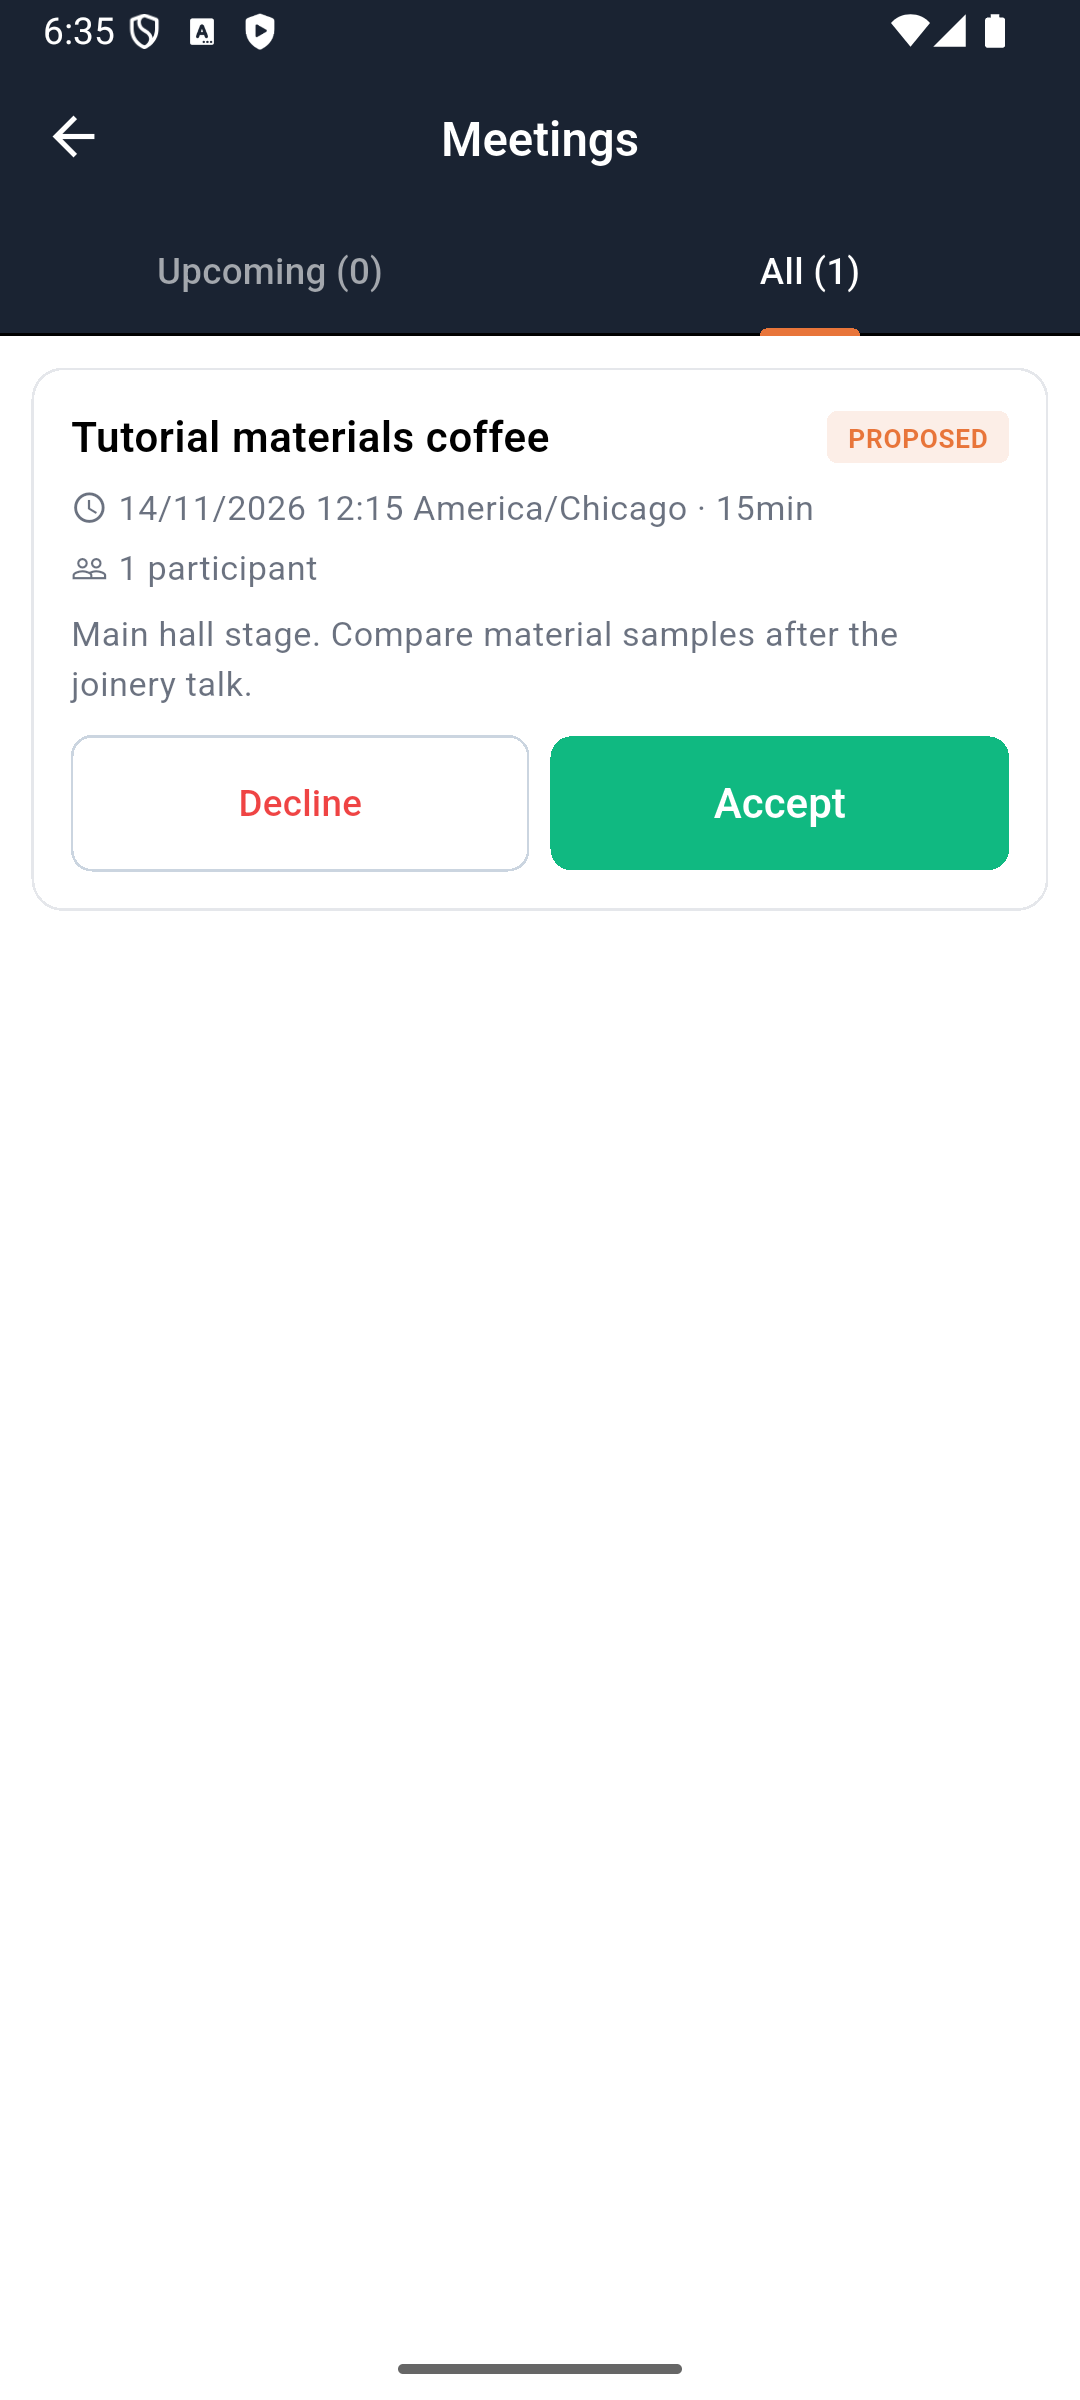
After acceptance, the card says CONFIRMED and appears under Upcoming. Reopen Meetings on the organizer's account too; both people should see the same appointment. A chat reply is useful context, but it does not accept the meeting invitation automatically.
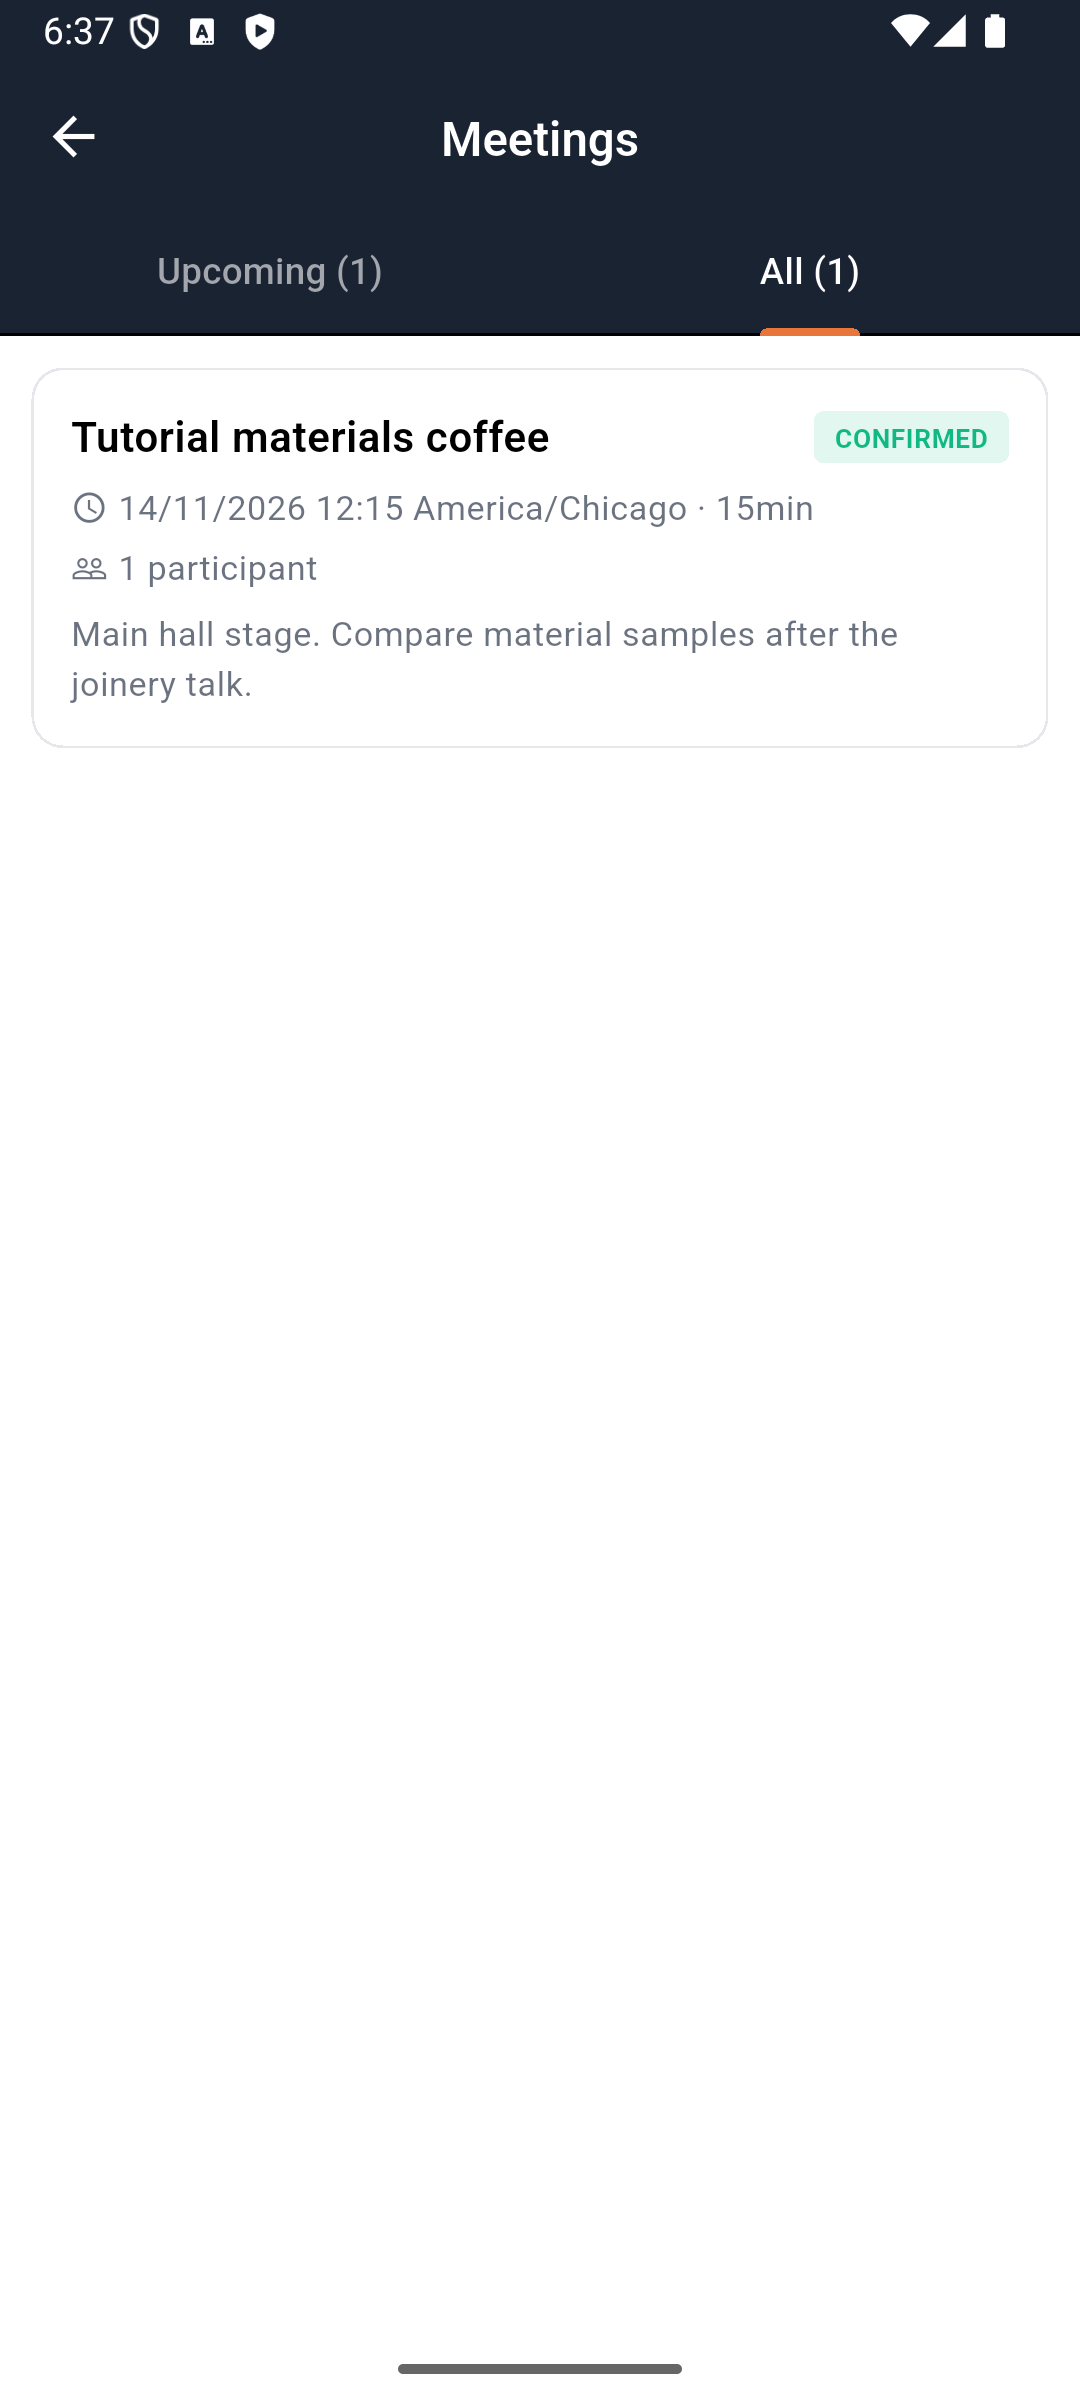
Watch for: selecting tomorrow instead of the conference day, choosing AM instead of PM, or interpreting the venue's time as your phone's local time. If an older app reports At least one participant is required while a partner is displayed, ask for the updated build; no meeting was created by that error. Check All before retrying any uncertain submission.
Try it: have your partner read the appointment's day, venue timezone and meeting place back to you, then find it again under Upcoming.
Check yourself: does a Pending connection or PROPOSED meeting mean the other person agreed? No. Look for the accepted connection or CONFIRMED meeting.
Part 5 — Share a useful question and save a post
1. Know what Explore contains
Tap Explore in the bottom bar. On this build, Explore is the community feed; the programme remains under Home → Schedule.
The local review feed also contained posts from another community in the same organization. The event’s automatically created page was absent from the active-page lookup, so the app fell back to the broader feed. Your feed may be empty; the next step creates the question used in this exercise.
Treat the feed as public to the wider organization unless the organizer has verified event scoping. An event heading is not an audience-control guarantee. Keep private client details, travel documents and confidential conversations out of public posts.
2. Ask a question someone can answer
Tap What’s on your mind?. In Create Post, enter:
Tutorial conference question: what would you test before using a printed timber connector?
The composer also offers Photo, Camera, Poll and Link. Start with text so you can verify the audience and saved result before adding media.
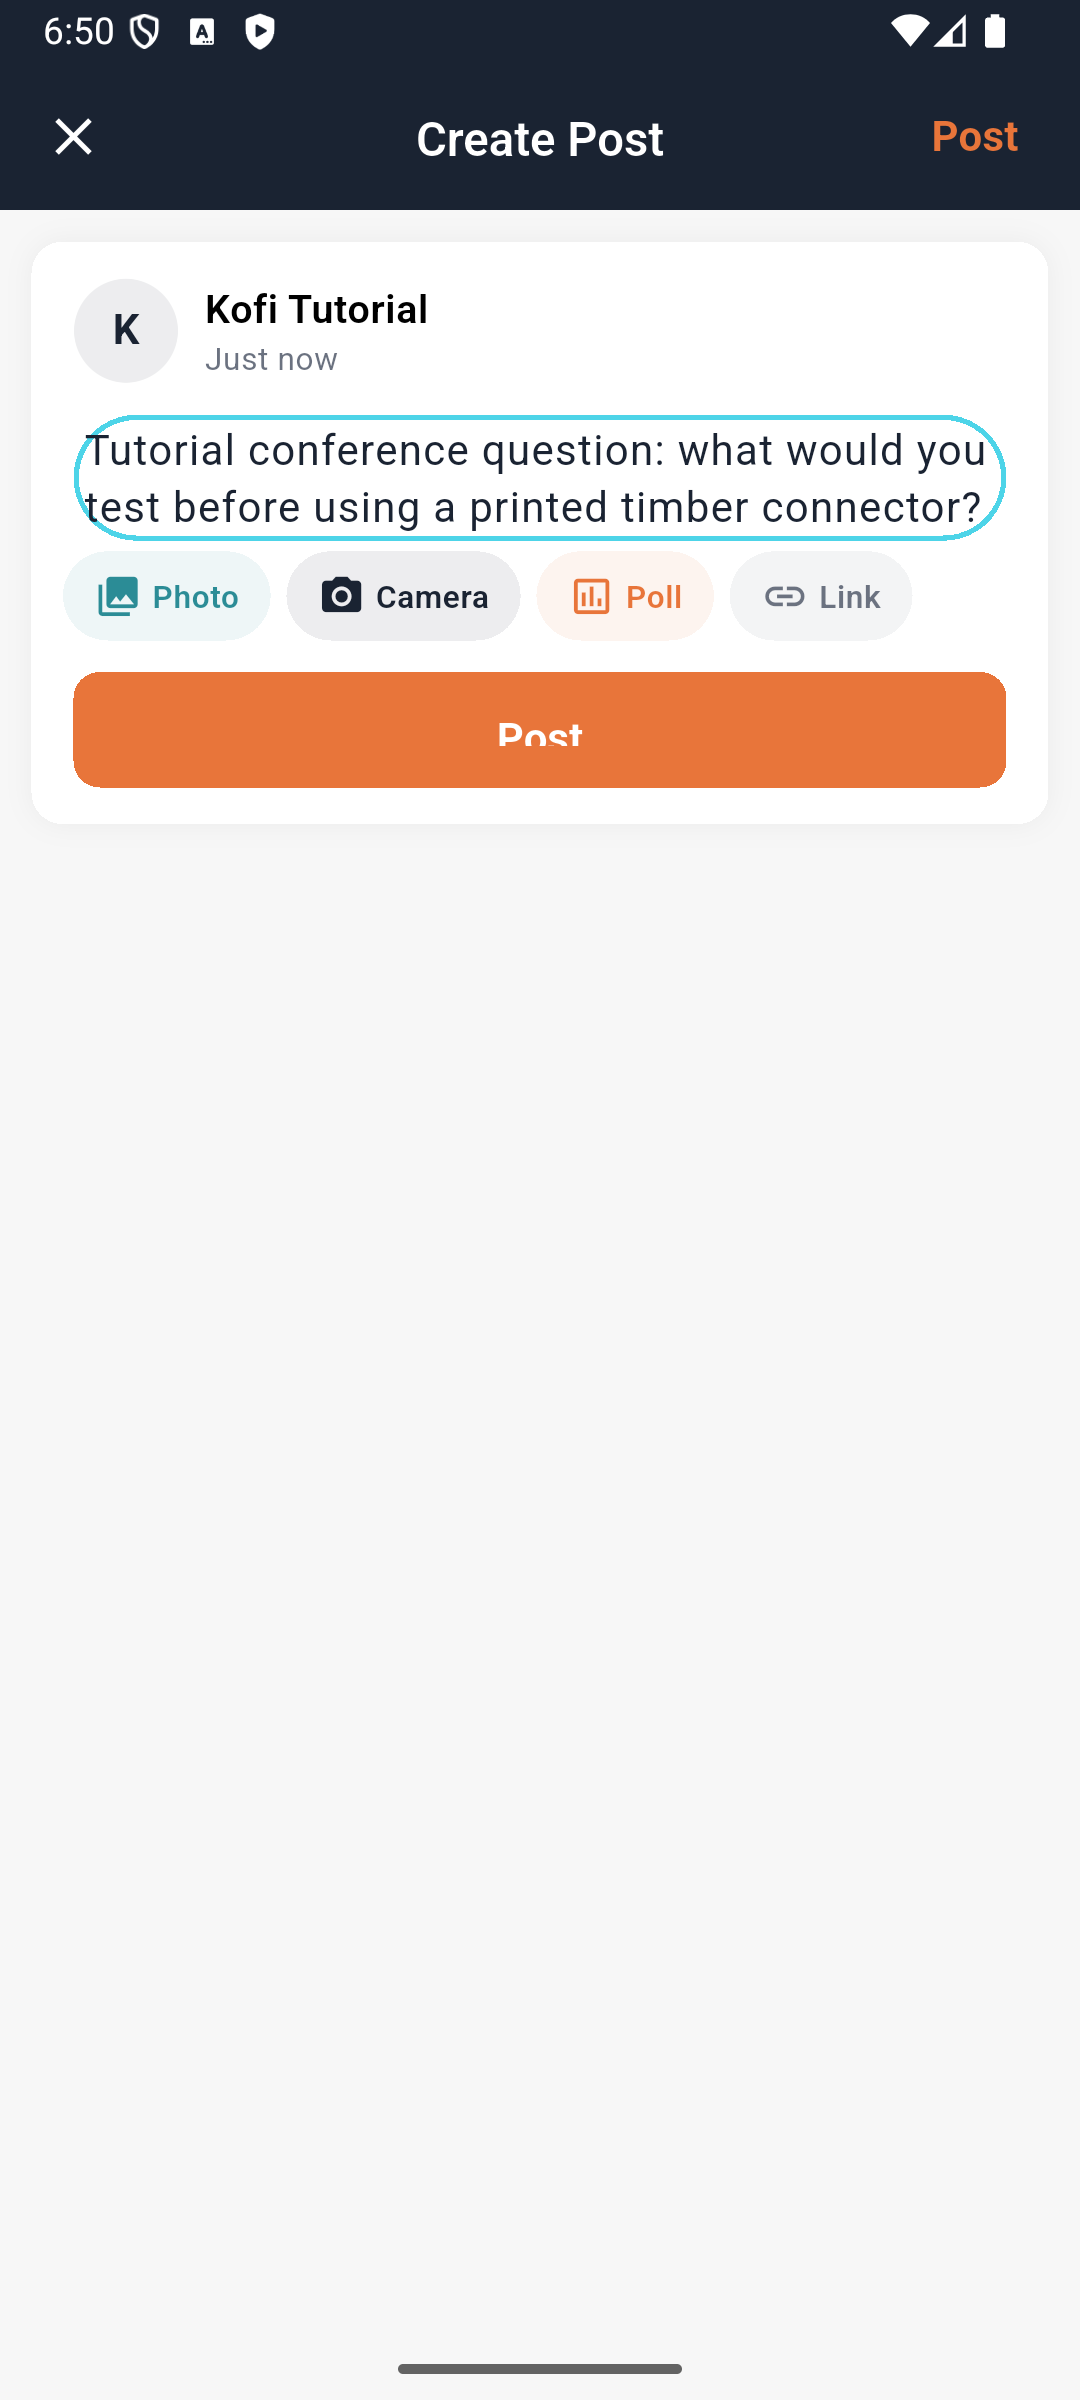
Tap Post. The question appears under your name; the latest rehearsal uses Kofi. Leave the feed and reopen it to confirm the saved post is there.
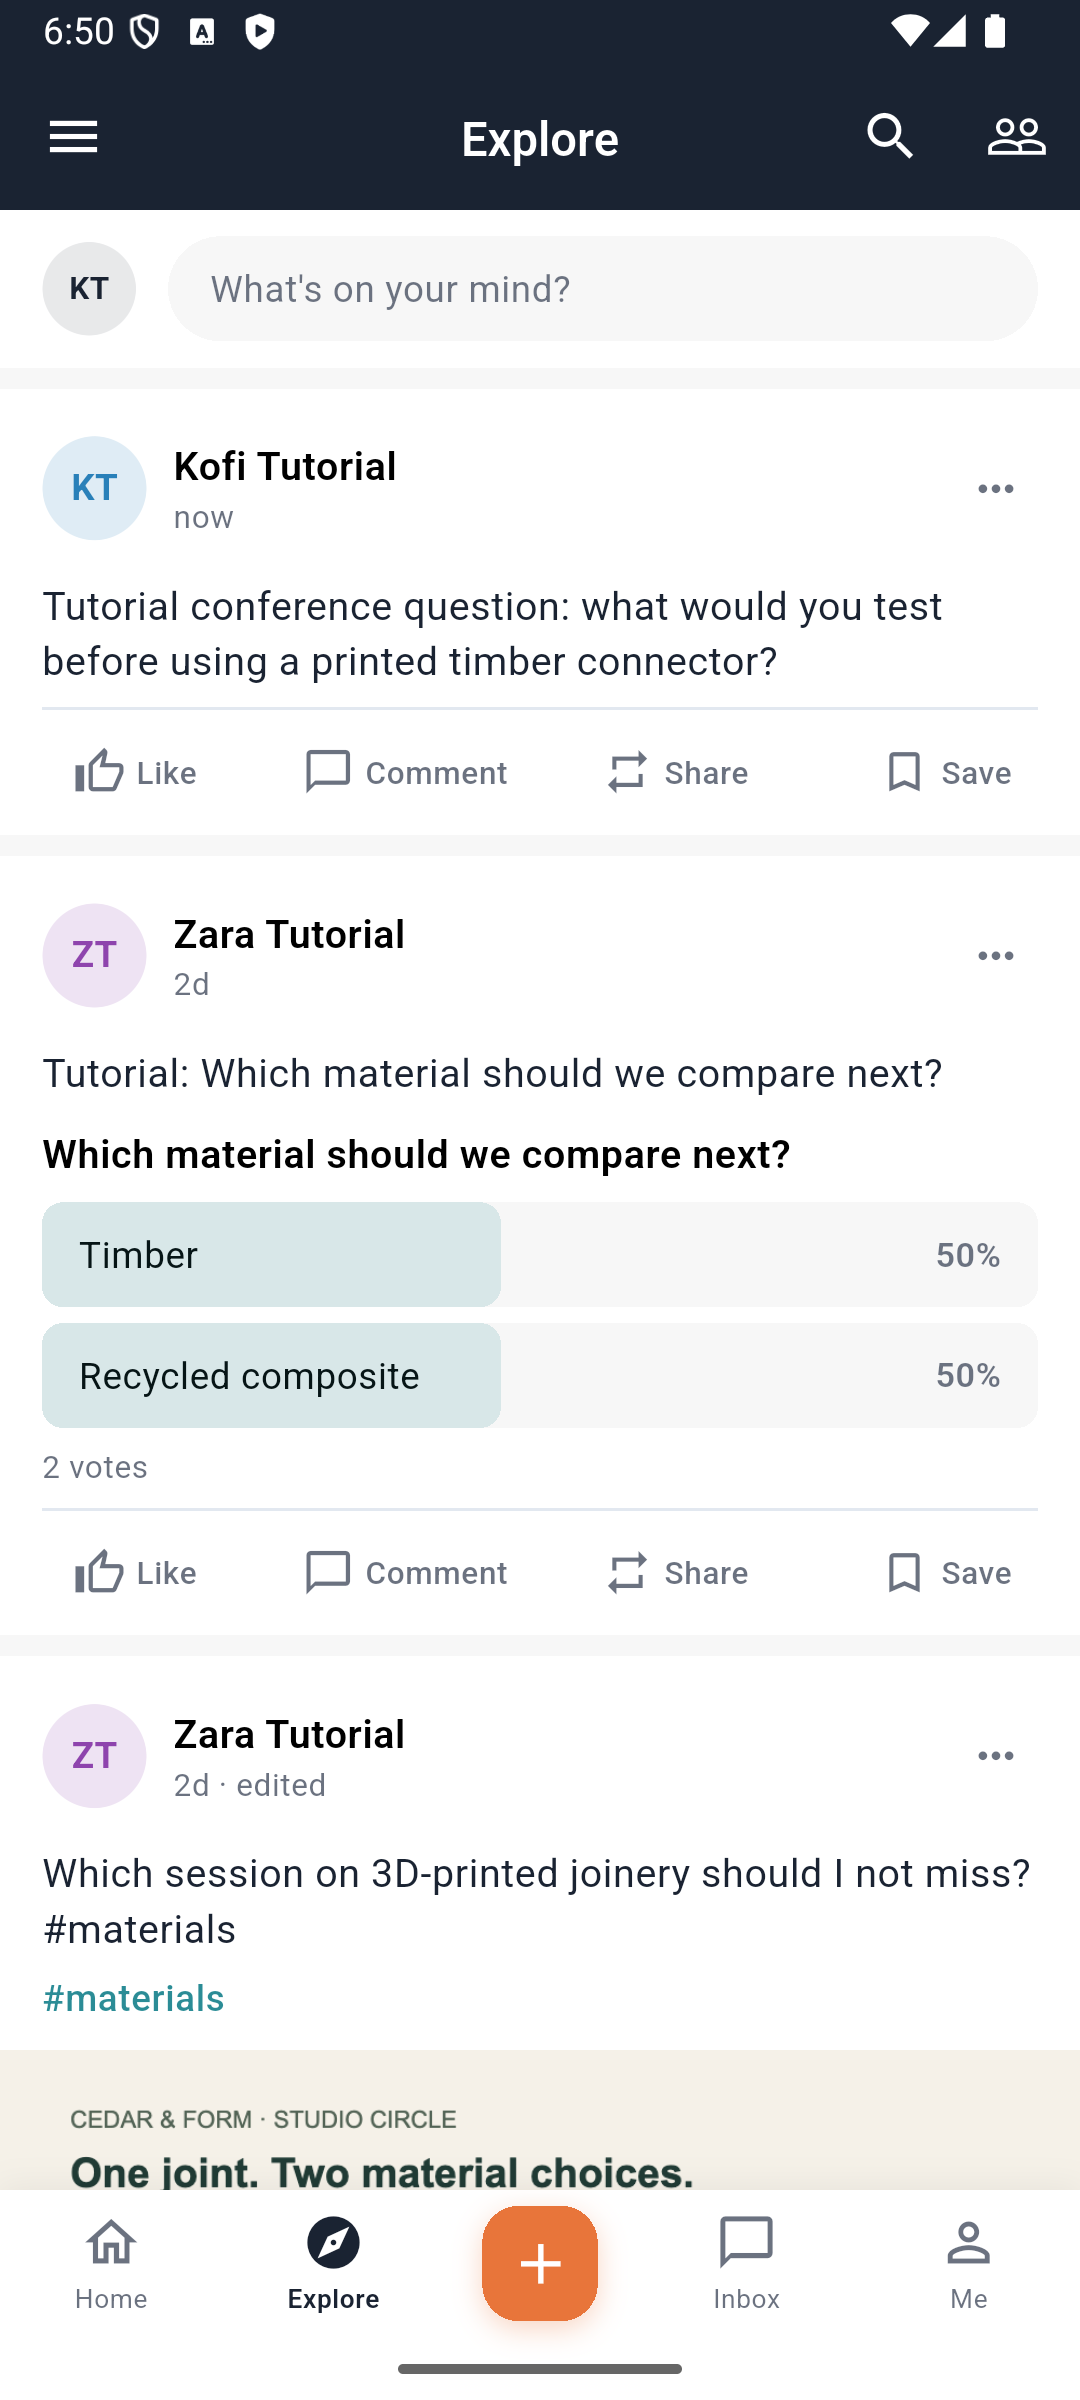
The saved record in this rehearsal had page: null and visibility: public. It was an organization-wide training post, not a private conference post. For event-scoped publishing, the organizer must first establish the page and the client’s page association. The bottom + action also opens a composer without an event-page ID in this build.
3. Save a useful contribution
Find the question you just published and tap Save beneath that post. Avoid the Save action beneath a different post. Return to Home, open the hamburger menu, select Bookmarks, then choose the Post filter. The screen title is Saved.
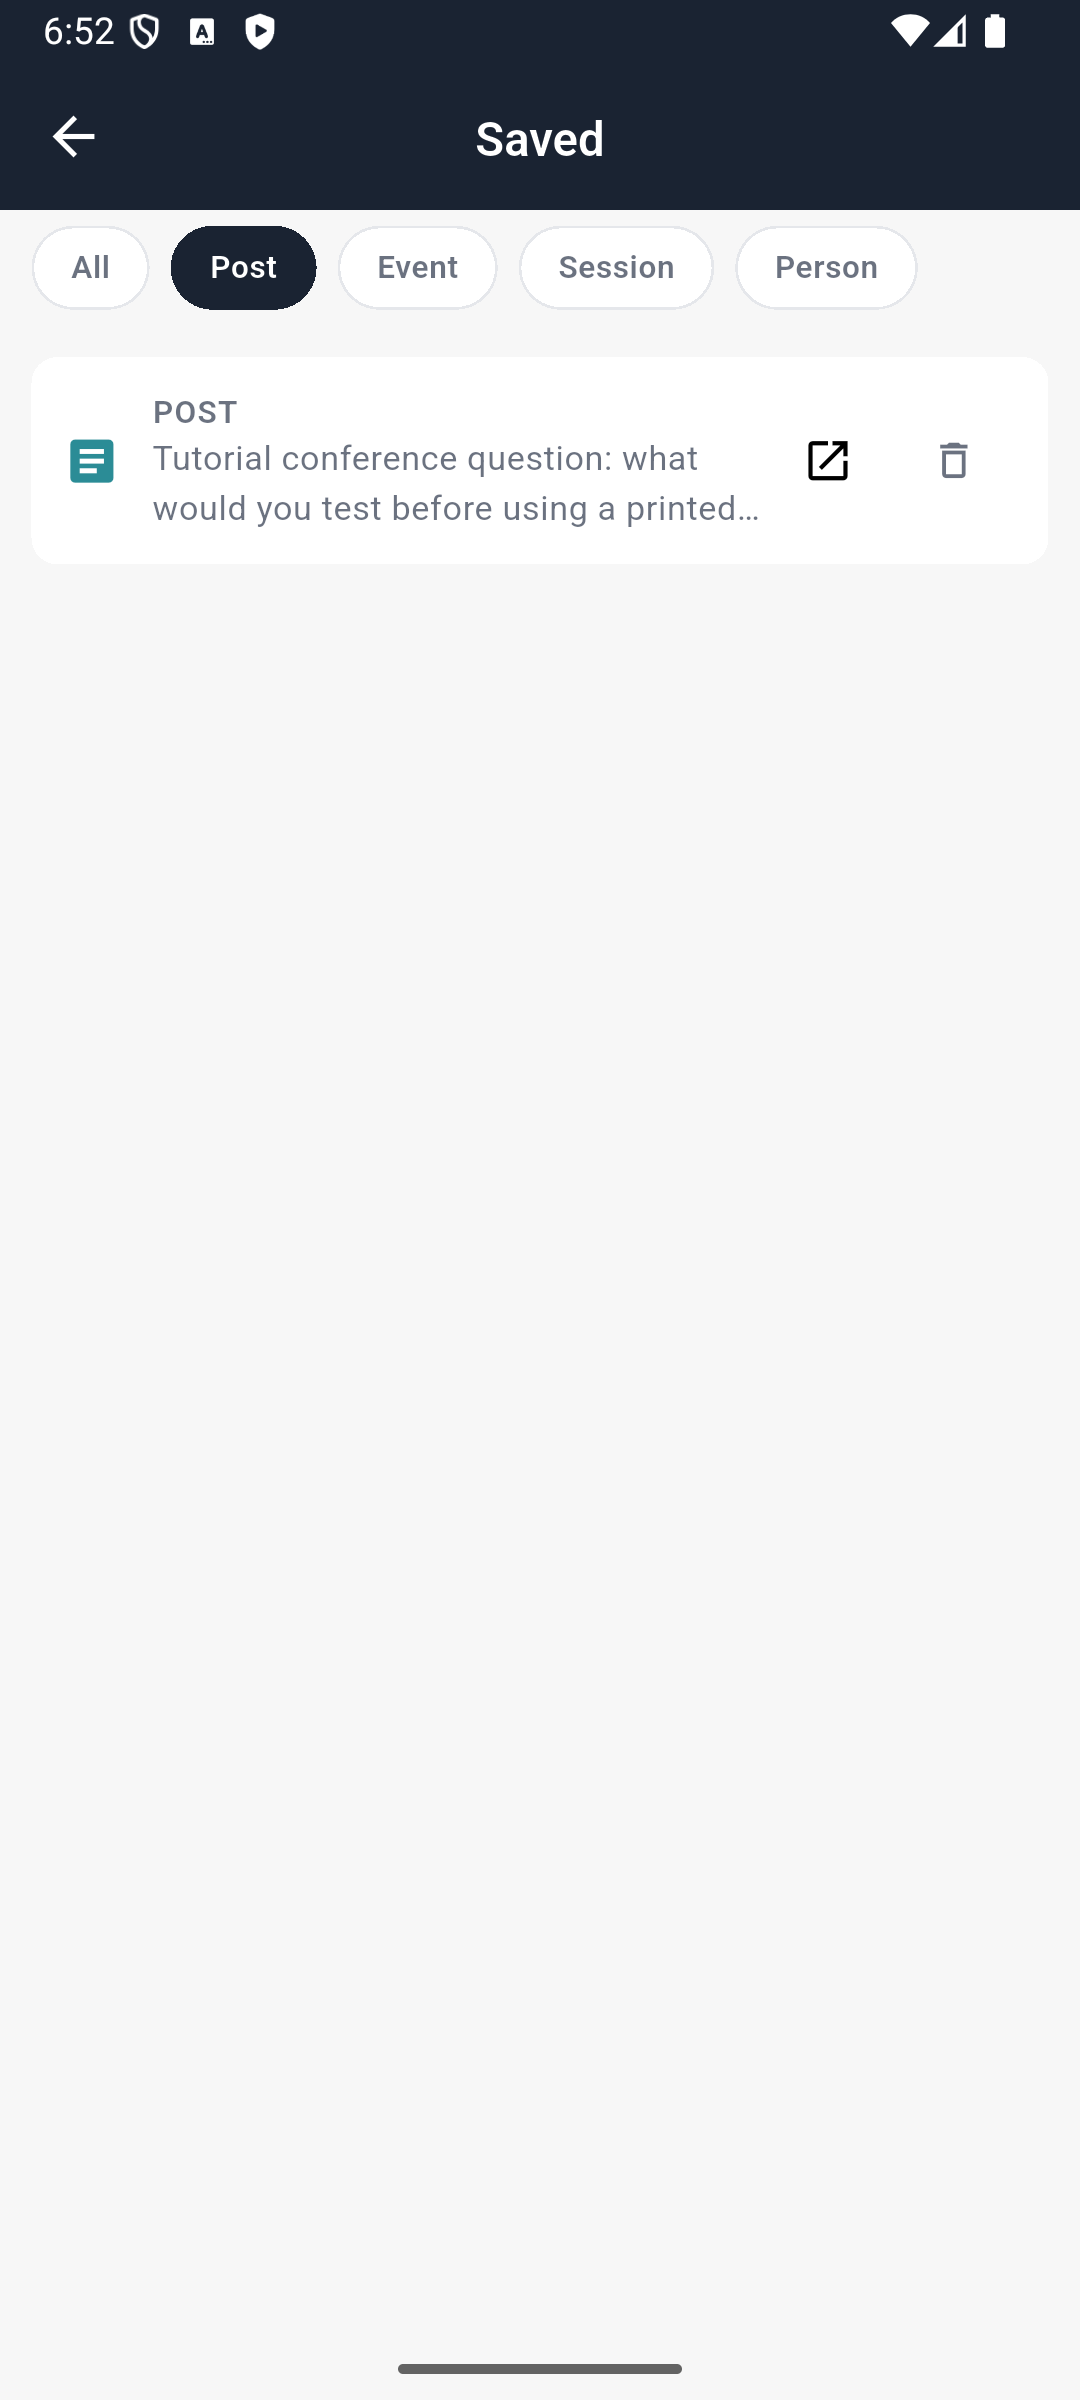
You should see: POST, followed by the beginning of your question. Select Open saved post, the arrow leaving a square beside that entry. The original question opens with its author and comment controls. Leave and reopen Saved to confirm it remains available.
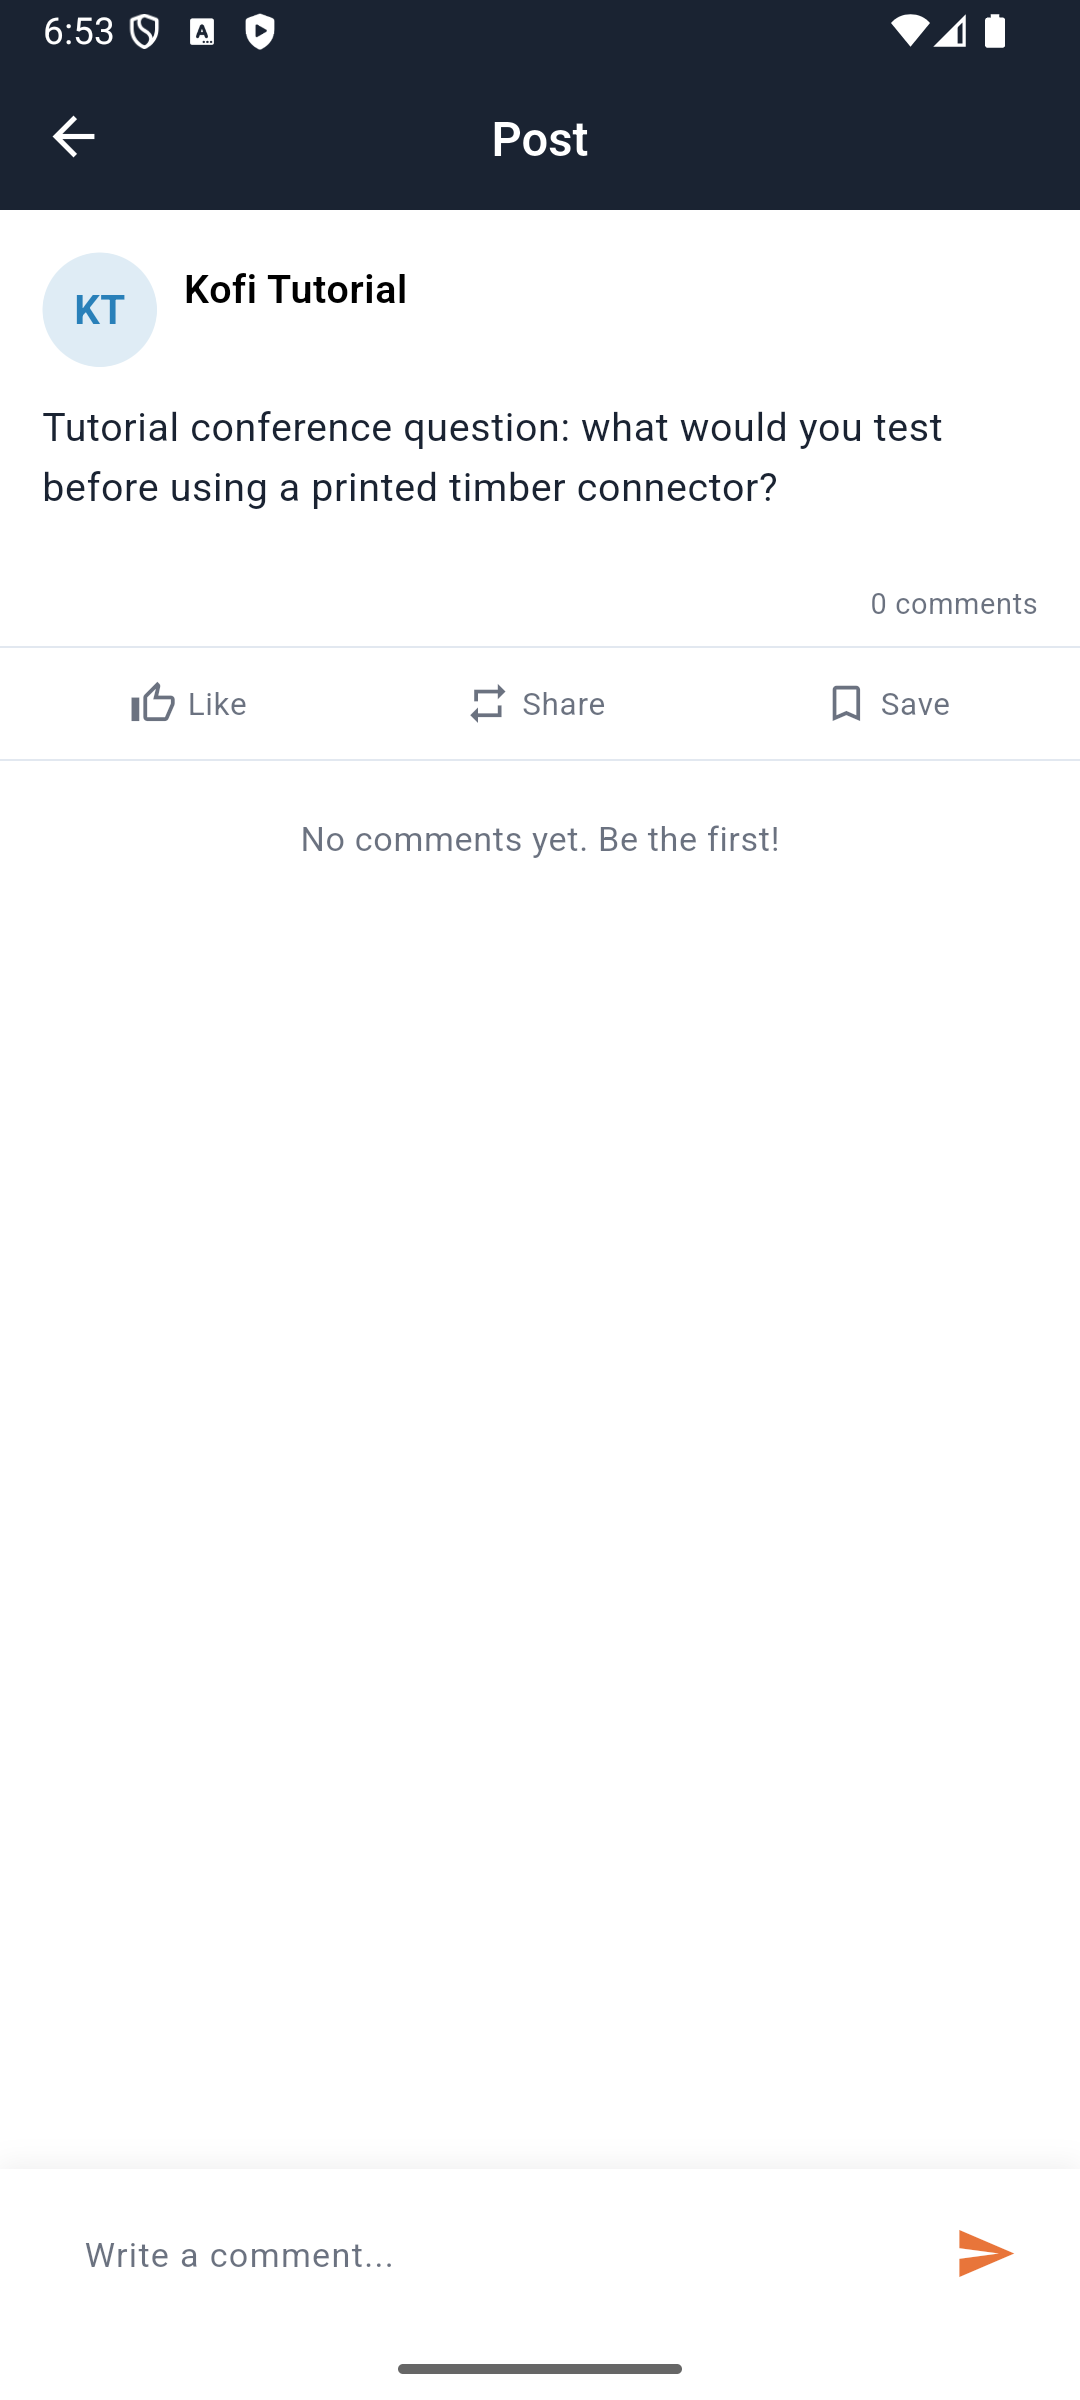
The trash control removes your bookmark, not the original post. If the post was deleted or its audience changed, opening it can fail; do not assume saving a bookmark gives permanent access. A category tab is not evidence that every corresponding screen has a save button.
Try it: make your question more useful by adding the material, constraint or decision you are considering. Keep personal project details out of the public example.
Check yourself: did a post made while the conference was open necessarily stay within that conference’s community? No. The actual record and page binding decide the audience.
Part 6 — PRO: organizer setup and supported integration repairs
1. Prepare the organization the app will actually use
The organizer course creates the event, ticket types, session and participant records. Before distributing an attendee build, verify all of these with a fresh attendee account:
- The app lists the intended organization’s published event.
- Get Tickets shows the intended prices, currency and quantities.
- A free registration appears under the same email’s My Events.
- Staff admission updates that exact ticket.
- People contains the confirmed participant records you intend to expose.
- Programme times, meeting times and community audience are correct in the app itself.
A staff dashboard that looks right does not replace this attendee rehearsal.
2. Configure a separate EventOxygen build
The source used here is appmint_go/event_app. The current local build accepts configuration in a private JSON file through Flutter's --dart-define-from-file option. You do not need to edit another organization's committed credentials.
Complete the connected-client course's staff authentication lab with your own organization owner account. Retain your API origin, organization ID and completed staff bearer privately. In the following request,
API_BASE,ORG_IDandSTAFF_TOKENmean those values; they are not supplied accounts.Register a dedicated application for this attendee build. Choose an application ID and contact email you control. Send this request from your trusted development environment, replacing the example body values:
curl --fail-with-body "$API_BASE/profile/app/register" \
  -H "orgid: $ORG_ID" \
  -H "Authorization: Bearer $STAFF_TOKEN" \
  -H 'Content-Type: application/json' \
  --data '{"appId":"my-conference-attendee-app","email":"YOUR_APP_CONTACT_EMAIL"}'
Save the response privately. Its
data.usernameis the application ID anddata.secretis the application secret. Usedata.keywhen returned; the tested registration response used the secret as the key fallback. Reuse the registered application when rebuilding; do not register it anew for every attendee. Never put the staff bearer in the mobile configuration.Create
eventoxygen-defines.jsonoutside the source repository. Replace every value below with your organization's configuration.EVENT_SITE_NAMEis the existing site record's name used for customer-facing links, not the API hostname or the event title.{ "APPENGINE_URL": "YOUR_APPENGINE_ORIGIN", "EVENT_ORG_ID": "YOUR_ORGANIZATION_ID", "EVENT_APP_ID": "REGISTERED_APPLICATION_USERNAME", "EVENT_APP_KEY": "REGISTERED_APPLICATION_KEY", "EVENT_APP_SECRET": "REGISTERED_APPLICATION_SECRET", "EVENT_SITE_NAME": "YOUR_SITE_RECORD_NAME" }The app reads these overrides in
lib/config/environment.dartin both debug and release builds. Its HTTP client obtains application authorization and adds separate customer authorization after attendee signup/sign-in. An attendee uses the normal account screens; they never enter staff credentials or these configuration values.From the
event_appsource directory, resolve dependencies and build your Android test package:flutter pub get flutter build apk --debug --dart-define-from-file=/absolute/path/to/eventoxygen-defines.jsonThe local rehearsal used OpenJDK 17. Flutter writes
build/app/outputs/flutter-apk/app-debug.apk. Install that package on your test device usingadb install -r build/app/outputs/flutter-apk/app-debug.apk. This is a development package, not a store-signed release. For an emulator connected to a local API, configure Android's host connection and development-only HTTP permission; a production build must use your reachable HTTPS API.Open the installed app before distributing anything. Events must show your published event. In the 24 September local run, the separate EventOxygen Tutorial build displayed Tutorial Makers Conference 2026. A fresh Lina account then registered one free ticket, and My Events still displayed it after reinstalling the updated app without clearing app data.
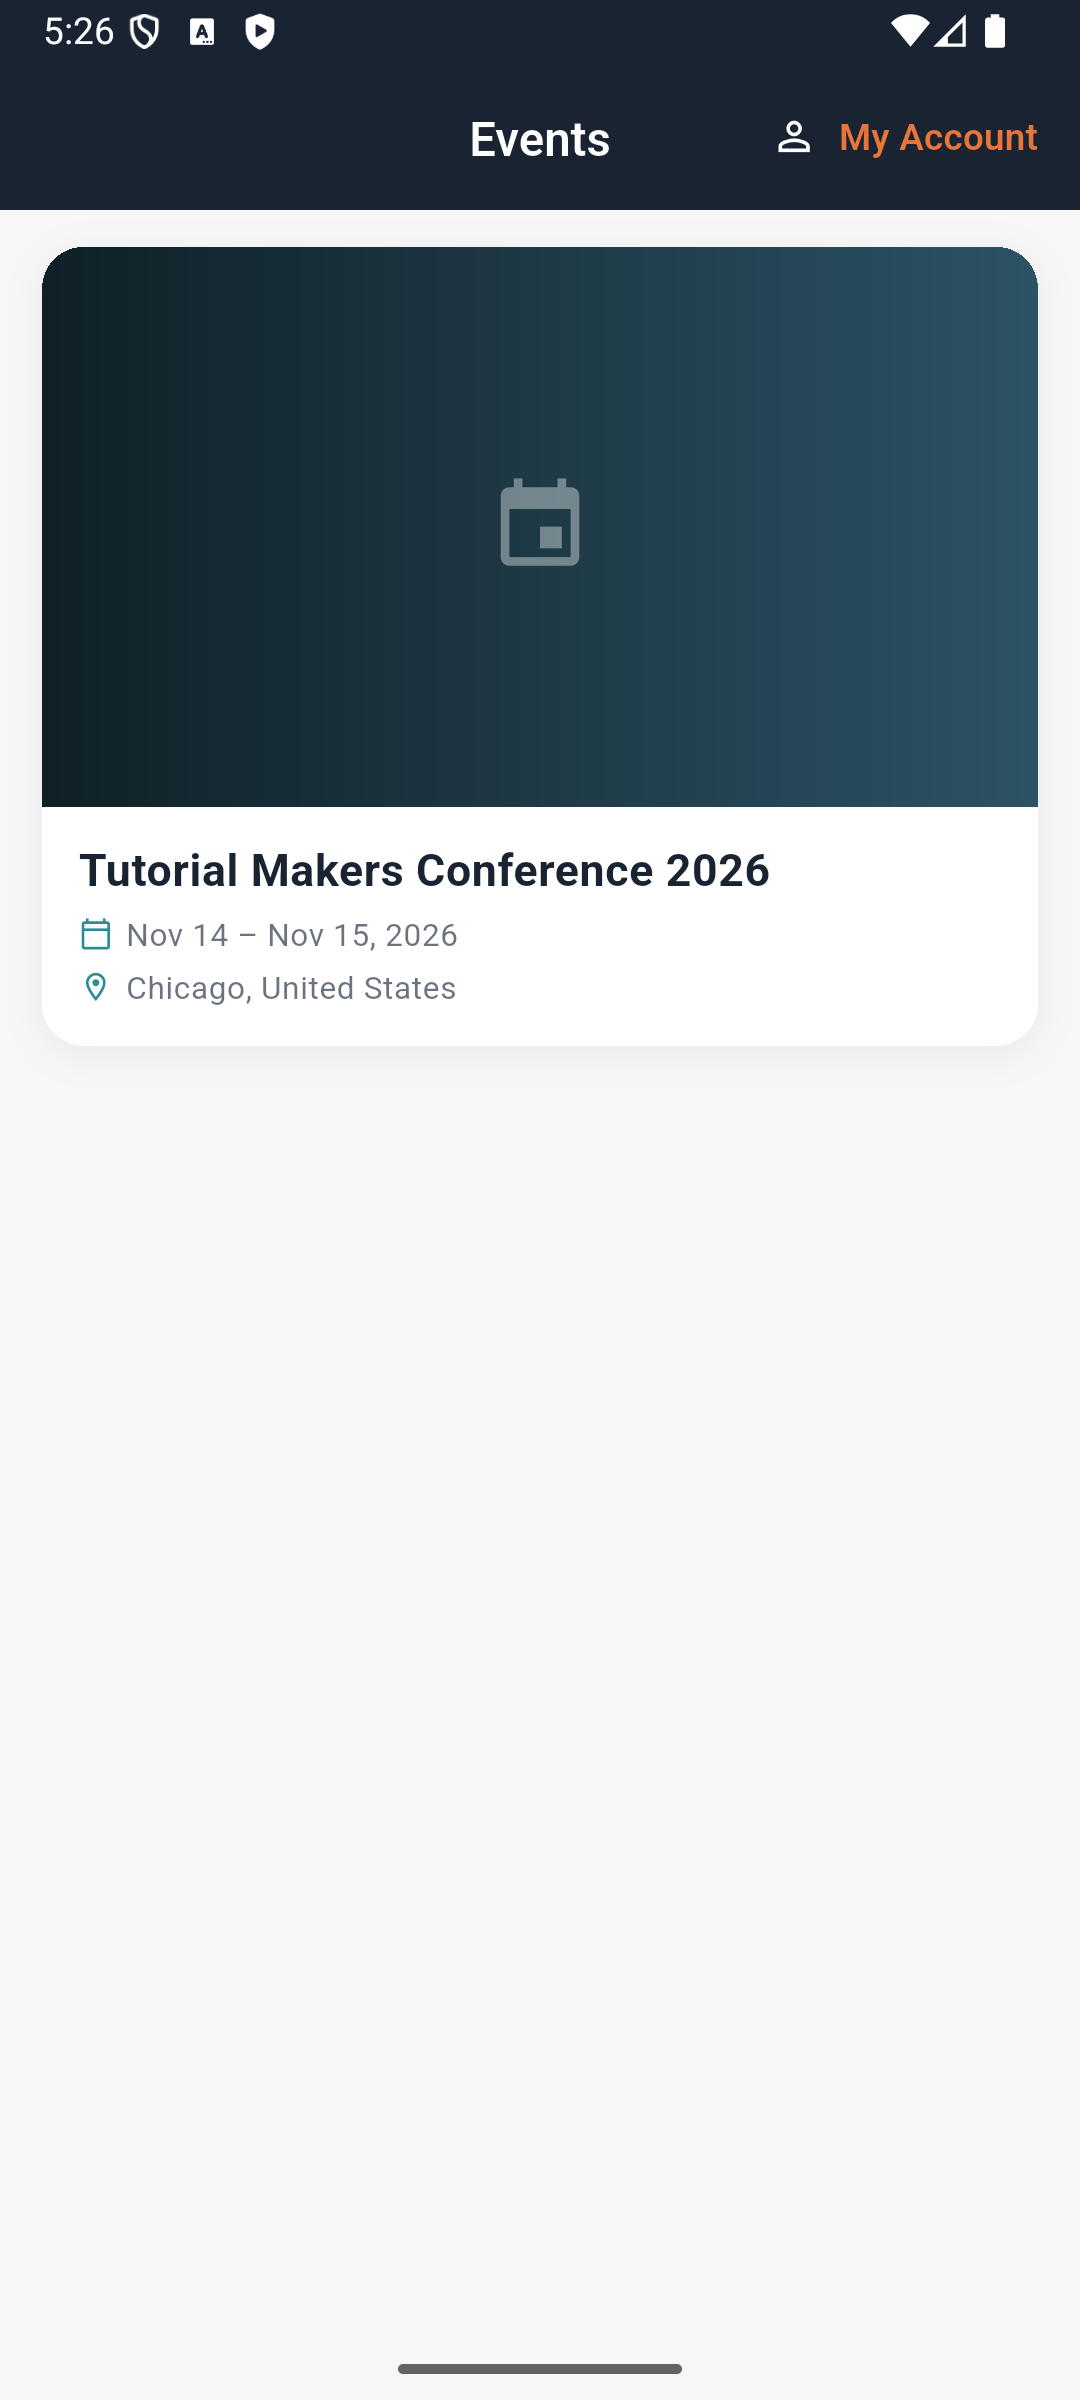

Give attendees your tested installable package or store listing and the event name. The public stock APK is a separate configured distribution; it does not acquire your organization simply because you created an Appmint account. Complete the readiness checklist above before inviting attendees. Feature fixes made during this local review are recorded in the live application review; unverified exercises remain open.
A public source-download URL and redistribution license were not established here. Obtain the authorized source distribution and applicable license from the project owner before publishing a customized app. An iPhone release also needs its signing and distribution work; the Android build is not an iOS validation.
3. Reference: meeting request fields used in the rehearsal
This is an endpoint-contract reference for integration developers. Attendees complete the working native sequence in Part 4 and do not need an API workaround. For authentication setup, use application registration in Part 6, step 2 and the connected-client authentication course. Customer-facing requests use the application bearer plus that attendee’s separate x-client-authorization: Bearer … header and the organization ID. Keep staff owner tokens out of customer requests.
Replace the fictional attendee identity, date/time and location below with your actual practice details; the example address is not a provided partner account. The 24 September native walkthrough created and accepted the meeting through these endpoints using the two fresh attendees.
The rehearsal created the request as Lina with POST /client/community/meetings:
{
  "title": "Tutorial materials coffee",
  "participantIds": ["[email protected]"],
  "startTime": "2026-11-14T12:15:00-06:00",
  "duration": 15,
  "timezone": "America/Chicago",
  "locationType": "in_person",
  "location": "Main hall stage",
  "description": "Compare material samples after the joinery talk."
}
The connection must already be accepted. The rehearsal response was 201, with the meeting in proposed state. In your authorized integration, retain the new response’s record ID for :meetingId below.
The rehearsal accepted it using Kofi’s separate customer identity with PUT /client/community/meetings/:meetingId/respond:
{ "response": "accepted" }The response was 200; the participant became accepted and the meeting confirmed. Read GET /client/community/meetings as Lina, then reopen Meetings in the app. The corrected native list displays the stored instant in the meeting’s named timezone: the local walkthrough stored 18:15 UTC and displayed 12:15 America/Chicago on both sides.
4. Understand ticket assignment before offering it
My ticket → three-dot menu → Assign to someone opens Assign Ticket, with Recipient Email, Recipient Name (optional) and Assign Ticket.
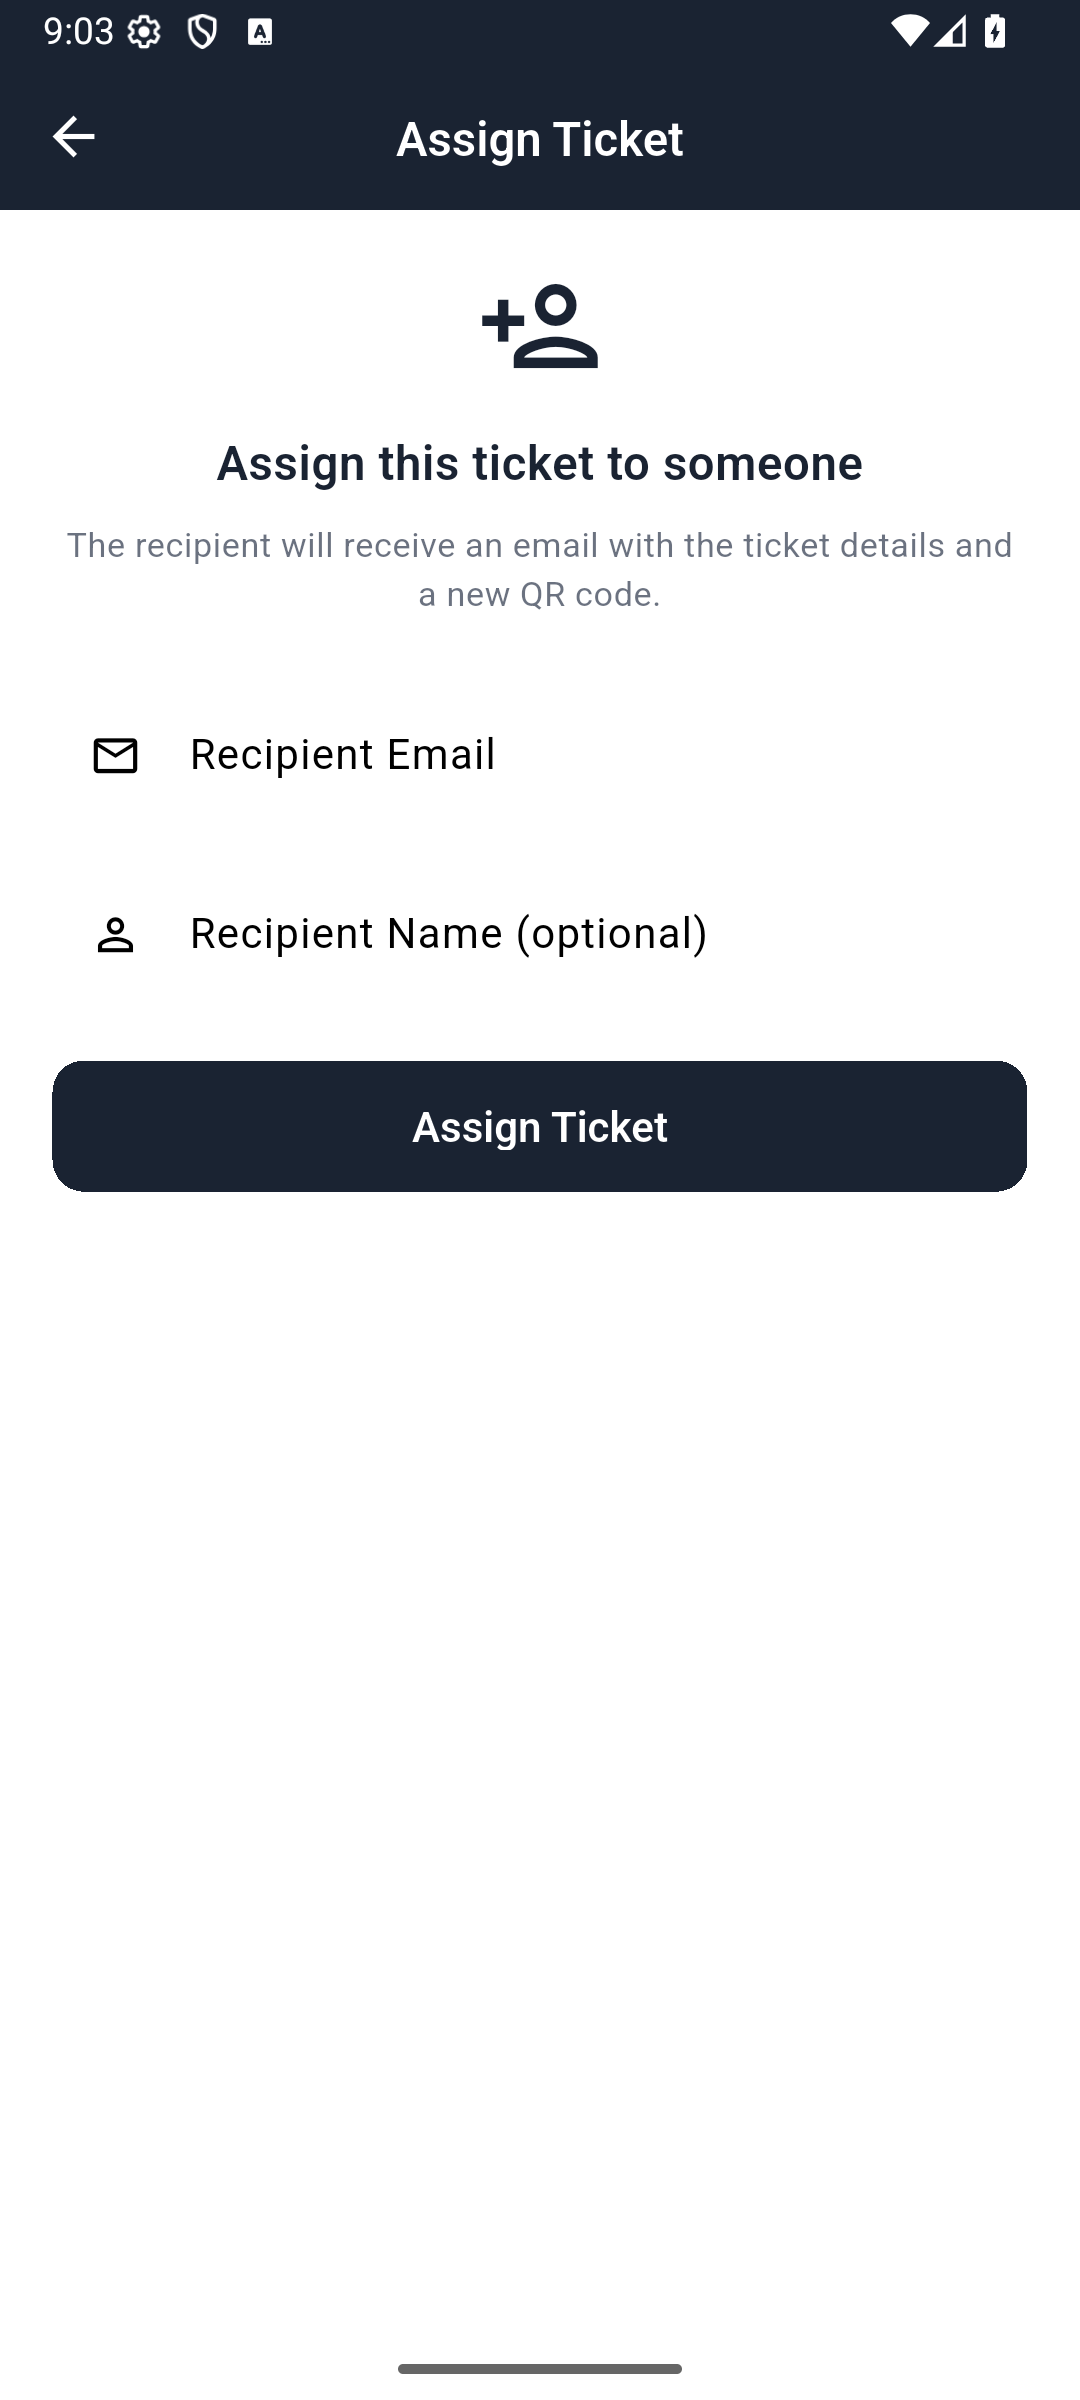
The menu was present even though this rehearsal’s General Admission type disallowed transfer. A visible action is therefore not a guarantee the service permits it. The service checks the ticket type and can return This ticket type does not allow transfers.
When an allowed assignment succeeds, the service changes the holder and code material and notifies the relevant addresses. Confirm the recipient’s exact email before a real transfer; the recipient must use that email to find the ticket. This course inspected the form without transferring either attendee’s rehearsal ticket. A launch test should verify the new holder’s view, the previous holder’s view, admission rules and message delivery together.
5. Repair the community and profile gaps at their actual layer
The event-page creation hook omitted an active status while the page list filters for active pages. Verify the event-linked page and its memberships in Studio, then make the client scope its feed and composer to that page. Avoid a silent global fallback where the UI promises an event-only audience. Existing tutorial members also hit the second-page membership issue documented in the community course.
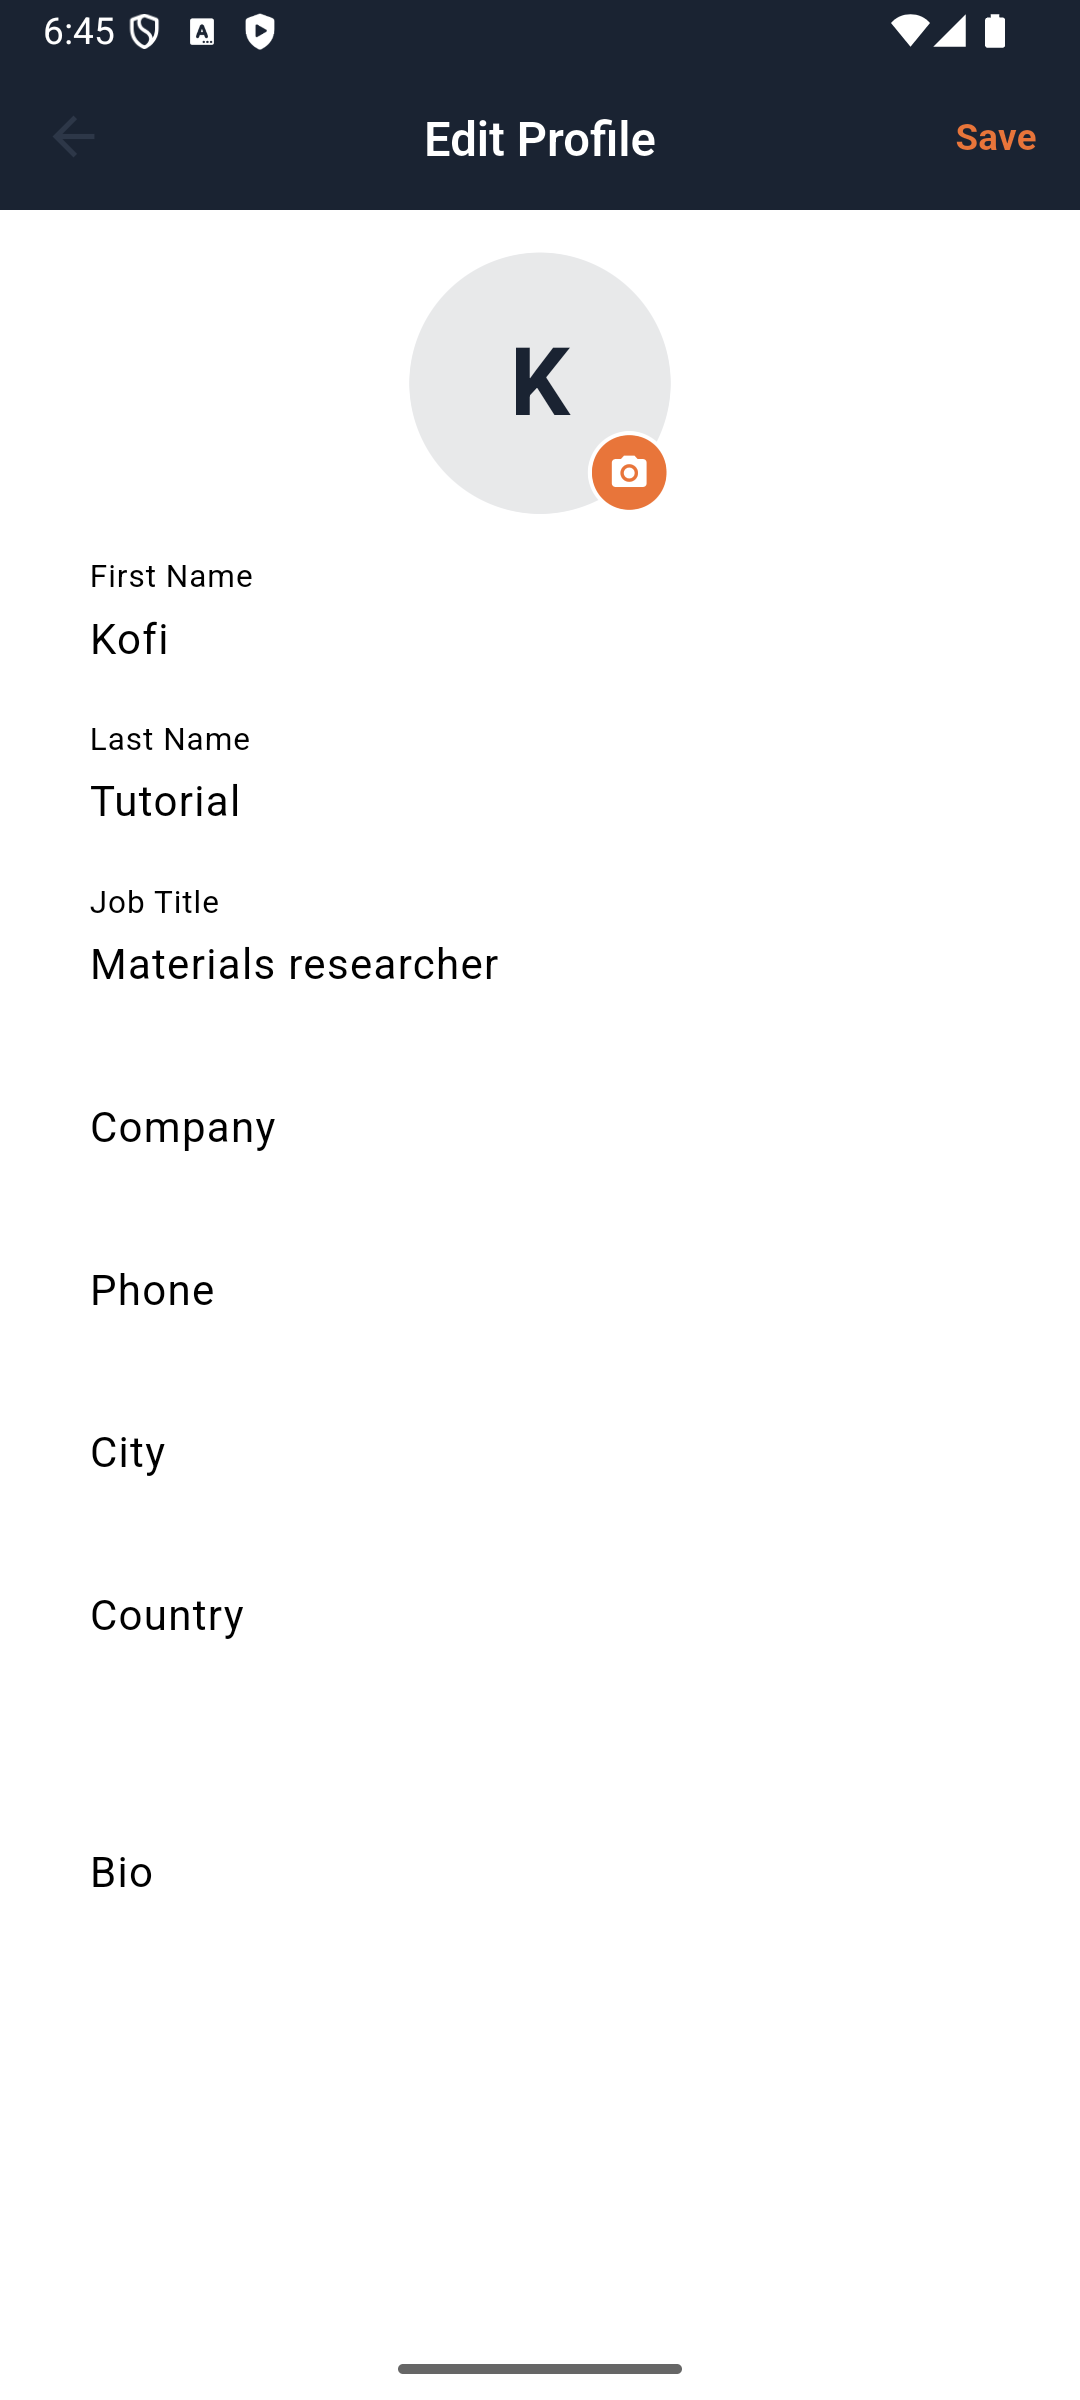
To update your attendee profile, open Me → Edit Profile. Enter a useful Job Title, such as Materials researcher, and your company or short bio if you want other attendees to see them. Select Save, then reopen Edit Profile to check your changes. The corrected build persists them to your account; the job title was also verified after a full app restart. If saving fails, your entries stay in the form with an error so you can retry.
The profile QR share action is now implemented and verified to open the Android image chooser. The event drawer’s Settings and Help still simply close the drawer. Those two drawer controls need implementation; changing tutorial wording cannot make them persist data or contact support. Give attendees a verified organizer contact route outside those controls.
For paid tickets, complete the payment verification work in the organizer course before taking real money. A pending booking is not an issued admission ticket, and an Appmint bookkeeping refund is not the same as moving money through a provider.
Try it: repeat the fresh-account, free-ticket and staff-admission sequence in your own configured build. Keep a record of the actual app version and organization used.
Check yourself: can you validate a branded attendee app by signing in as the organization owner? That tests the wrong identity. Use a normal attendee and only the intended customer-facing permissions.
If something goes wrong
| Symptom | Check first | What to do |
|---|---|---|
| Android download shows AccessDenied | Whether an APK actually downloaded | Get the organizer’s current working package; the XML error is not an APK. |
| Correct account, wrong events | Which organization the installed app is configured for | Use the organizer’s named build; the stock production app uses eventos. |
| Signup returns to sign-in | Whether you are still on the prior login route | Return once to My Events before creating another account. |
| My Events is empty after signup | Whether this email holds a ticket | Open Browse Events; if the supplied event is visible, register once under the same email. |
| Browse Events says No events yet / Check back soon | Whether the organizer’s event is available in this installed app | Ask the organizer to verify the app/event pairing before continuing; a new account does not supply a published event. |
| Policy link shows a certificate warning | The browser error and linked address | Request a working policy link through the organizer contact route; do not bypass the warning. |
| Registration fields are blank while signed in | Email and name in Get Tickets | Fill them explicitly; do not assume account details were copied. |
| Booking says PAID and Free | Total is zero | This is a settled free booking, not a card charge. |
| Ticket missing after an error | Existing booking/ticket under the holder email | Ask the desk to check before registering again. |
| QR will not admit you | Correct ticket versus profile QR; code freshness; network | Ask staff to use Manual Lookup and check the actual admission result. |
| Workshop door refuses General Admission | Ticket type’s zone access | Ask registration about workshop entitlement. |
| Another scan is accepted | Re-entry rule | Staff should follow the configured movement procedure. |
| Person missing from People | Confirmed participant record | Ask the organizer; a ticket alone did not create the listing here. |
| Connected row updates but counters do not | Reopen/refresh Connections | Use the saved accepted row while diagnosing the stale summary. |
| Message appears only on sender’s screen | Recipient Inbox and persisted thread | Reopen/check once before resending. |
| Meeting says At least one participant is required | Older app build with the wrong request field | Get the organizer’s updated build. Check All before retrying; the corrected native form creates the invitation. |
| Meeting is absent from Upcoming | Whether the recipient accepted it | Open All for proposals. Upcoming contains confirmed future meetings. |
| Add to My Schedule or Saved’s Session filter is unclear | Agenda controls versus Bookmarks | The agenda action’s behavior is unverified here; use the programme and do not infer a seat reservation. |
| Saved list only says POST | Bookmark exists but lacks display details | Return to the original feed; the list needs a richer title/link. |
| Explore includes another community’s posts | Event page lookup and fallback | Treat the feed as broader/public until the organizer verifies scope. |
| Assign action exists but transfer is refused | Ticket type’s transfer permission | Ask the organizer; do not infer permission from the menu. |
| Profile edits disappear | Save implementation | Ask the organizer for a working update route; the native handler is incomplete. |
| Share QR Code does nothing on an older build | App version | Use the organizer’s updated build; the locally verified version opens an image chooser. |
| Event-drawer Help or Settings does nothing | Known empty callbacks | Use the organizer’s verified contact route. |
| Log out leaves the event visible | Navigation stack | Return to the signed-out Events list before using another attendee account. |
What happened behind the scenes
Records, source pointers and verification
Source paths are relative to /Users/imzee/projects:
appmint_go/event_app/lib/screens/auth/register_screen.dart,login_screen.dart: account fields, validation and post-signup navigation.lib/screens/customer/public_events_shell.dart,my_events_screen.dart,event_detail_screen.dart,booking_summary_screen.dart: browsing, email-specific tickets, checkout and confirmation.lib/providers/event_provider.dart,lib/screens/customer/ticket_screen.dart: ticket persistence, enrichment, pinning and assignment. The current ticket screen usesLiveTicketQrto fetch and renew holder-authorized codes, clears them in the background and hides them when refresh fails. Refreshed tickets also replace the active Home ticket list.lib/screens/customer/event_shell.dart,event_home_screen.dart,schedule_screen.dart,session_detail_screen.dart: actual navigation and programme presentation.lib/screens/customer/people_screen.dart,connections_screen.dart,chat_screen.dart,meetings_screen.dart: connection request/acceptance, messaging, meeting form payload and time display.lib/screens/customer/feed_screen.dart,create_post_screen.dart,bookmarks_screen.dart: event-page lookup, global fallback, composer association and saved-post presentation.lib/screens/customer/me_screen.dart,qr_profile_screen.dart,edit_profile_screen.dart: profile editing, persistence and profile QR sharing.appengine/src/events/events-client.controller.ts,events-client.service.ts,event-ticket.service.ts: holder-specific ticket reads, public purchase, transfer and QR handling.appengine/src/community/community-client.controller.ts,community-connection.service.ts,community-messaging.service.ts,community-meeting.service.ts,community-page.service.ts: accepted connection, saved thread, correct meeting payload and page creation/listing.
Capture ledger, download error, attendee ticket after admission, redacted, accepted connection, message received through the customer endpoint, bookmark, failed-form meeting list, supported meeting create, accepted meeting, public feed record with signed URLs removed.
Where next
- Run the event and rehearse the staff door — event setup, ticket access and registration operations.
- Build and moderate the community — page membership, reporting and moderation.
- Get started with Appmint Mobile — the separate staff app.
Current evidence, 24 September 2026: native Android API36 emulator, a separately configured current-source EventOxygen Tutorial app and real isolated local AppEngine data. Two fresh attendee accounts completed signup and free registration. Native checks passed for ticket reopening and staff manual admission, schedule bookmarks, People filtering, accepted connections with immediate totals, reciprocal messages, native meeting creation/acceptance and venue timezone, profile Save/restart/server readback, profile QR image sharing, learner-created post save/reopen, logout, ticket QR renewal/offline recovery and pin/unpin. Application source was repaired during this review. Current fixes and proof.
The Privacy Policy destination is corrected and passed native navigation; the intended Terms of Service destination remains unresolved. No iOS execution, paid payment/refund, actual ticket transfer, physical QR-camera decode or finished companion video is claimed. The 18September capture ledger remains historical evidence; current repair screenshots are explicitly linked above. Video production guide.
Independent stock-app review, 18 September 2026: the corrected public APK, EventOxygen 1.0.0 (8), installed on a fresh API 36 emulator. A new reviewer account reached My Events using Android Back and remained signed in after reopening. Browse Events stayed empty, so the reviewer did not execute the ticket, programme, networking, feed or admission exercises. The signup policy page showed a certificate warning. Documentation corrections on 21 September use that saved evidence; they do not establish a new end-to-end app pass.