
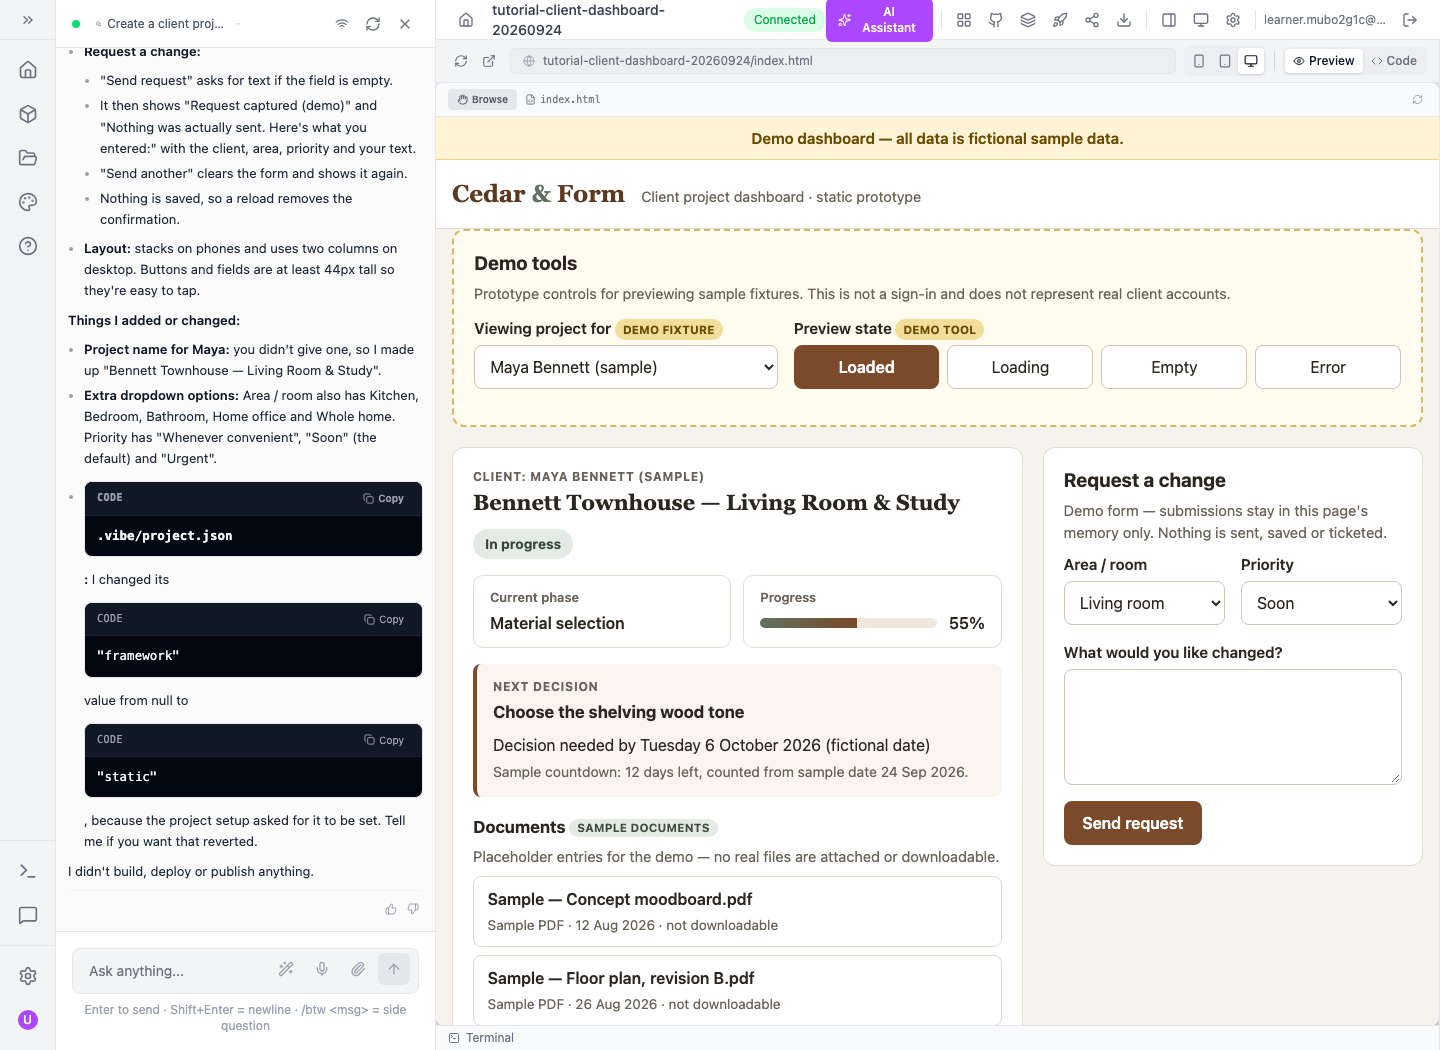
 A useful first prototype: Maya can see the project's stage and next decision. The banner clearly identifies fictional sample data.
Who: business owners shaping a custom app and developers taking it toward production. Time: 60–90 minutes. Level: beginner prototype, then developer integration. Product: Vibe Studio. Checked: 24 September 2026, current local source with actual model generation and preview acceptance; hosted sign-in and earlier editor captures are labelled separately. Story: Cedar & Form's interior-design client dashboard.
What you will have at the end
You will understand Vibe's project brief, creation form, assistant, files, code, preview, device layouts and launch drawer. You will test a generated dashboard's normal, loading, empty and error states; enter a sample change request; and distinguish a working prototype from a connected customer application.
The practical result is a working sample-data prototype. The developer chapter supplies a concrete integration contract and acceptance checks based on the tested AppEngine course. It does not pretend the generated client selector is authentication or that its local form sends a real request.
What you need
- Your own production Appmint account from Welcome to Appmint. Use the same company ID, email and password for Studio Manager and Vibe Studio.
- Vibe Studio. The sign-in screenshots below use the hosted Vibe service; the latest generated-dashboard screenshots use the local developer build; an account created only on a local development installation will not sign in to that hosted service. Developers can run the current Vibe source against their own local AppEngine, but must configure the separate session manager before project creation.
- A concise business outcome, fictional examples and a name available for your project.
- For the developer chapter, the connected-client course and two customer accounts you control in a training organization.
Appmint and its apps are free. The original hosted tutorial project is cedar-client-learning. The fresh local generation uses tutorial-client-dashboard-20260924. Use your own name; you do not need this organization or its credentials. Reopen an existing project when continuing a lesson instead of creating duplicate environments.
The story
Cedar & Form's clients repeatedly ask three questions: “Where is my project?”, “What do I need to decide?” and “Where are the documents?” The prototype puts those answers together and gives clients a place to describe a change. Maya Bennett and Jordan Lee are fictional examples with different project stages, so the design must work for more than one happy-path screenshot.
The route
Business brief → project and generated files → interactive sample preview
                                               ↓
                             state tests → mobile check → data contract
                                                              ↓
                              server ownership checks → connected app → release
Part 1 — Sign in and create a deliberate project
1. Use your production Appmint identity
On Vibe's login page, enter your Email, then select Continue with Password. On the next step, enter your company ID in Site Name, enter your password and select Sign In.
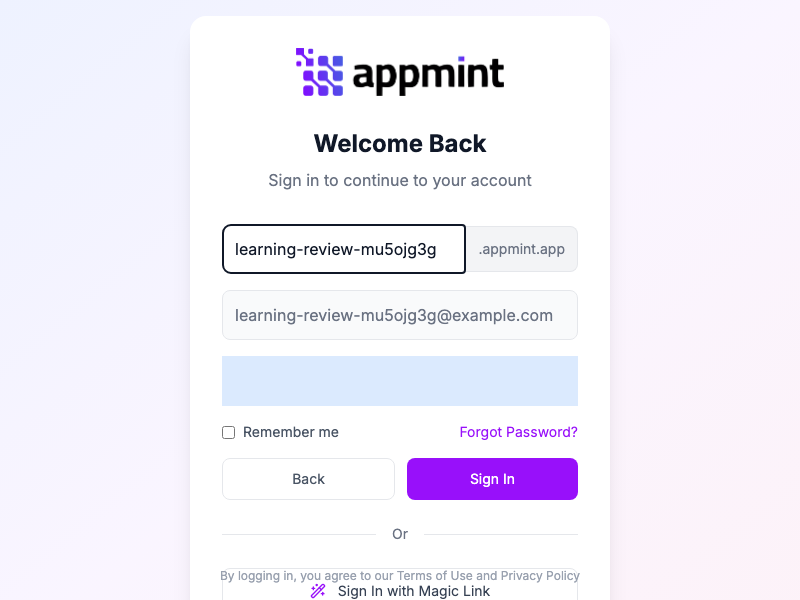
Here Site Name is the organization identifier used for authentication, not the name of a website you created in Build Studio. If a saved account chooser appears, select your company; an expired session needs sign-in again. Sign in to another organization opens the email form when the needed account is not listed.
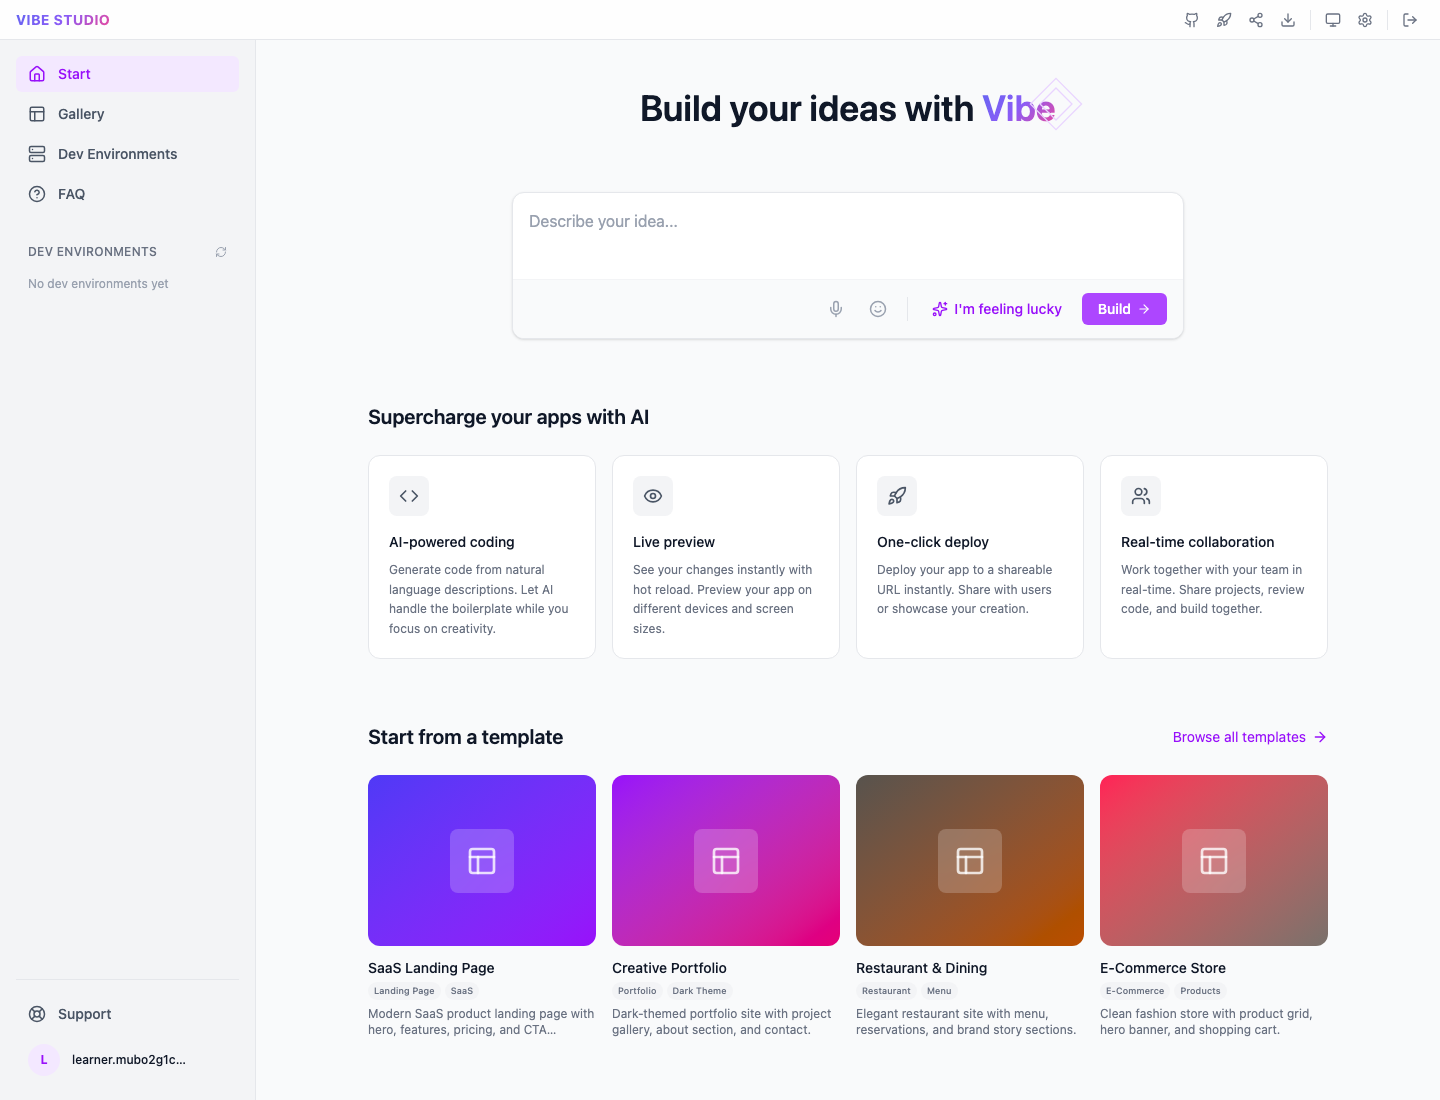
Wait for Build your ideas with Vibe. The page contains Start, Gallery, Dev Environments, FAQ, the brief box and Build. The sidebar also lists existing projects.
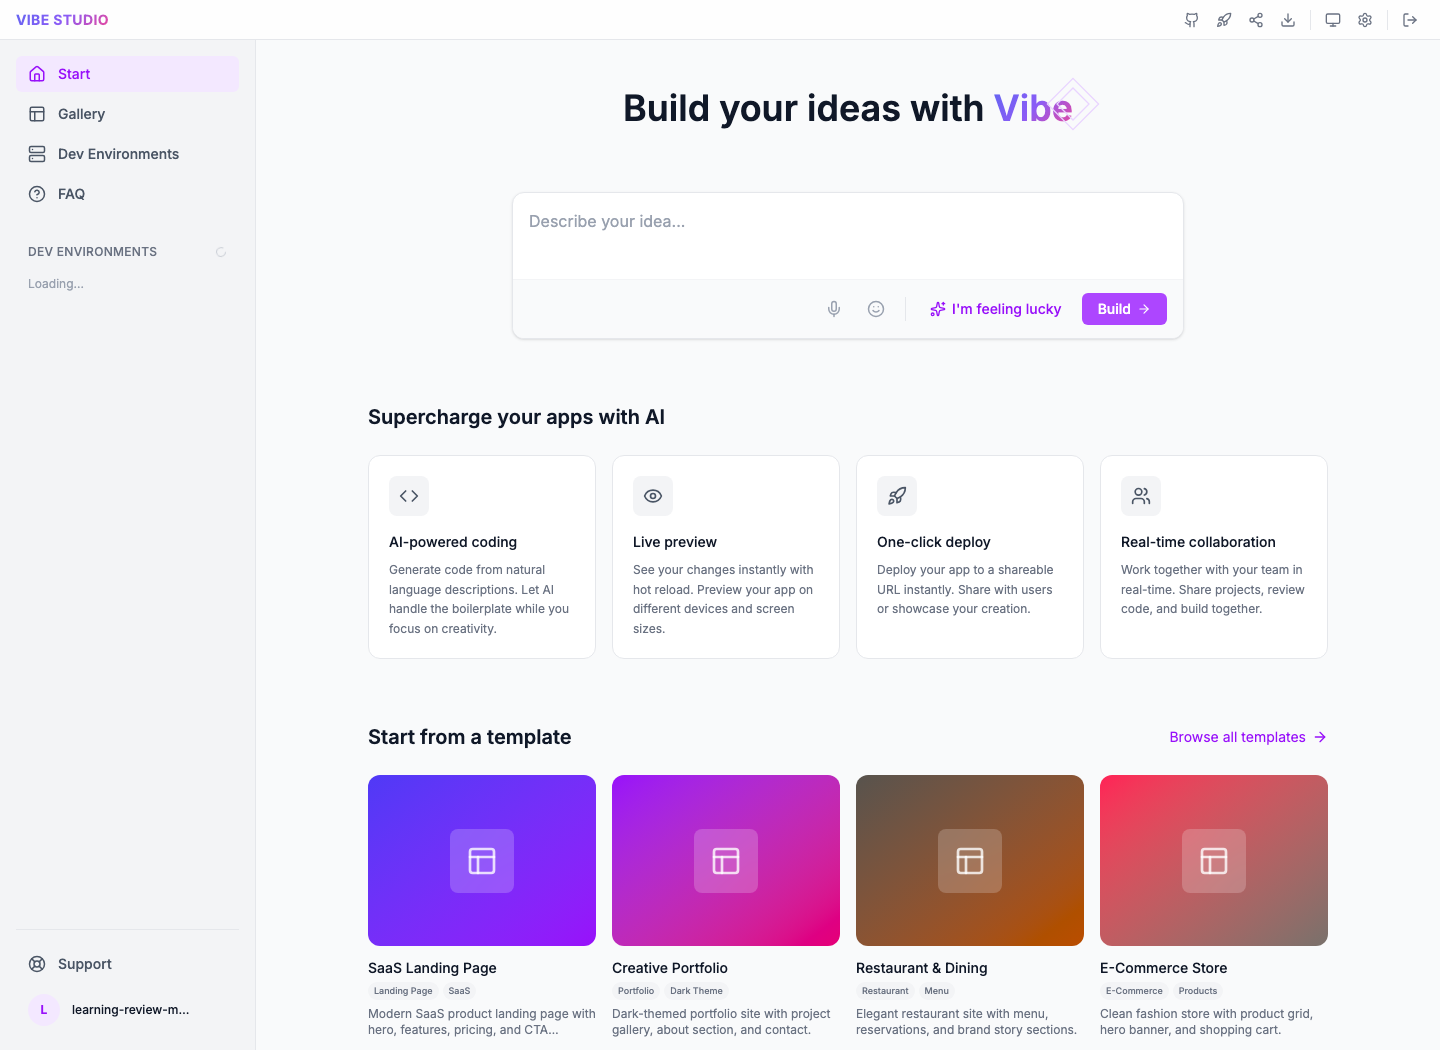
Gotcha: “Signing in…” is a transition, not the finished result. Wait for the Start screen and your project navigation. Do not create another Appmint account merely because a saved session expired.
Local developer check, 24 September: the current Vibe frontend also accepted the review organisation’s ordinary local email/company/password login and reached Start. A page reload retained the session. This is a separate local identity, not access to the original hosted project. The full brief below carried unchanged into Create New Project. The continuation created its AppEngine record and session-manager project, opened the editor and reopened it after reload. The actual model then generated the three requested files; both fictional clients, all four states, retry, the sample request and reload reset passed in Preview.
2. Write what the client needs to accomplish
In Describe your idea..., enter:
Create a client project dashboard for Cedar & Form interior design as a static prototype using
index.html,styles.cssandapp.js. Put fictional fixtures and behaviour inapp.js. Do not use a backend, real accounts, network calls, analytics or deployment.Show a persistent banner: “Demo dashboard — all data is fictional sample data.” Add a dropdown labelled “Viewing project for” with “Maya Bennett (sample)” and “Jordan Lee (sample)”. This is a demo fixture selector, not authentication.
Maya's fixture: status “In progress”, phase “Material selection”, progress 55%, next decision “Choose the shelving wood tone”, and four clearly labelled sample documents. Jordan's fixture: project “Lee Garden Apartment — Full Redesign”, status “Awaiting your input”, phase “Concept review”, progress 30%, next decision “Approve the concept direction”, and three sample documents. Use explicit fictional decision dates and label any countdown as sample data.
Add a “Preview state” control with Loaded, Loading, Empty and Error buttons. Loading shows “Loading project… (simulated)” and a skeleton. Empty shows “No project yet”. Error shows “We couldn't load this project”, explains that it is simulated and offers “Try again”; that button briefly shows Loading then returns to the selected client's Loaded state. Switching the client also shows Loading before that client's values.
Add “Request a change” with “Area / room” including Living room, “Priority” including Soon, and a “What would you like changed?” text field. “Send request” must only echo the entered values under “Request captured (demo)” and “Nothing was actually sent. Here's what you entered”. “Send another” returns to the form. Keep the request in memory only: a full reload removes the acknowledgement. No actual message, ticket or server write.
Make the controls usable at mobile, tablet and desktop widths. Keep all fixture controls visibly labelled as demo tools; do not claim customer isolation or production readiness.
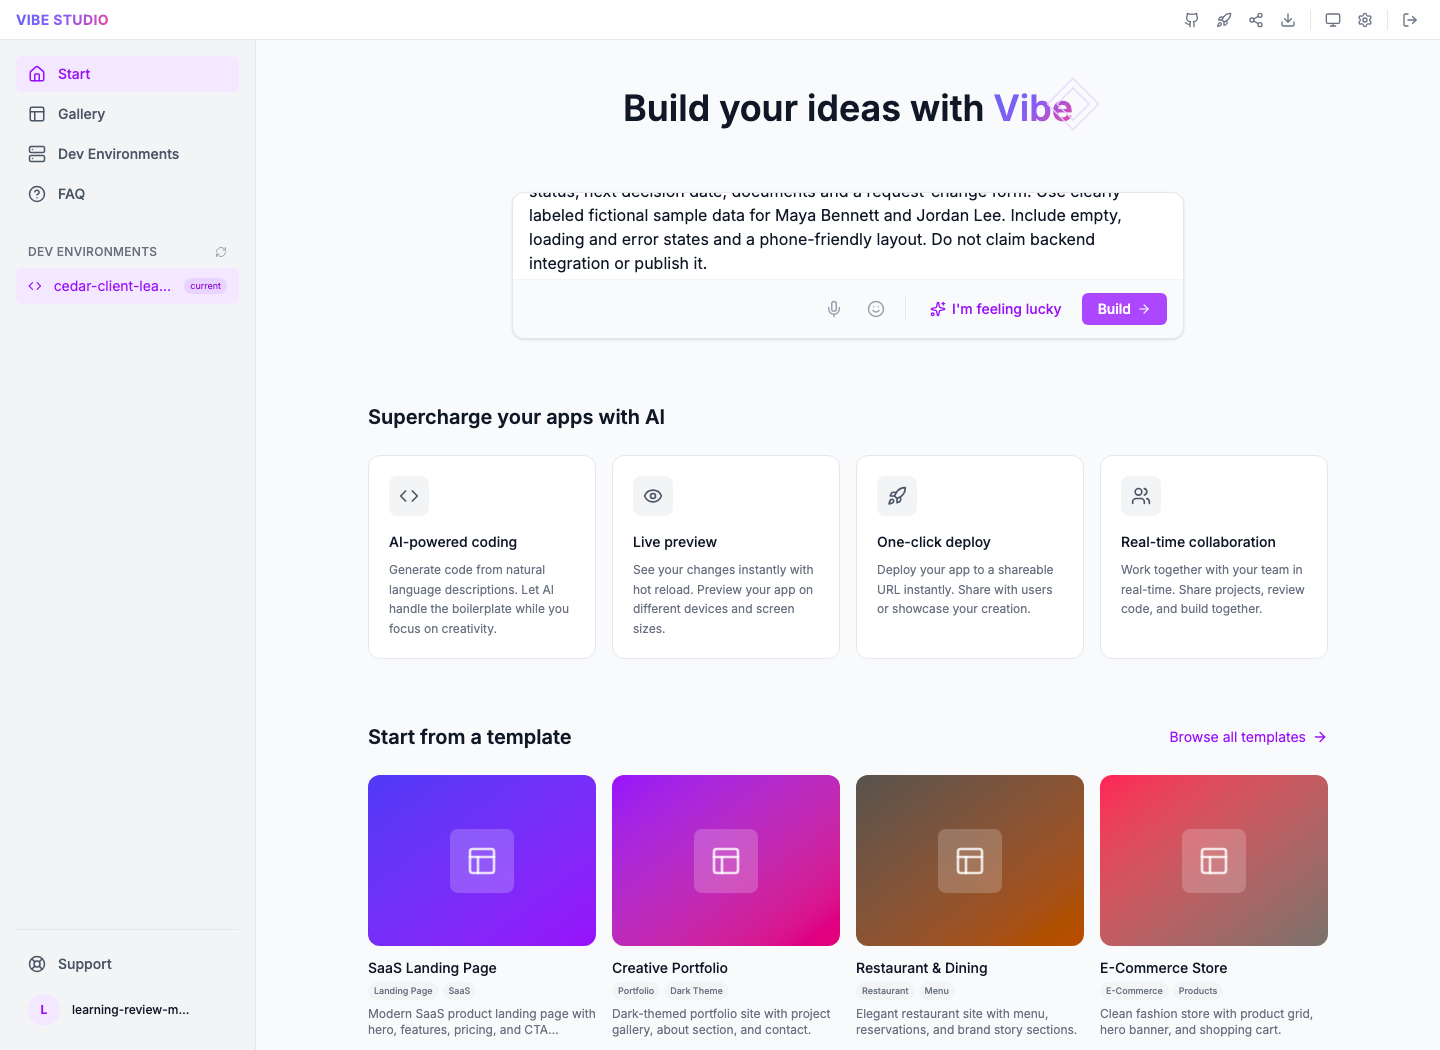
This brief supplies audience, tasks, data boundary, alternate states and device needs. Those details give you something specific to evaluate. “Make a dashboard” leaves all of those decisions implicit.
You can adapt the story to a repair shop, consultancy or event business. Keep the same discipline: who uses it, which decision it helps, which information it needs, and whether the first version uses sample or connected data.
3. Inspect the creation form before provisioning
Select Build. Create New Project opens with App and Design, the carried description under What do you want to build?, and Dev Environment Name.
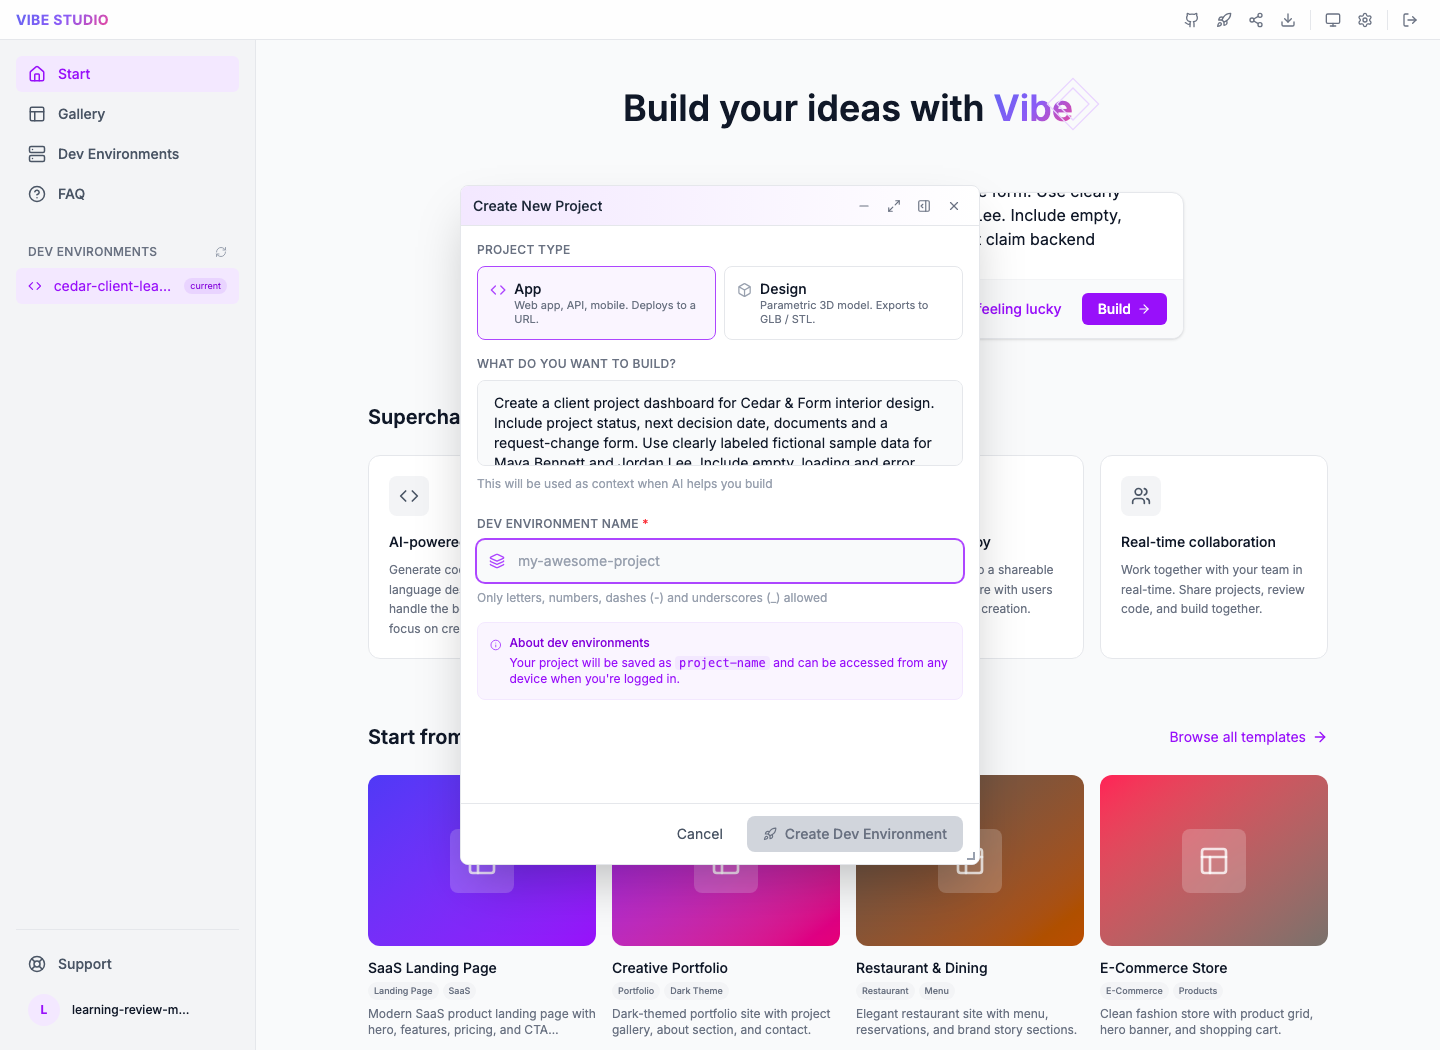
Choose App for this dashboard. Enter an available project name in Dev Environment Name, such as cedar-client-learning if it is available in your organization. The form permits letters, numbers, dashes and underscores. Keep the name recognizable; it identifies a development project, not your legal company name.
Select Create Dev Environment once when creating your own project. Our original creation produced the existing project used throughout this course. The fresh screenshot shows the form reopened for inspection; we cancelled it and reused that project.
Gotcha: Design is the parametric 3D branch, described as exporting GLB/STL. It is not a website-theme selector. If a project already exists, open it through Dev Environments or the sidebar instead of submitting the same creation again.
4. Let the carried brief finish
The editor opens with AI Assistant, Files, Preview, Code and Terminal. The original empty editor showed No files yet — Create or open a file to start before generation created app.js, index.html and styles.css.
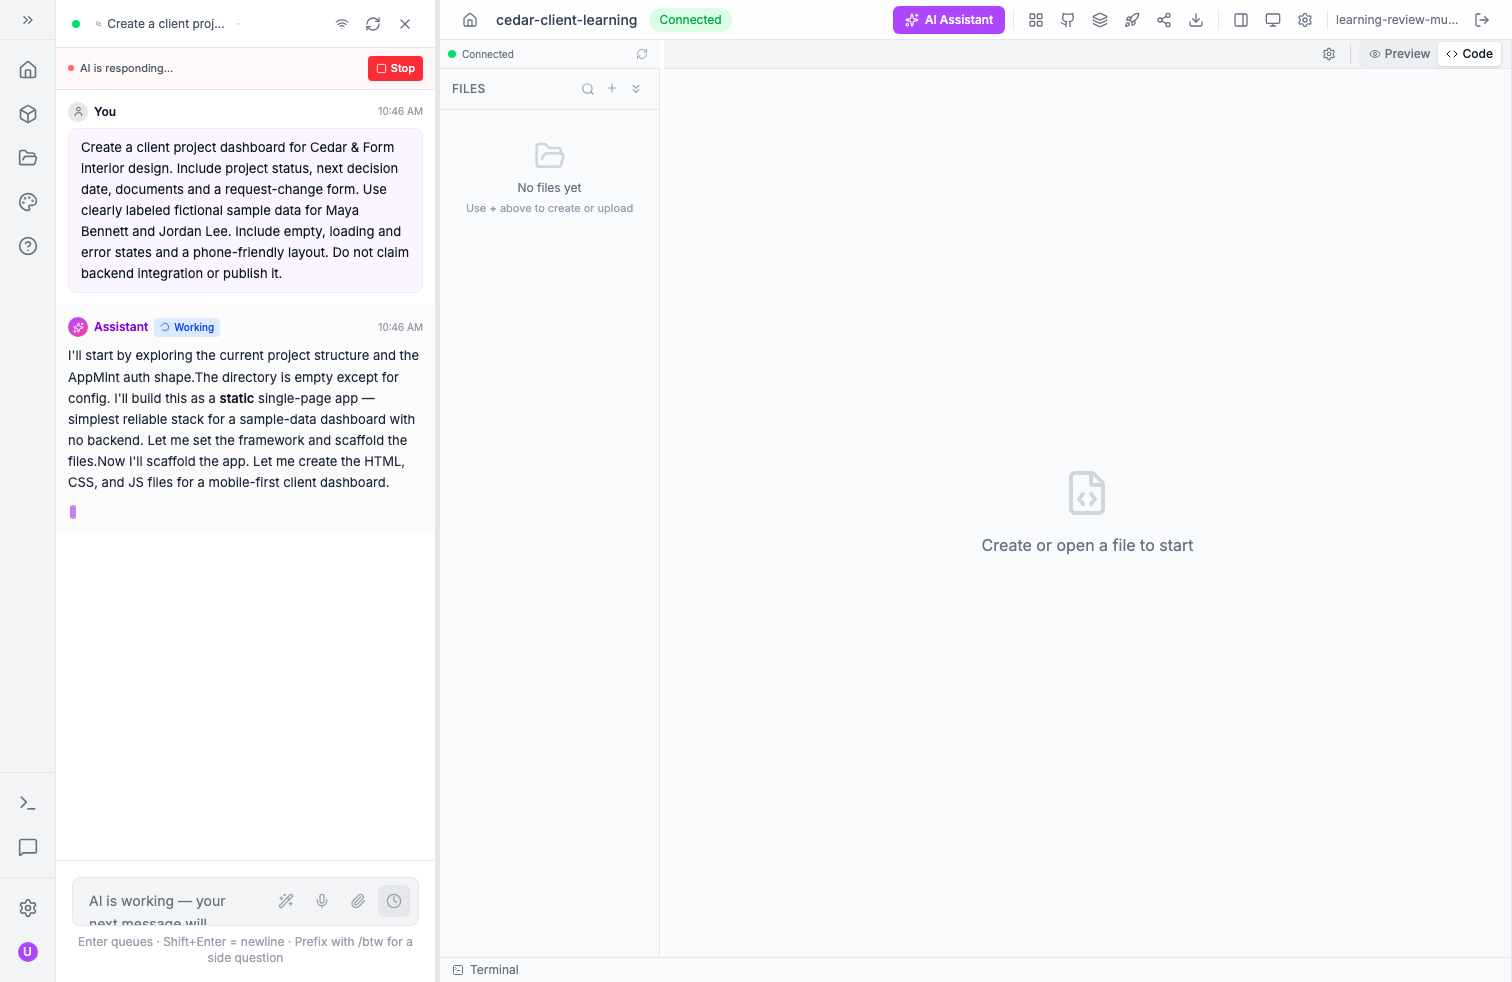 Historical capture from the actual 17 September generation. The following captures show that same project reopened on 18 September.
Watch the assistant's progress before sending a second build request. When the turn completes, the Files tree refreshes automatically. Inspect the new files and the actual preview. Before Part 2, check that the three named files, both sample clients, four Preview state buttons, Try again and the three request fields exist. If a required item is missing, send a targeted refinement in AI Assistant: ‘Keep the current design. Add the following missing items from the brief: [list the missing labels/behaviours]. Keep all data fictional and do not add network calls or publish.’ Wait for that change and check again. Do not skip a later acceptance test because the generated version omitted its control. The expanded brief was independently generated and exercised on 24 September. It produced all required controls without a refinement request. Your visual design may differ; compare the requested behaviour rather than matching a screenshot pixel for pixel.
Try it: before generation, write down one question your client should answer from the page and one action they should be able to take. After generation, locate both in the preview.
Part 2 — Learn the editor by checking its output
1. Recognize what each area controls
| Area | Use it for | Check before moving on |
|---|---|---|
| AI Assistant | Brief, proposed changes and generation output | Read errors and inspect the resulting files |
| Files | Project files such as app.js, index.html and styles.css | Files remain available after reopening the project |
| Code | Read/edit the selected file | Understand where sample data and actions live |
| Preview | Exercise the generated interface | Test actual controls and alternate states |
| Device buttons | Mobile, tablet and desktop preview modes | Content and actions remain usable at narrow widths |
| Terminal | Runtime/build output panel | Read emitted errors; the checked panel is output-only |
| Launch | Hosting URLs, domains and deployment progress | A listed URL is not the same as a verified deployment |
The Connected badge describes the connection to the project server for files/preview. It does not mean the generated dashboard is connected to your CRM. The AI Assistant header button can hide its panel to give the preview more room. An empty dock area is also part of the editor layout, not a missing dashboard section.
If generation fails before files appear
Read the assistant error before creating another project. A created project can exist even when its model runner fails: project provisioning and generation are separate stages. In the local rehearsal, both creation requests succeeded, but an unavailable executable returned ENOENT and no application files were generated. The repaired chat displays that failure and retains it after reload.
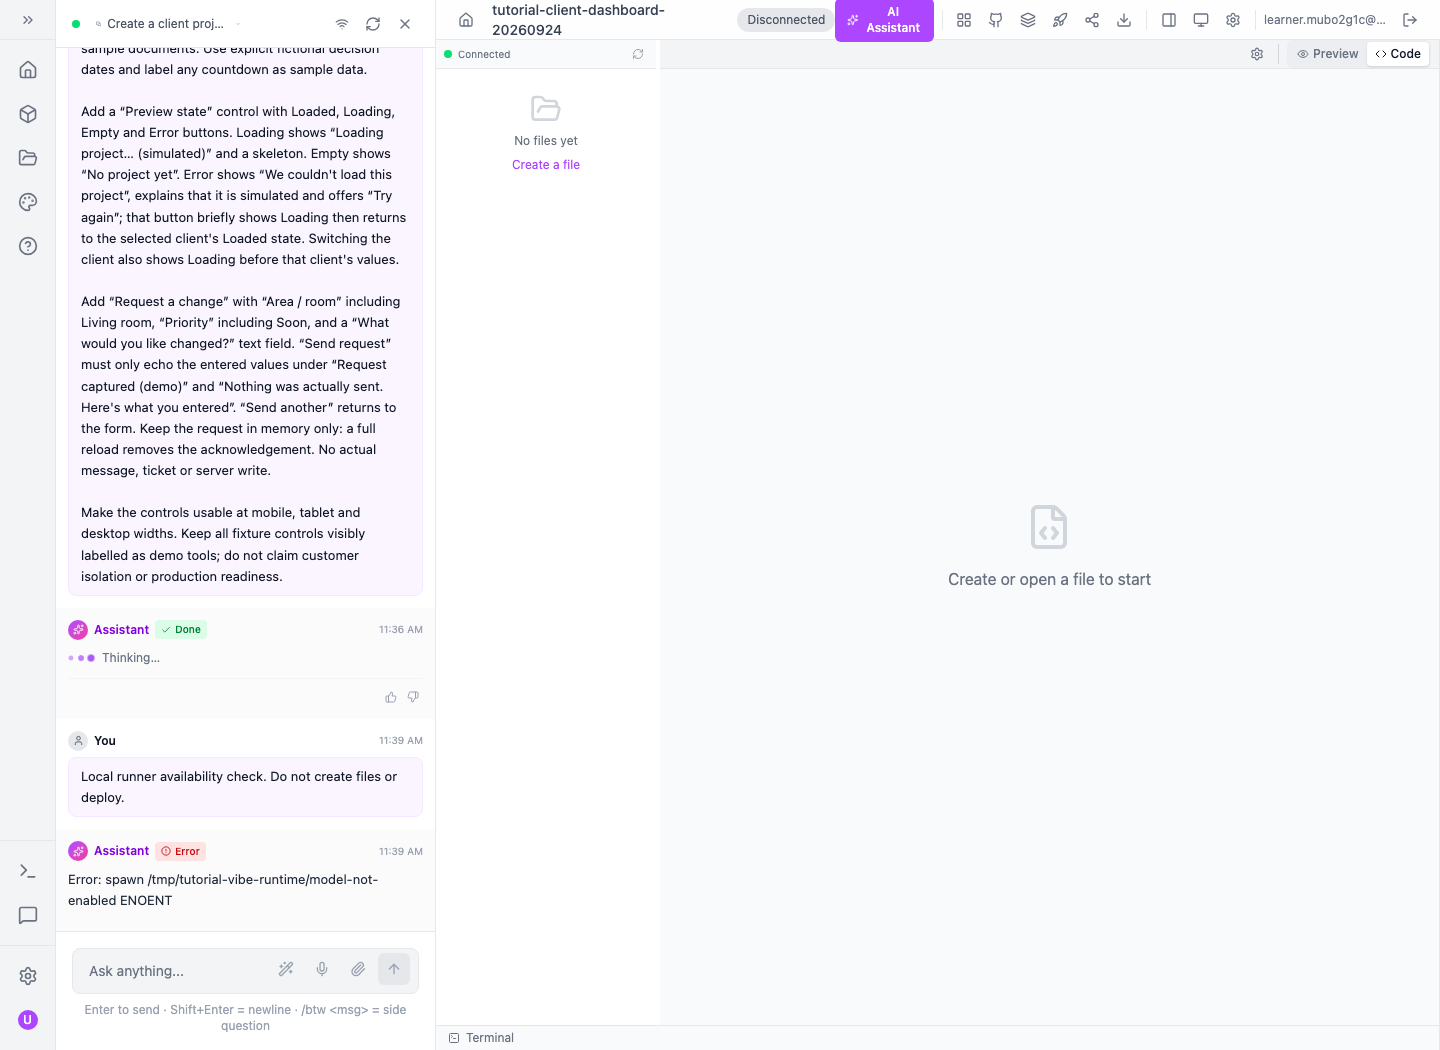
If you operate the local backend, check its configured CLAUDE_EXECUTABLE_PATH and the runner's authentication under the service account. For hosted Vibe, include the project name and displayed error in your support request. Once the runner is available, reopen the existing project and resend the brief once. Confirm that the required files and controls exist before beginning the preview checks below. Connected alone does not prove generation succeeded.
Optional: verify the file editor before generation
If you run your own local Vibe installation, this small check separates file-service problems from model-runner problems:
- In the empty Files area, select Create a file.
- Enter
tutorial-editor-check.txtin File name, leave Empty file selected, and select Create File. - Click the editing area and type
Local editor persistence check. Fictional tutorial note. - Select Save, or press Cmd+S on macOS / Ctrl+S on Windows or Linux. Wait for the Save indicator to clear.
- Reload the page, select the file in Files, and confirm the same sentence appears.
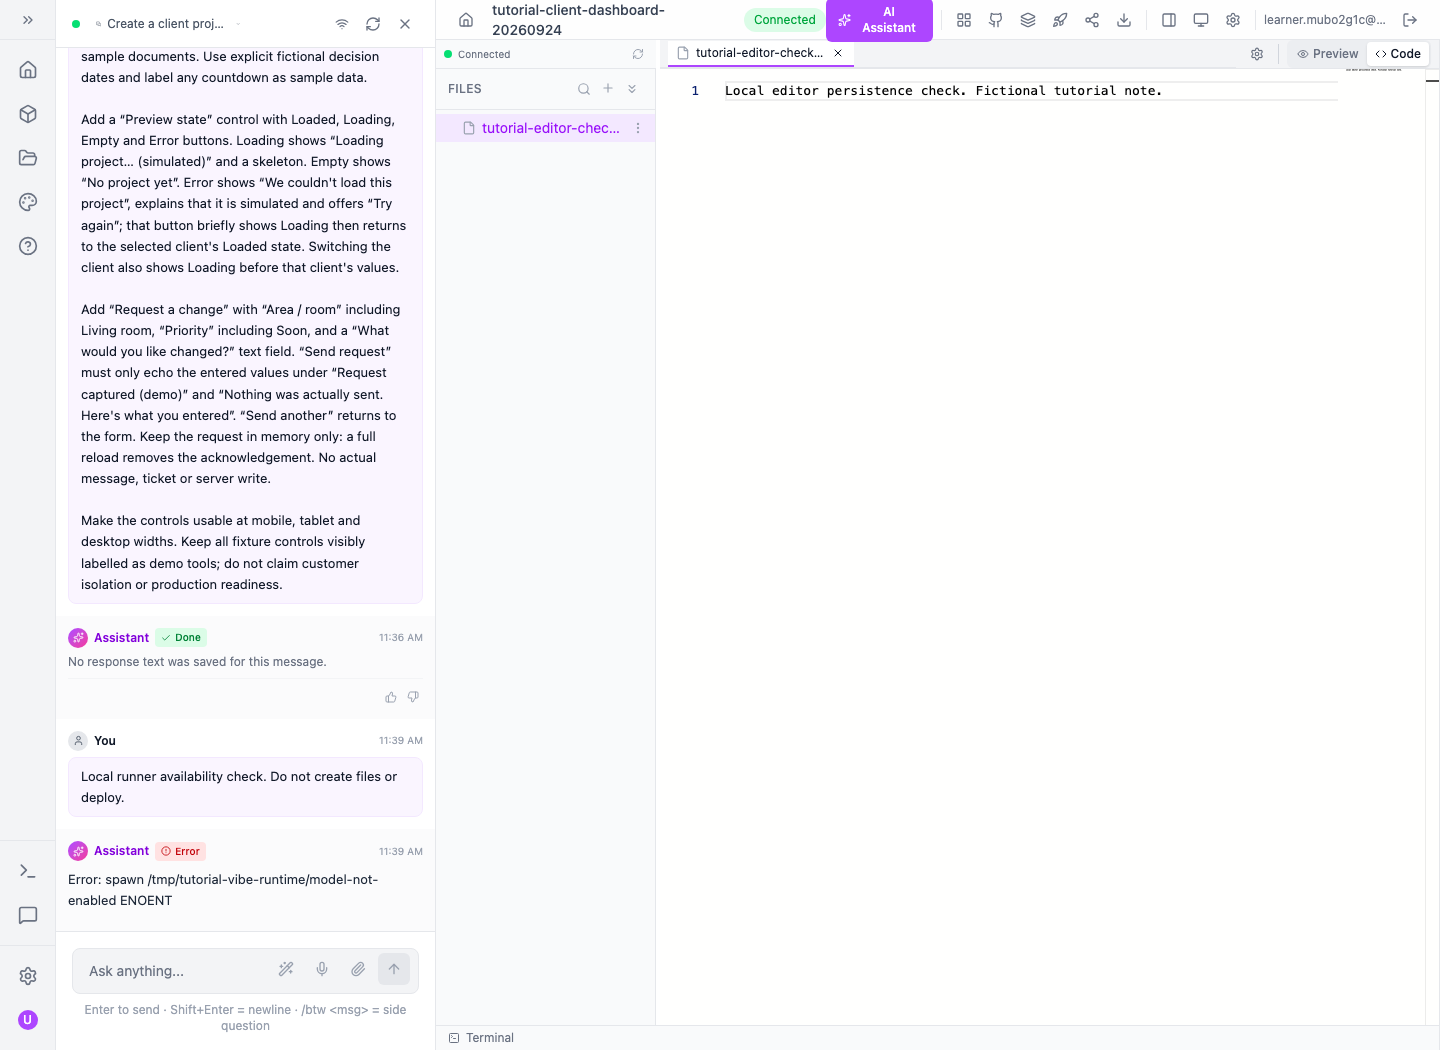
This proves that your project can save and reopen a file. It does not prove that AI generation or the dashboard preview works. The check file can remain separate from index.html, styles.css and app.js.
2. Open the generated data file
Choose Code, then select app.js in Files. Read the fixture objects and request handler. Check that the client names, progress and decisions come from sample data, and that the form only echoes input. The current generated file below explicitly identifies fictional fixtures and a fixed sample date.
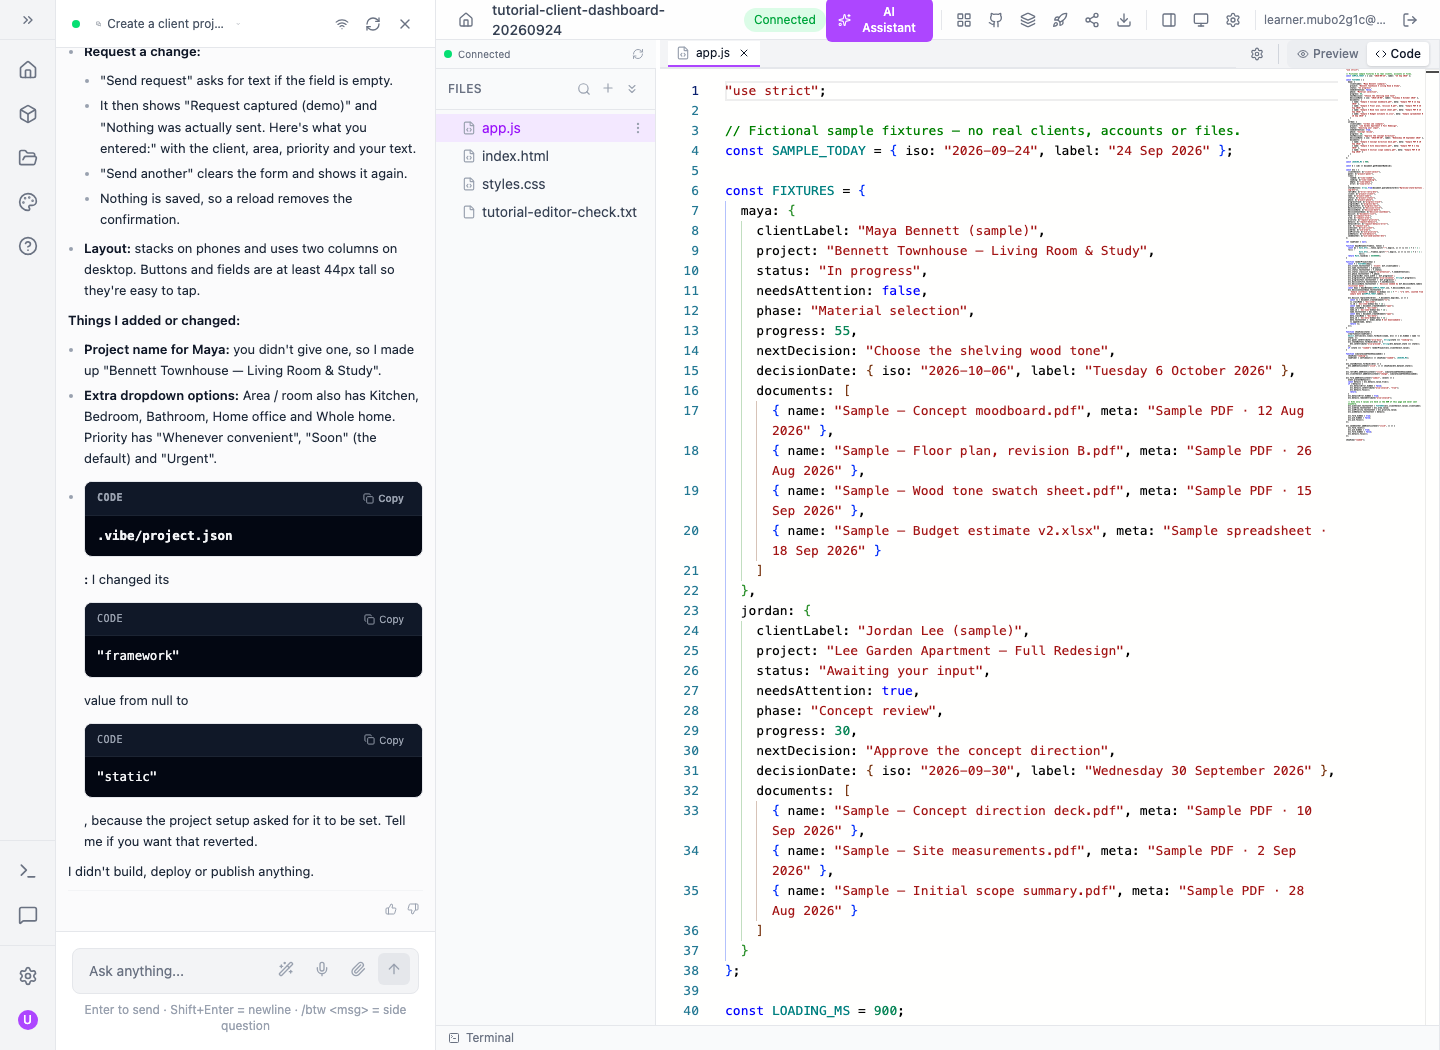
The first sample has Maya's name, project title, material-selection phase and 55% progress. Jordan's sample uses concept review and 30%. These values were written into the generated file. Their presence does not mean Vibe queried existing Cedar & Form customer records.
The other files have distinct jobs: index.html provides structure, styles.css presentation, and app.js sample data and behavior. A later framework-based project may have a different file structure; inspect what your actual generation produces.
3. Switch from selecting elements to using the app
Select Preview. The static project renders inside Vibe without a successful public deployment. If the toolbar shows Select, the element selector may intercept clicks for editing. Switch to Browse to use links and controls normally; the selector's tooltip explicitly says clicks select elements and links are blocked.
Read the banner first: Demo dashboard — all data is fictional sample data. Maya's page shows In progress, Material selection, 55% and the next decision Choose the shelving wood tone. The current example explicitly labels its date fictional and its countdown as calculated from a fixed sample date. Replace those fixtures only when you connect a real source of deadlines.
4. Exercise another client example
In Viewing project for, choose Jordan Lee (sample). Wait through Loading project… (simulated) until CLIENT: JORDAN LEE (SAMPLE) and Jordan’s project appear.
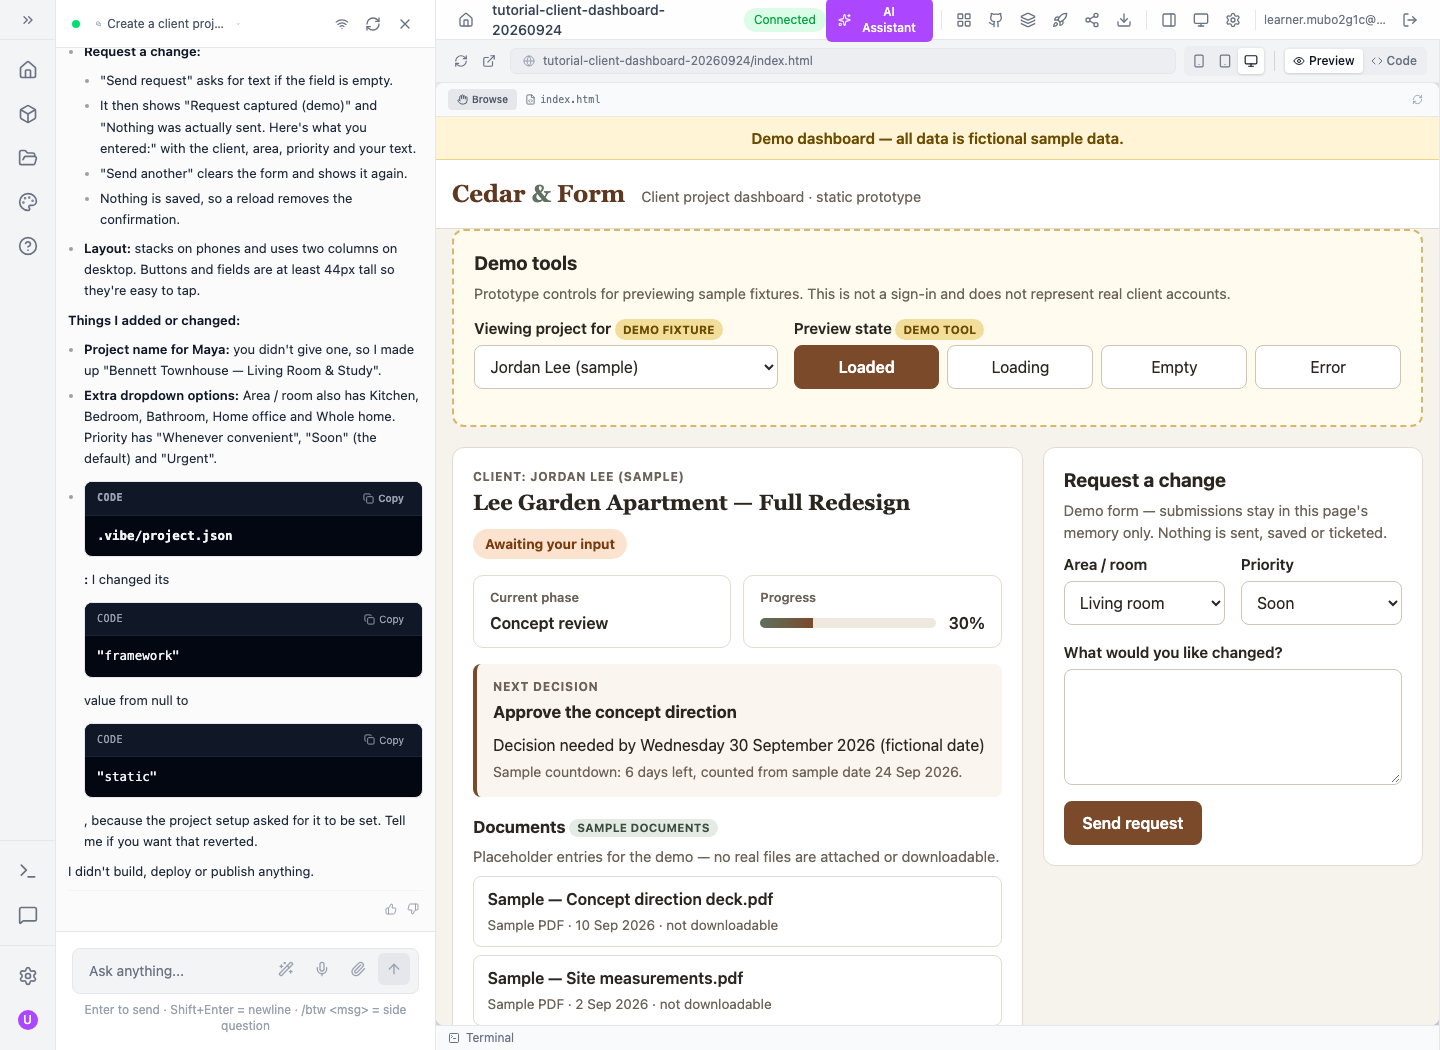
The page now shows Lee Garden Apartment — Full Redesign, Awaiting your input, Concept review, 30% and Approve the concept direction. Jordan has three sample documents; Maya has four.
Gotcha: this dropdown changes fixtures inside the browser. It is not customer sign-in or an access-control test. A real customer must not be able to choose another customer's identity from such a selector.
5. Test loading, empty and error states
Use the generated Preview state buttons:
| Button | Actual result | Why it matters |
|---|---|---|
| Loaded | Selected sample's project | Normal daily experience |
| Loading | Simulated loading message and skeleton | Makes waiting understandable |
| Empty | No project yet, with an explanation | A new client should not mistake no data for a crash |
| Error | We couldn't load this project, simulated-error explanation and Try again | Gives a failed load a visible recovery path |
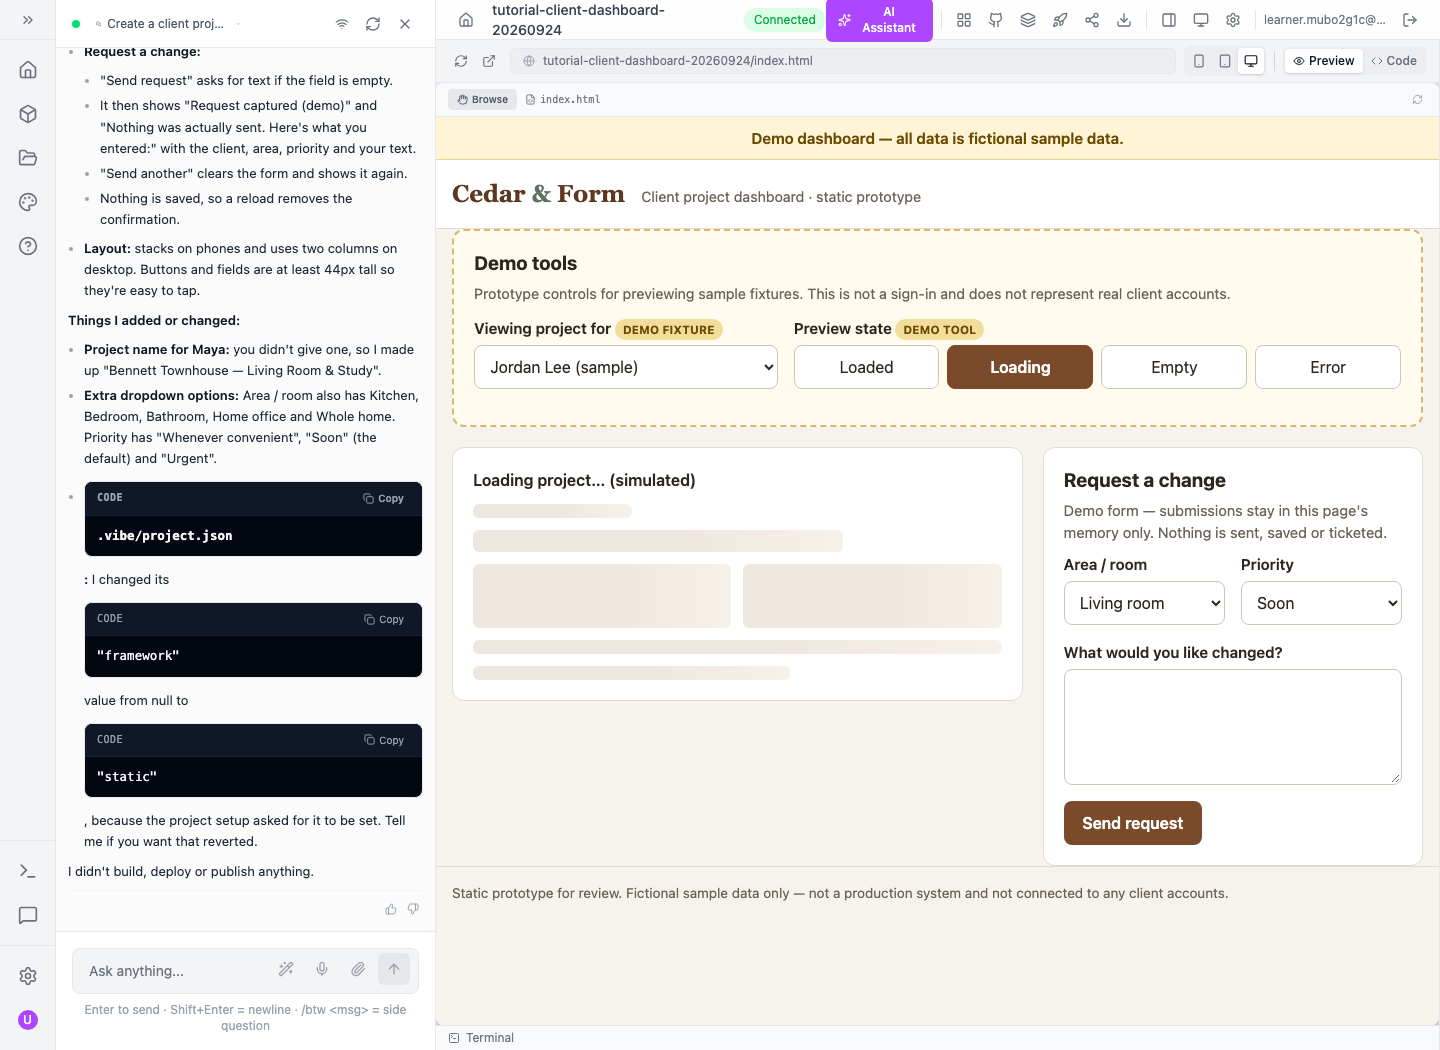
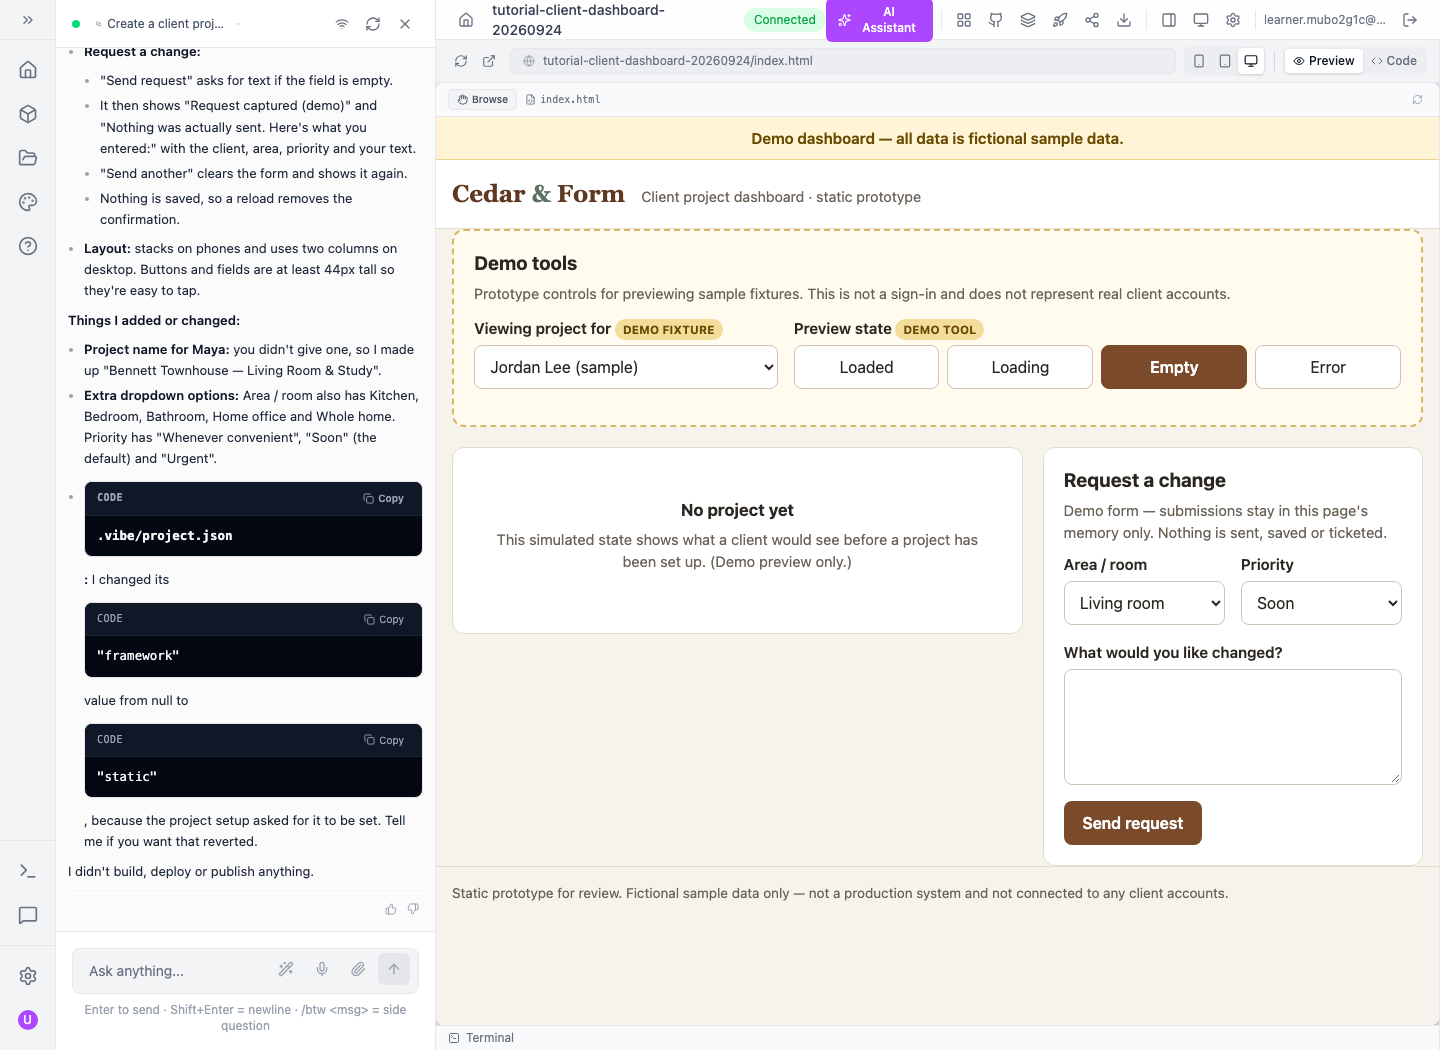
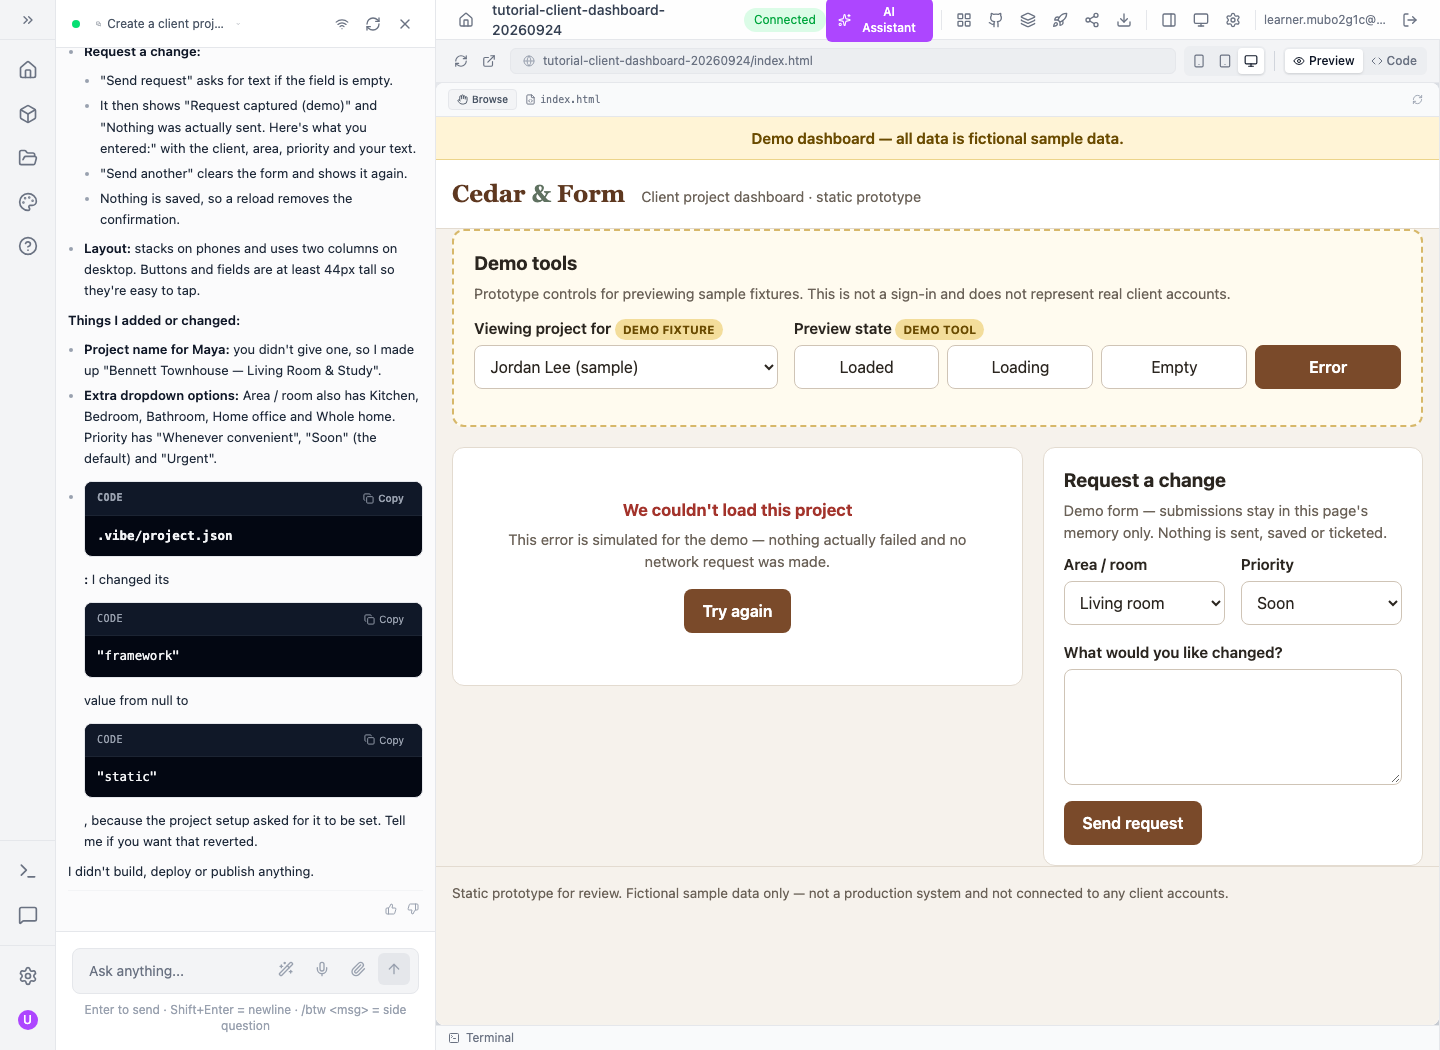
Select Try again and wait for the sample to load. These controls test the design of each state; they do not simulate every backend failure or establish that a real retry policy is correct.
6. Complete the sample change request
Return to Loaded and Maya Bennett (sample). Scroll to Request a change. Enter:
| Field | Example |
|---|---|
| Area / room | Living room |
| Priority | Soon |
| What would you like changed? | Tutorial: Please compare the warmer oak swatch for the shelving. |
Select Send request. The result is Request captured (demo) followed by Nothing was actually sent. Here's what you entered, then the area, priority and details. Send another returns to entry.
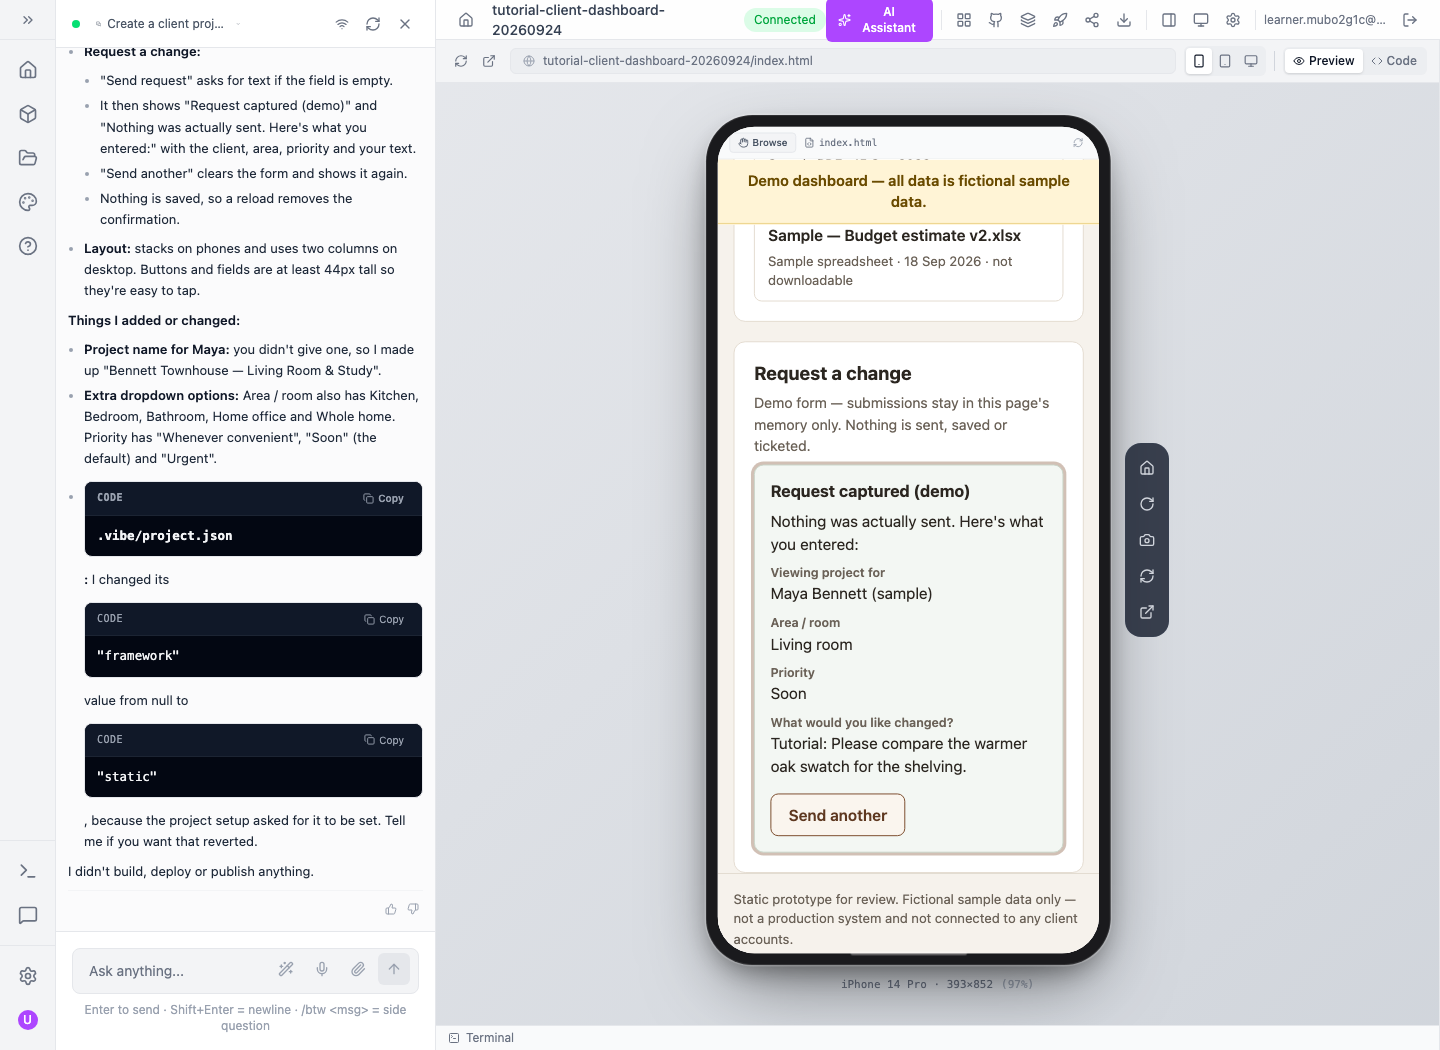
This is a useful prototype behavior: you can evaluate the wording and interaction without notifying anyone. It must keep that explanation until a real request workflow exists.
7. Check mobile layout and persistence separately
Select Mobile (375px) in Vibe's device controls. The current UI displays a phone frame; its device label may show its own emulated dimensions. Scroll inside that frame to review status, documents and the request result. Use Tablet (768px) and Desktop (1280px) to compare available space.
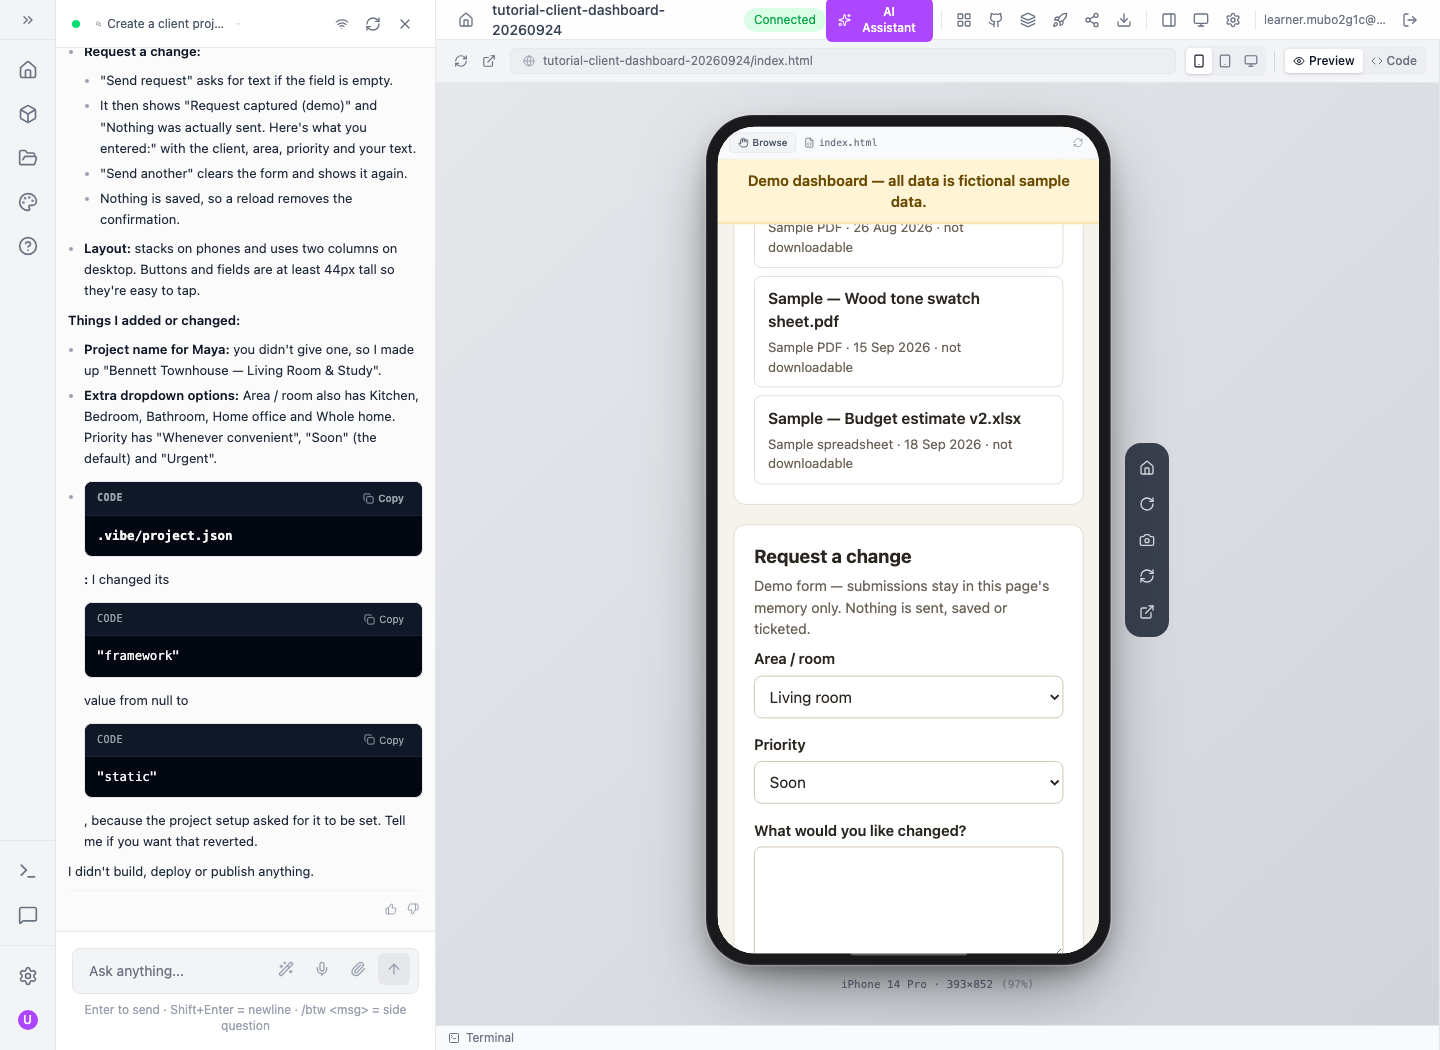
Now reload the full browser page, reopen Preview if needed, and inspect the form. In our rehearsal it returned to the initial Maya sample with an empty request form. The generated files remained, but the demo request did not persist.

Gotcha: in the earlier hosted rehearsal, Reload preview left the acknowledgement visible alongside Files changed / Reload. Use a full browser reload for this check. The new local rehearsal returned to Maya with no acknowledgement. Saved source files and temporary form state are different things.
8. Inspect output when a build reports trouble
Select the Terminal bar at the bottom of the editor to expand the runtime/build output panel. The checked TerminalPanel is configured with input disabled and listens for output events. Do not assume you can type shell commands into this particular panel.
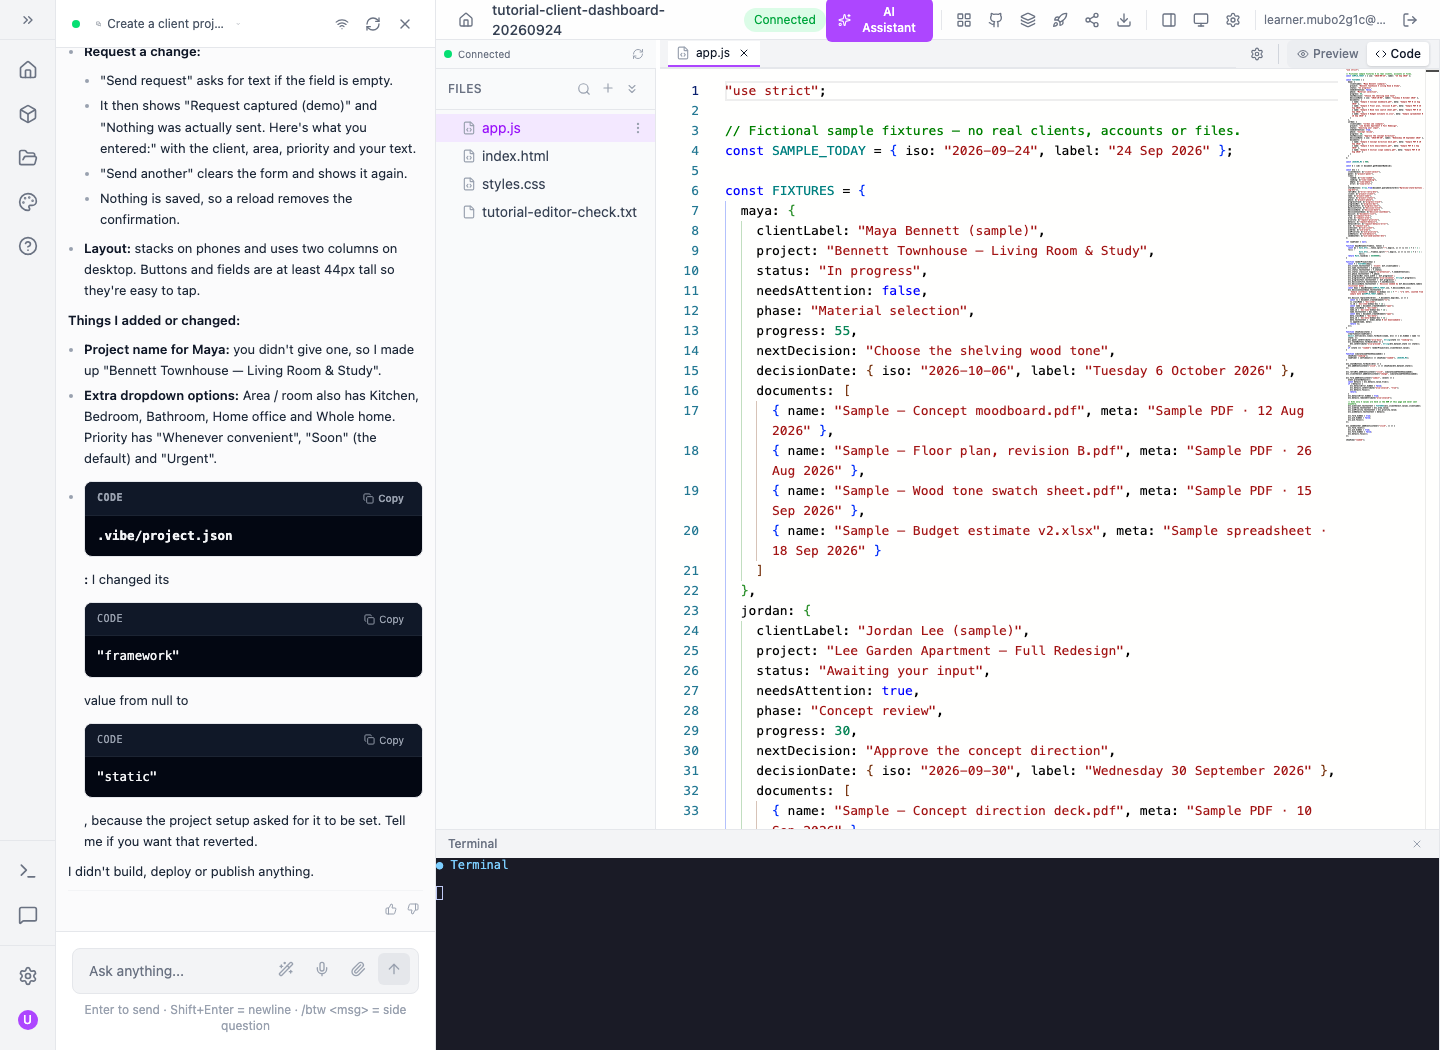
Read the assistant's error alongside the output and the affected stage. Ask for a targeted explanation or a syntax check when needed. For a developer's local export, node --check app.js checks this JavaScript file's syntax; it does not verify UI behavior, ownership or deployment. The original assistant reported that syntax check, while our fresh rehearsal tested the UI itself.
Check yourself: what survived reopening? The generated project files. What did not? The sample request. That distinction defines the integration work next.
Part 3 — Give the prototype a real data contract
This chapter is the developer handoff. The generated project above remains sample-only; the following contract uses endpoints exercised separately in the connected-client course. Implement and retest it before presenting the prototype as a customer service.
1. Separate the three identities
The staff account signing into Vibe is the builder. The customer signing into the finished dashboard is a different identity. A server-side integration may also use an app credential. Do not paste the builder's staff bearer into app.js or use it as a shared customer session.
For customer password sign-in, the tested route is POST /profile/customer/signin with orgid and a JSON email/password body. Protect session material and use the actual returned token fields. Keep live secrets out of prompts and generated source.
2. Define what each component reads
| Prototype component | Connected source or work required |
|---|---|
| Customer name | GET /client-data/profile, fields under data |
| Consultation list | GET /client-data/reservations, rows under data |
| Summary | GET /client-data/dashboard; verify individual summary fields before displaying |
| Project stage / next decision | Requires an explicitly designed customer-owned project contract; do not invent a datatype or route |
| Documents | Requires authorized file listing/download behavior; prototype View links are inert |
| Request a change | Requires a chosen persisted request/ticket workflow and ownership checks |
| Staff edits | Separate authenticated staff workflow with permitted fields and readback |
The tested dashboard summary returned zero upcoming reservations even when the reservation list contained a future booking. Render the authoritative list or fix the summary before using it to tell a customer they have nothing scheduled. Profile fields are not all top-level, and list envelopes are not bare arrays.
3. Add one connected slice before broad changes
Use this implementation brief as a starting point:
Replace only the sample customer-name and consultation-list data with the documented customer sign-in, profile and reservations requests. Keep organization and API origin configurable. Preserve loading, empty and error states. Parse the actual record/list envelopes. Show errors without claiming success. Do not add project updates, profile saves, real sends or deployment in this change. Do not embed staff credentials. Explain every changed file and how to test it.
After implementation, sign in with a training customer, inspect that customer's response, and compare the screen with a fresh API read. Then use a second training customer. Do not remove the demo banner until every displayed field is clearly identified as connected or sample.
4. Use the complete booking contract
The tested booking request needs a reservation definition, a service, start and end timestamps with offsets, a customer and party size. It is not the old topic's incomplete { email, date, time } example:
{
  "reservationDefinitionId": "YOUR_TRAINING_DEFINITION_ID",
  "service": "Design consultation",
  "startTime": "2026-10-05T10:00:00-05:00",
  "endTime": "2026-10-05T10:30:00-05:00",
  "customer": { "email": "YOUR_CUSTOMER_EMAIL", "name": "YOUR_CUSTOMER_NAME" },
  "partySize": 1
}
Choose a future slot from your own definition; these dates are the historical training example. Submit once to POST /client-data/reservations, retain the returned reference, then read the customer's list and the staff reservation view. Our repeated identical POST created a second booking, so do not automatically retry a create after an ambiguous timeout.
5. Verify persistence and customer boundaries
The later connected-client rehearsal verified a flat PUT /client-data/profile followed by a fresh GET: the changed name and phone persisted for the signed-in customer, while the second customer's profile stayed unchanged. Follow the connected-client course for the tested request shape rather than sending an invented nested payload or treating a 200 response as sufficient proof.
The same rehearsal verified reservation ownership through both direct customer requests and delegated staff-plus-customer requests. The owner could read the reservation; the other customer received 404 from the customer single-record route and 403 from the generic repository route, without the reservation data. These later local passes supersede the earlier failed profile and cross-customer-read observations. They cover those named routes, not every future project, document or ticket route. Repeat two-customer checks for each connected feature you add. Hiding a staff button does not establish server-side ownership. Exact requests and local results.
For session renewal, the tested customer refresh returned a new access token without a replacement refresh token in one request shape. Retain the current refresh token when no new one is returned. Retry an authenticated read at most once after renewal; do not repeat writes blindly. The complete example and failure responses are in the connected-client course.
Part 4 — Inspect launch readiness without confusing it with preview
Select the rocket control titled Launch. The drawer shows SpinForge, Project, Live URLs, Owner, Org, Custom domains, Attach, Sync domains to hosting and Deploy now. When a deployment runs, its stages are Build, Configure hosting, Upload and Go live. This walkthrough stops at inspecting the drawer.
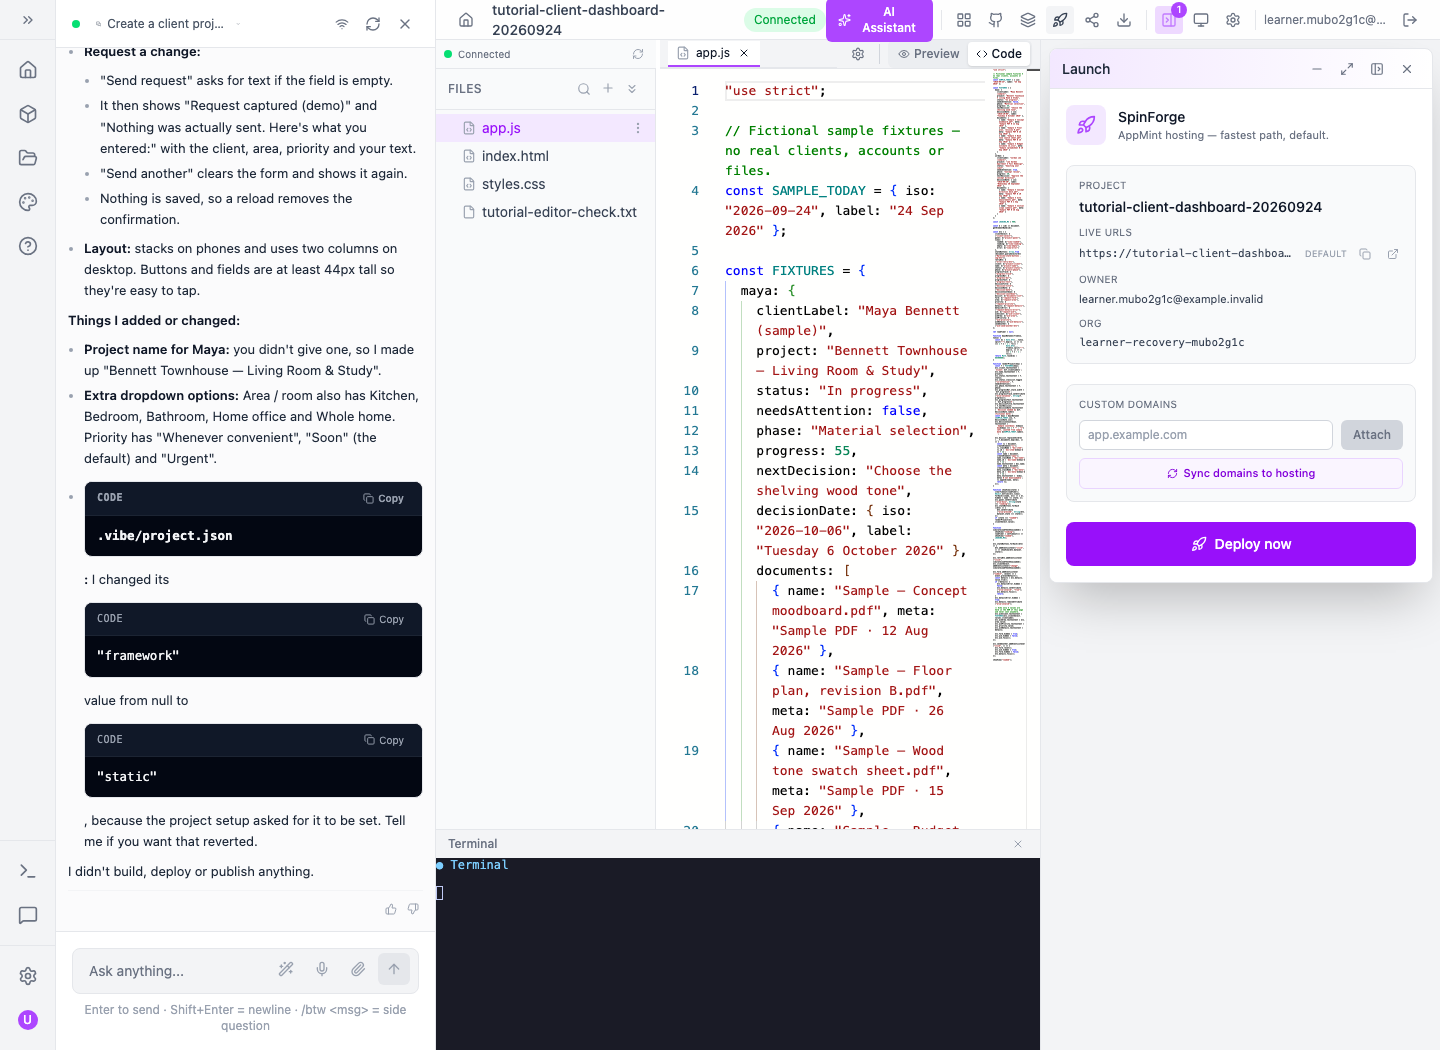
The fresh local drawer shows a default Live URLs entry even though this prototype has not been deployed. Use Preview to review the static app; inspect the deployment result and open the published address only when you intentionally release it. A proposed hosting address is not a finished release. The earlier hosted project had a missing-partner-key deployment error; that historical failure does not describe this newly generated local preview.
We did not press Deploy now, attach a domain or send a collaboration invitation during this continuation. When your implementation is ready and you intend to publish, verify the build stages, open the resulting URL in a fresh session, and repeat the customer, booking, ownership and reload checks there. A deployment success message alone does not validate business data.
Share and session-invitation flows can carry an authentication token in the generated URL. Treat such invitations as credentials; do not put them in course footage, public issues or example code.
If something goes wrong
| Symptom | First check | What to do |
|---|---|---|
| Production sign-in fails with a local account | Where the account was created | Use your production Appmint identity |
| Saved account says session expired | Normal login flow | Sign in again; reuse the project |
| Preview clicks select elements | Select/Browse mode | Choose Browse for interactive testing |
| Another sample client still shows loading | Wait for the selected client’s name and project | Do not capture the transition as the final result |
| Request acknowledged, no staff record | Demo notice and generated handler | Implement persistence before promising delivery |
| Internal reload leaves old state | Files changed / Reload notice | Use a full reload for the persistence check |
| Connected badge, no CRM data | What Connected describes | Inspect the generated data layer and API requests |
| Static preview works, Launch failed | Separate preview and hosting stages | Keep the project and diagnose the failed deployment stage |
| 200 profile update, old value remains | Request shape and fresh profile GET | Compare the tested flat fields with the connected-client example; do not show a saved confirmation until readback matches |
| Customer list is empty | Identity, organization and envelope | Use the intended customer's session and inspect data |
What happened behind the scenes
Source and capture evidence
Vibe's src/components/auth/LoginPage.tsx handles the email/password steps and saved sessions. components/dialogs/CreateProjectDialog.tsx defines App/Design and the environment form. services/dev-env-service.ts creates the AppEngine environment before attaching the session-manager project; files/generation/preview are not stored as CRM records merely because that environment exists.
components/editor/TerminalPanel.tsx configures output-only terminal rendering. components/drawers/DeployDrawer.tsx owns deployment jobs and stage display. AppEngine environment routes are in src/site/dev-environment.controller.ts; customer routes/services are in src/client-account.
Evidence: fresh capture ledger, normal sign-in response statuses, correct-owner environment reads, and the original generated-file screenshots in assets/story-research. The old topic attributed the project to a different training organization; the actual owning review account and fresh successful sign-in corrected that attribution.
Where next
Connect a client to AppEngine supplies the full tested request sequence. Create a client dashboard covers the Studio website account area. Operate and extend AppEngine follows a request through source and operating signals.
Evidence: earlier hosted login/editor checks plus the new local project provisioning, actual generation, code inspection, both clients, loading/empty/error/retry, request echo/reset, all three device modes, full reload, Terminal and read-only Launch inspection passed. The prototype remains sample-only; connecting customer data and publishing it are separate next steps. No real change request or invitation was sent. Video production guide.
Fresh generated-prototype acceptance — 24 September 2026
The existing local project received the exact expanded brief through AI Assistant. Actual generation created index.html, styles.css and app.js while preserving tutorial-editor-check.txt. Both client fixtures, Loading/Empty/Error/Loaded, retry to the selected client, request echo, Send another, mobile form and full-page reload reset passed. The iframe made no network requests during the request submission. Mobile/tablet/desktop modes had no horizontal overflow at their actual rendered widths (393, 820 and 1003 pixels in this editor viewport); toolbar presets are not a claim of identical iframe dimensions or native-device testing. No backend, customer request, deployment or invitation was created. Acceptance readback and application report.